代码拉取完成,页面将自动刷新
KiCad 开源项目合集
本仓库使用 git submodule 方式收集 KiCad 开源项目合集
git clone https://gitee.com/KiCAD-CN/KiCadOpenSourceProjectCollection.git
// 初始化子模块仓库
git submodule init

// 更新子模块仓库
git submodule update
或:
// 初始化和更新子模块仓库组合命令
git submodule update --init --recursive
这些是一些由用户制作的 KiCad 设计的项目。
如果您想与本页上的其他展示案例一起展示,请在 GitLab 上 提交合并请求 (如果您符合添加项目要求的贡献指南)!
dvk-mx8m-bsb
Librem 5 Developer Kit using EmCraft's i.MX 8M System-on-Module.
KiCad v5.0.0 has been used to create this design.
License
dvk-mx8m-bsb is licensed under the GNU GPLv3+.
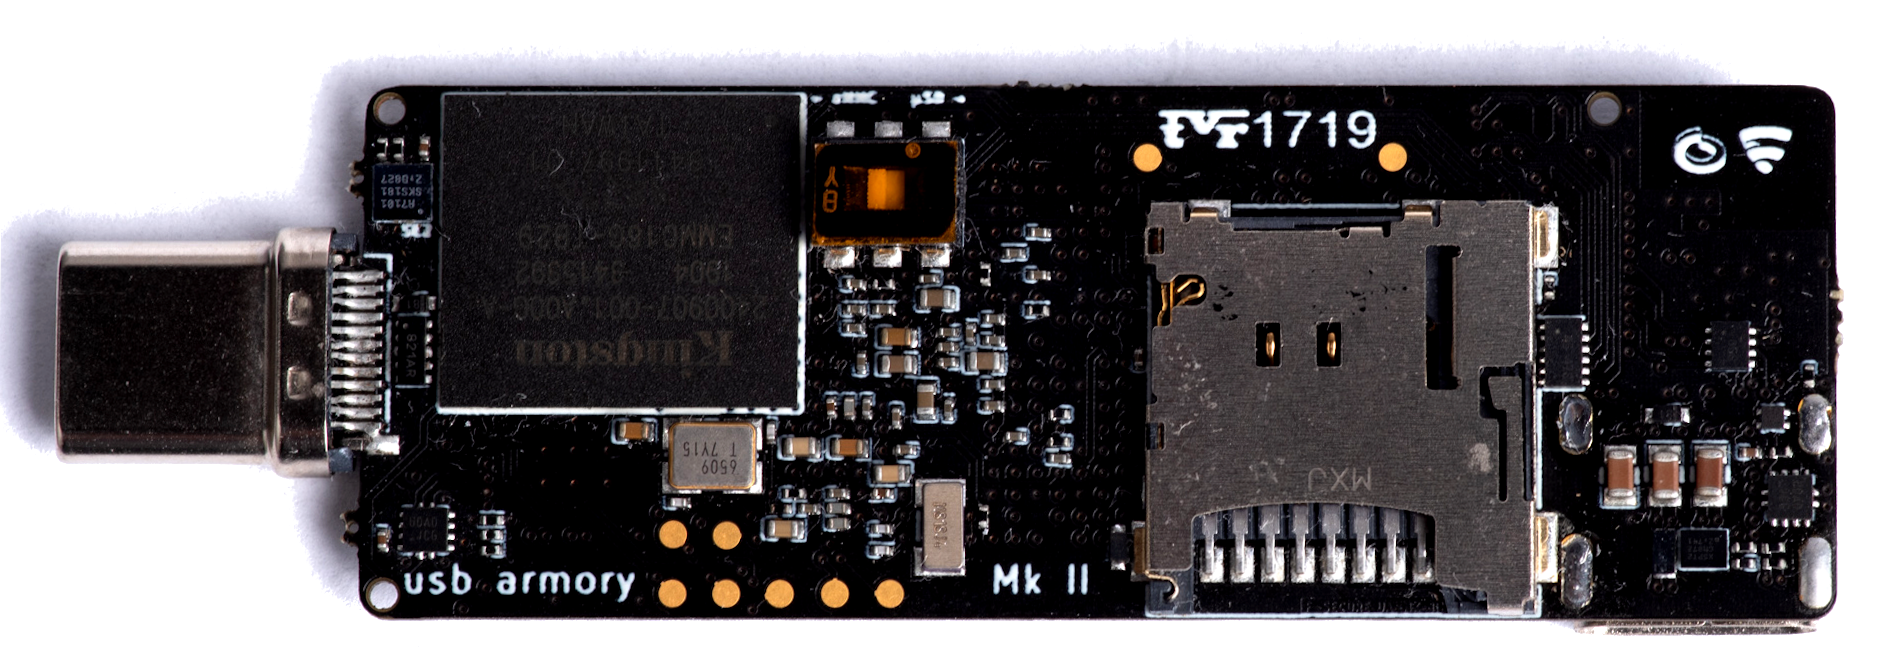
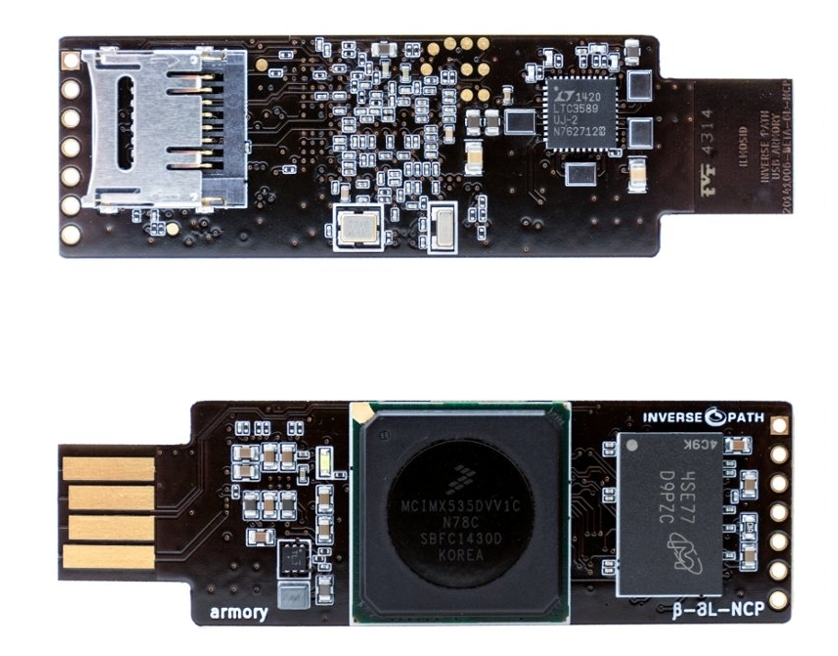
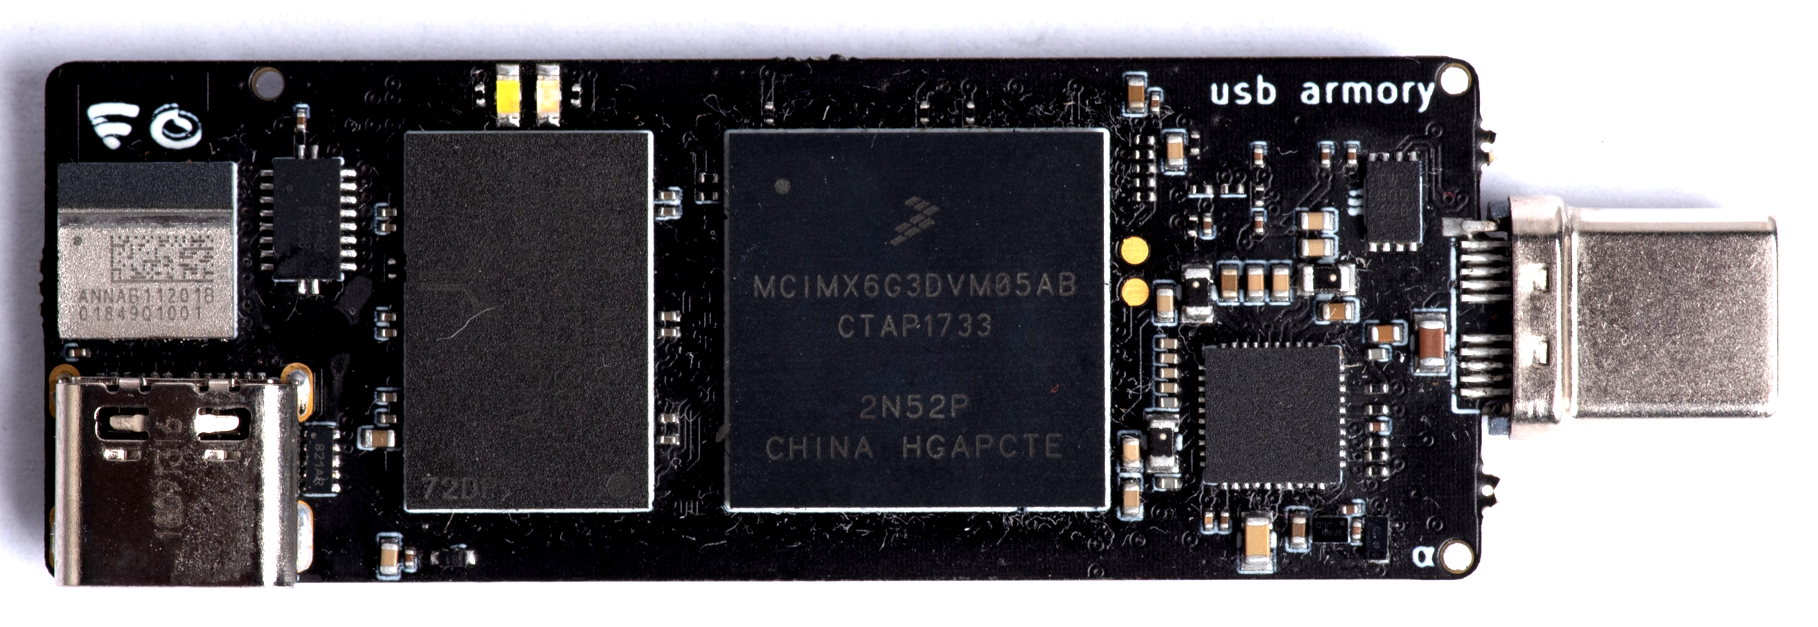
usbarmory
Introduction
USB armory | https://github.com/f-secure-foundry/usbarmory
Copyright (c) F-Secure CorporationThe USB armory from F-Secure Foundry is an open source hardware design, implementing a flash drive sized computer.
This repository is aimed towards developers, if you wish to purchase a USB armory board please see the USB armory project page.
Authors
Andrea Barisani
andrea.barisani@f-secure.com | andrea@inversepath.comAndrej Rosano
andrej.rosano@f-secure.com | andrej@inversepath.comDaniele Bianco
daniele.bianco@f-secure.com | daniele@inversepath.comDocumentation
The main documentation can be found on the project wiki.
Board revisions
- USB armory Mk I: first production release.
License
USB armory | https://github.com/f-secure-foundry/usbarmory
Copyright (c) F-Secure CorporationThis is an open hardware design licensed under the terms of the CERN Open Hardware Licence (OHL) v1.2.
You may redistribute and modify this documentation under the terms of the CERN OHL v.1.2 (http://ohwr.org/cernohl). This documentation is distributed WITHOUT ANY EXPRESS OR IMPLIED WARRANTY, INCLUDING OF MERCHANTABILITY, SATISFACTORY QUALITY AND FITNESS FOR A PARTICULAR PURPOSE. Please see the CERN OHL v.1.2 for applicable conditions.
H7PI
简介
H7PI基于STM32H750VBT6, 设计初衷是为了做一个通用平台,在这个设计上,按照一个场景一个 应用的模式扩展出其他扩展功能,同时实现如代码复用一般的硬件复用。板载8M QSPI Flash程序空间,8M SPI Flasn文件空间,支持扩展SD卡,支持扩展LCD.参考说明
KiCad v5.1.5 has been used to create this design.
license
H7PI is licensed under the BSD 3-Clause.
H7PI
简介
ESP32PI基于ESP32-PICO-D4, 为快速开发wifi,ble应用提供方案验证的可能
- 板载CP2102,可通过USB转串口直接更新固件,无需手动按按键
- 板载Micro SD Card接口,扩展文件系统
- 板载天线,可直接链接WiFi和蓝牙,无需额外购买天线
- 板载PSRAM,增加应用内存空间
- 所有IO引出,方便复用,可扩展多种功能 参考说明
KiCad v5.1.5 has been used to create this design.
license
ESP32PI is licensed under the BSD 3-Clause.
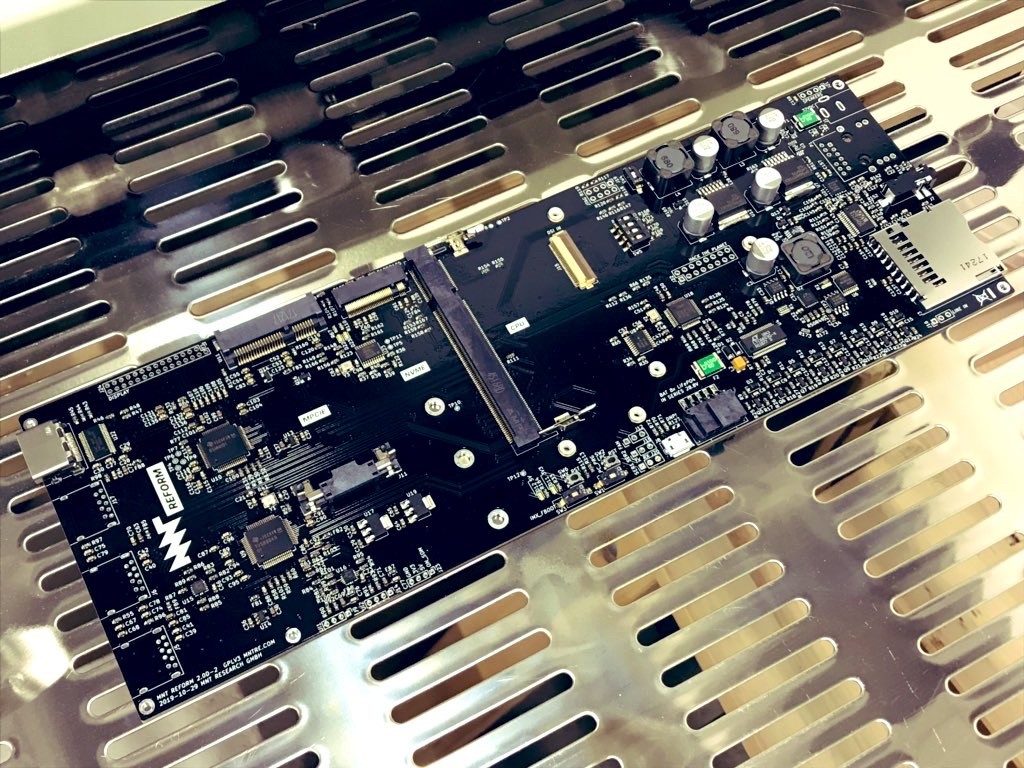
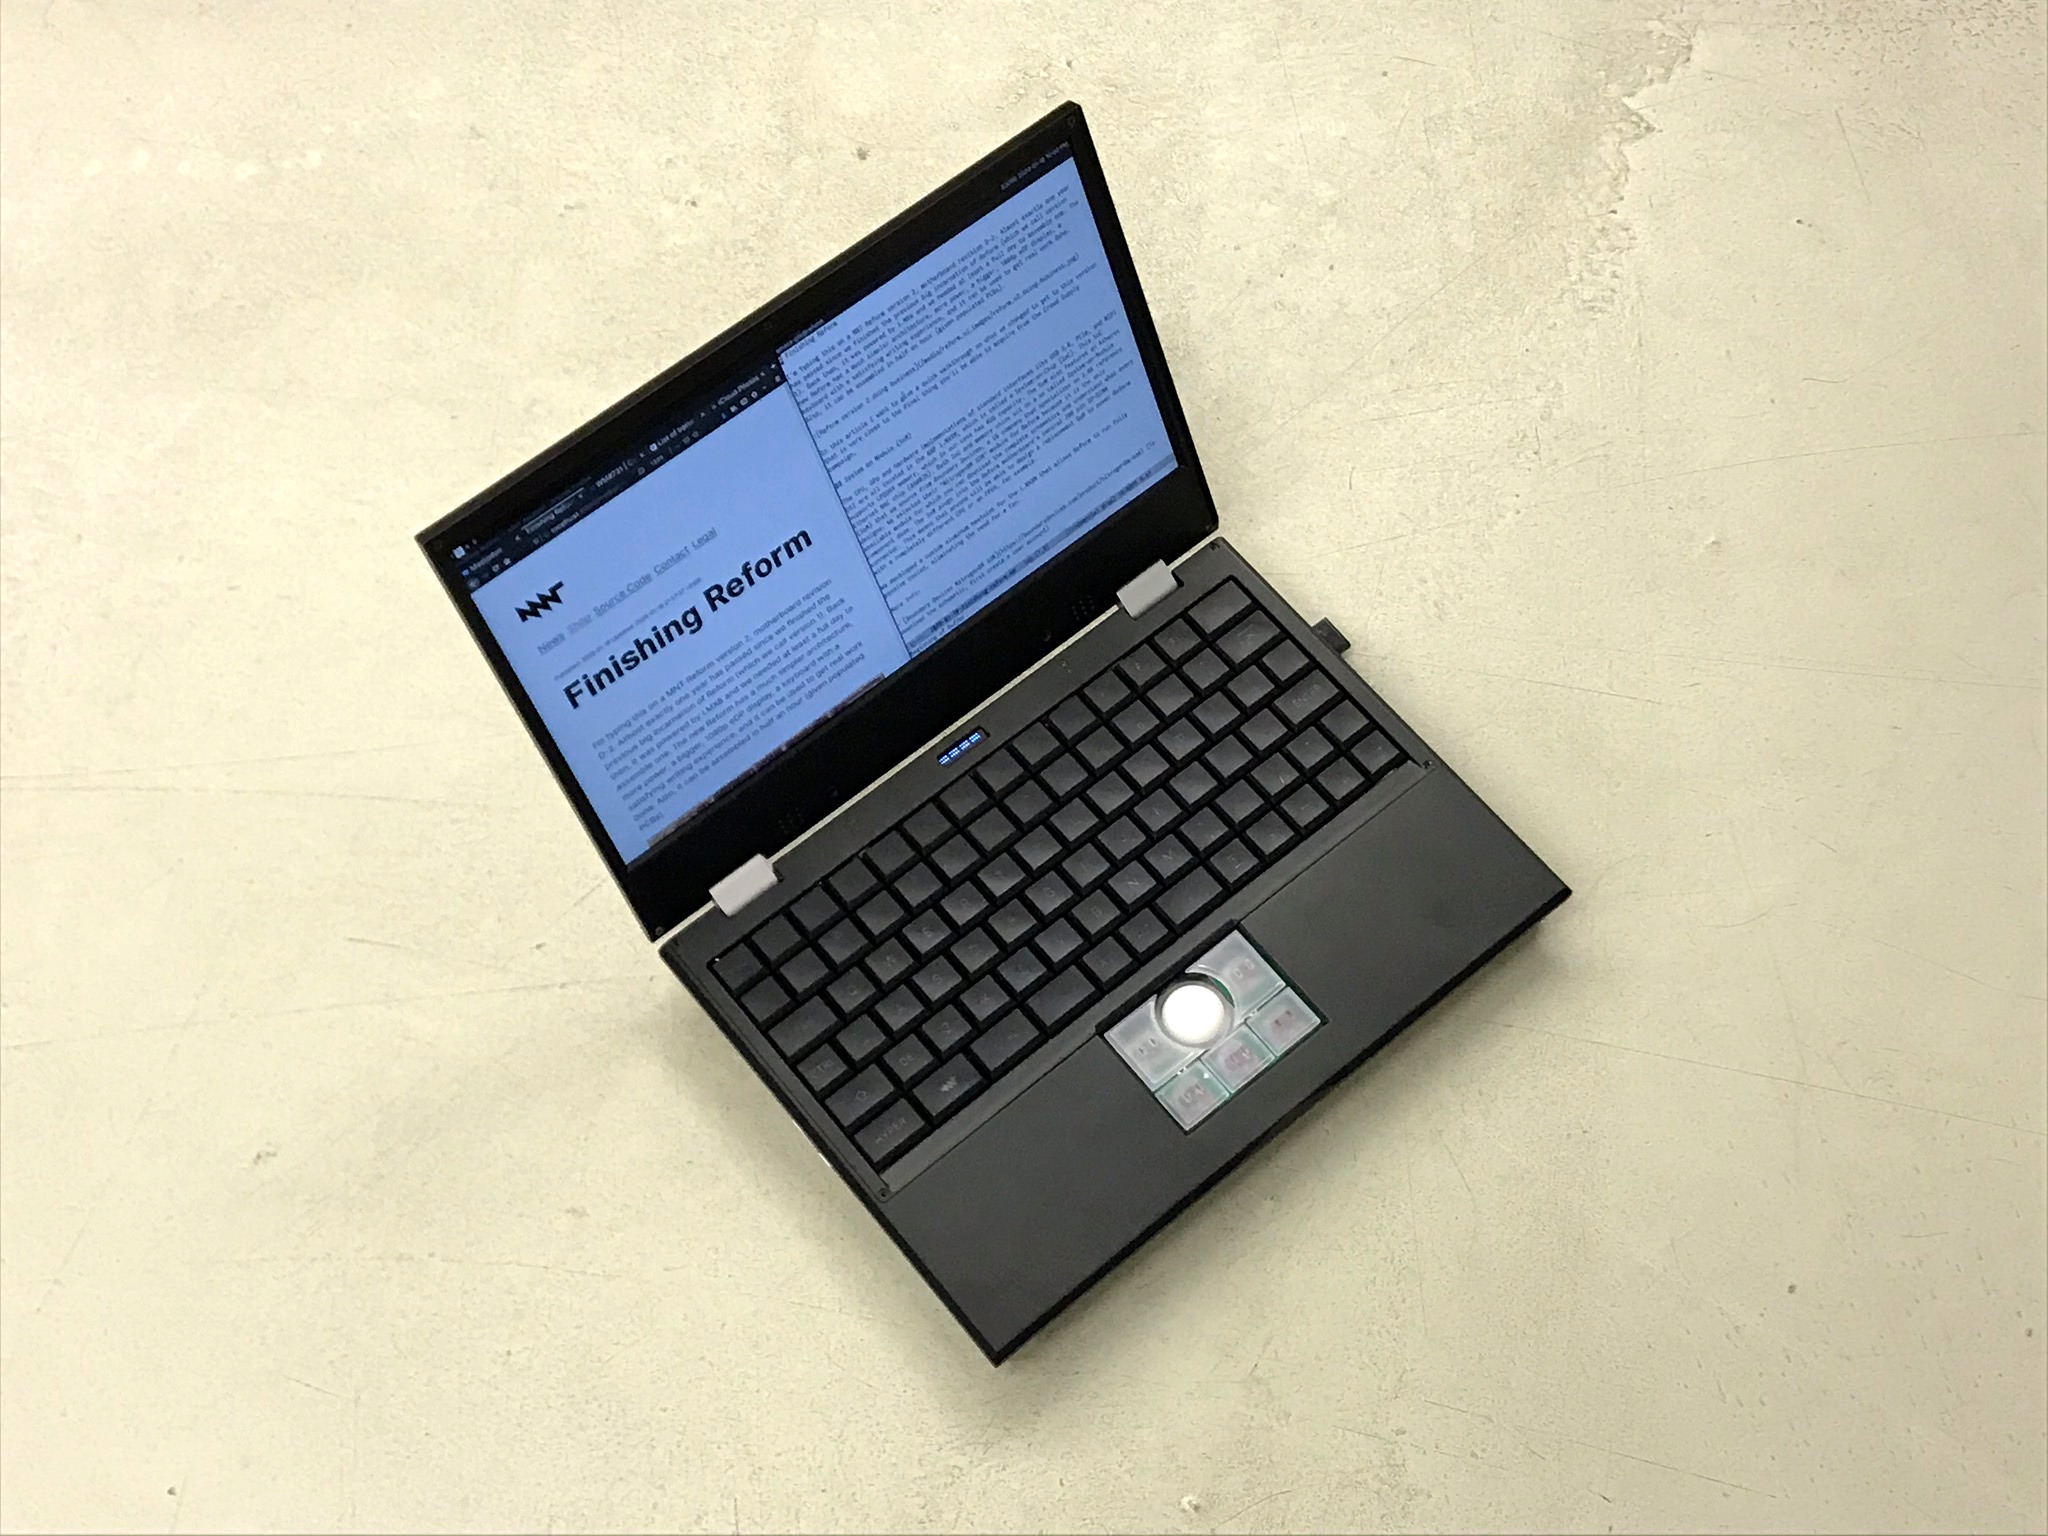
MNT Reform
This is the main repository for the MNT Reform open source laptop.
For details, check out Finishing Reform and related articles.
Impressions
License
Copyright 2018-2020 MNT Research GmbH.
The following licenses are used in the project, unless specified differently in a particular subfolder:
- Schematics, PCBs: CERN-OHL-S v2
- Other documentation, artwork, photos and drawings that are not trademarks (see below): CC-BY-SA 4.0
- Software, firmware: Various. GPL 3.0 if not specified otherwise in the file/subdirectory.
The "MNT" and "MNT REFORM" logos are trademarks of MNT Research GmbH. You may not use these in derived works. The reason for this is that we cannot be responsible for regulatory issues with derived boards and we cannot support them. If someone sees an MNT brand on a product, it has to be clear that it comes from MNT Research and not from a third party.
Made With
MNT Reform Team
- Lukas F. Hartmann (mntmn) - Schematics, PCB
- Ana Dantas - Industrial Design
- Greta Melnik - Quality & Assembly, Sleeve
Credits and Contributions
- fully automated technologies - inrush limiter circuit
The Rusty High-speed Probe
This is an open hardware probe for the Serial Wire Debug (SWD) and JTAG protocol. It utilizes an STM32F723 MCU which has an USB 2.0 High-speed Phy.
Firmware
The firmware is available here and is open-source: https://github.com/probe-rs/hs-probe-firmware
Features
There is an USB MUX on the board, so when the probe starts it enumerates in USB FS where one can access the internal bootloader, and then when the firmware takes over it can switch to the USB HS.
- The output connector can either be:
- The STDC14 connector used on STLink/V3 which is mounted by default.
- Or the standard Cortex-M Debug (1.27mm, 10 pin) connector if one bends/removes the outer 2 pins on the connector.
- The programming connector is the Tag Connect TC2030, however for just loading firmware the USB bootloader is recommended.
- USB MUX between USB HS/FS.
- Castellated vias for all programming pins, power and 2 GPIOs.
- USB-C connector.
- Target 5V and 3.3V is protected with an ideal diode circuit to not have current flow from the target to the host.
- For compatibility (mainly with Tag-Connect TC2050), pin 7 on the STDC 14 can be connected to the protected 5V.
The schematic can be found in the schematic PDF.

License
This work is licensed under CERN-OHL-P.
System76 Launch Configurable Keyboard
The System76 Launch Configurable Keyboard is designed to provide the ultimate user controlled keyboard experience, with open source mechanical and electrical design, open source firmware and associated software, and a large number of user configuration opportunities.
Mechanical Design
Open Source Chassis
The Launch chassis is licensed CC-BY-SA-4.0 and can be viewed in the chassis folder using FreeCAD.
Milled Aluminum
The chassis is milled from two solid blocks of aluminum and powder coated to provide excellent fit and finish. Each pocket, port, and hole is designed and precisely machined so that swapping switches and plugging in cables is easy and secure for the user.
Detachable Lift Bar
The included lift bar can be magnetically secured to add 15 degrees of angle to your keyboard for ergonomics.
Innovative Layout
The layout is designed to provide a large number of remapping opportunities. The default layout can be viewed here, and the extra keys included can be viewed here.
Swappable Keycaps
The keycaps are PBT material with a dye sublimation legend and XDA profile to provide excellent feel and lifespan. Extras are provided for common replacements and color preference. An included keycap puller can be used to move and replace the keycaps.
Swappable Switches
The switches are mounted in sockets that support any RGB switch with an MX compatible footprint. Examples are the Cherry MX RGB switches and the Kailh BOX switches. Switches can be removed easily at any time with the included switch puller.
Electrical Design
Open Source PCB
The Launch PCB is licensed GPLv3 and can be viewed in the pcb folder using KiCad.
Integrated Dock
Launch connects to a computer using the included USB-C to USB-C cable or USB-C to USB-A cable. It supports USB 3.2 Gen 2 with speeds up to 10 Gbps with either cable, provided the computer supports these speeds. It provides 2 USB-C and 2 USB-A connectors that also support USB 3.2 Gen 2, with the 10 Gbps bandwidth shared between them on demand.
Independent RGB Lighting
Each switch has an RGB LED that is independently controlled by firmware. This allows for a number of RGB LED patterns to be selected.
N-Key Rollover
The keyboard matrix uses diodes on all intersections, providing full independent scanning of each key position.
Firmware and Software
Open Source Firmware
The Launch firmware is based on QMK, licensed GPLv2, and the latest version is linked in the
firmwaresubmodule.Open Source Software
Projects that integrate with Launch are open source software, such as the System76 Keyboard Configurator, licensed GPLv3, and fwupd, licensed LGPLv2.1.
Easy Remapping
The keyboard can be remapped at runtime using the System76 Keyboard Configurator. This utility runs on Linux, Mac OS, and Windows.
Firmware Updates
Firmware updates are supported through the fwupd project, and are distributed using the related Linux Vendor Firmware Service. Settings are stored on EEPROM and are maintained through firmware updates.
CANtact Pro User Guide
CANtact Pro is available from CrowdSupply
Getting Started
Thank you for buying a CANtact Pro 🙂
To start using CANtact, connect it via USB. Before using, you should update to the latest firmware following the instructions in this document.
After updating, the device will work on Linux via SocketCAN. For details, see SocketCAN.
On all platforms, you can install the CANtact CLI. For details, see CANtact CLI.
For more information on software support, see Software Tools.
Features & Specifications
- 2x CAN Interfaces
- 1x CAN/CAN-FD/SWCAN
- 1x CAN/CAN-FD
- High Speed USB interface (480 Mbit/s)
- Isolation between CAN and USB
- Industry standard DB9 connectors
- Software support for Windows, macOS, and Linux
- Cross-platform USB driver, command line interface, and APIs:
- Python (via python-can)
- C / C++
- Rust
- ETAS BUSMASTER support on Windows
- SocketCAN support on Linux
Pin Assignments
Pin Function CAN 0 Only? 1 2 CAN - 3 GND 4 SWCAN Yes 5 6 GND 7 CAN + 8 9 +12 V In Yes Note that single-wire CAN is only available on the CAN 0 connector.
LED Indicators
The device has four LEDs, two for each CAN channel. When powered on, the LEDs will blink in sequence. The LED indications during normal operations are shown here.
Color State Meaning Green Solid channel enabled, no activity Green Blinking receive activity Red Solid channel transmit enabled, no activity Red Blinking transmit activity When using SocketCAN, each CAN interface can be identified by blinking the corresponding LEDs using
ethtool. This is especially useful when using multiple devices.sudo ethtool --identify can0Configuring Permissions on Linux
By default, root privileges are required to interact with the device. To allow other users to access the device, create a file at
/etc/udev/rules.d/99-cantact.rules:SUBSYSTEM=="usb", ATTRS{idVendor}=="1d50", ATTRS{idProduct}=="6070", MODE="0666"After creating the file, reload the udev rules:
sudo udevadm control --reload-rules
sudo udevadm trigger
This will make the device accessible to all users.
Flashing Firmware
- Download the newest firmware binary from Github.
- To enter bootloader mode, hold down the button beside the USB connector while connecting the device to your computer.
Fork 本仓库
新建 Feat_xxx 分支
添加新的子模块仓库
// `URL` 为子模块的路径,`PATH` 为该子模块存储的目录路径
git submodule add [URL] [PATH]
例如:
// 仓库后缀的 `.git` 可加可不加
git submodule add https://source.puri.sm/Librem5/dvk-mx8m-bsb
// 从子模块远端仓库更新并合并
git submodule update --remote --merge
// 提交修改
// -s : 在提交日志消息的末尾添加提交人签名行。
// 签约的含义取决于项目,但它通常证明提交者有权在相同的许可证下提交此作品,
// 并同意开发者原产地证书(有关更多信息,请参阅 http://developercertificate.org/)。

git commit -sa
修改本仓库的 README 自述文件,增加对新增子模块仓库的描述。
// 使用文本编辑器编辑 `README.md`, 如:
// vim notepad gedit notepad++ nano emacs ...
vim README.md
// vim 批量处理 markdown(md) 语法引用操作 >
// 在 vim 编辑界面下,如给 usbarmory 批量添加引用符号 >
// : 编辑模式 54 开始行号 110 结束行号 s 搜索 ^ 行首 > 替换内容 g 替换
:54,110 s/^/> /g
// 修改完后记得保存退出,并清理文本编辑的缓存文件。
// 或者将缓存文件的格式添加到 `.gitignore` 文件中。


// 提交 README.md 修改
git commit -am "此次修改的描述"
// 例如:
git commit -am "Add dvk-mx8m-bsb"
git commit -am "新增 dvk-mx8m-bsb"
git commit -am "Update dvk-mx8m-bsb"
git commit -am "更新 dvk-mx8m-bsb"
git commit -am "Delete dvk-mx8m-bsb"
git commit -am "删除 dvk-mx8m-bsb"
推送到自己的仓库
git push
此处可能存在不合适展示的内容,页面不予展示。您可通过相关编辑功能自查并修改。
如您确认内容无涉及 不当用语 / 纯广告导流 / 暴力 / 低俗色情 / 侵权 / 盗版 / 虚假 / 无价值内容或违法国家有关法律法规的内容,可点击提交进行申诉,我们将尽快为您处理。