

代码拉取完成,页面将自动刷新
同步操作将从 TangGuoNiuBi/spring-boot-study 强制同步,此操作会覆盖自 Fork 仓库以来所做的任何修改,且无法恢复!!!
确定后同步将在后台操作,完成时将刷新页面,请耐心等待。
代码仓库地址:https://gitee.com/CandyWall/spring-boot-study 跟着黑马程序员spring boot教程做的学习笔记,本笔记跟视频内容的项目名称和代码略有不同,都是基于我自己的考量,代码都已经过运行验证过的,仅供参考。
视频教程地址:https://www.bilibili.com/video/BV15b4y1a7yG
注:四级标题和部分5级标题是使用子项目名称命名的,和我代码仓库的项目是一一对应的。
P3 基础篇-03-SpringBoot入门案例(Idea联网版)18:12
P4 基础篇-04-SpringBoot入门案例(官网创建版)06:21
P5 基础篇-05-SpringBoot入门案例(阿里云版)06:01
P6 基础篇-06-SpringBoot入门案例(手工制作版)08:34
P11 基础篇-11-入门案例:辅助功能:更换SpringBoot内嵌的默认的web容器从tomcat换成jetty
properties
yml(主流格式)
yaml
三种格式共存,优先级从先到后为properties、yml、yaml
课程中使用到的数据库脚本
/*
 Navicat MySQL Data Transfer

 Source Server         : localhost
 Source Server Type    : MySQL
 Source Server Version : 80023
 Source Host           : localhost:3306
 Source Schema         : springboot_db

 Target Server Type    : MySQL
 Target Server Version : 80023
 File Encoding         : 65001

 Date: 20/01/2022 11:50:34
*/

SET NAMES utf8mb4;
SET FOREIGN_KEY_CHECKS = 0;

-- ----------------------------
-- Table structure for tbl_book
-- ----------------------------
DROP TABLE IF EXISTS `tbl_book`;
CREATE TABLE `tbl_book`  (
  `id` int NOT NULL AUTO_INCREMENT,
  `name` varchar(50) CHARACTER SET utf8mb4 COLLATE utf8mb4_0900_ai_ci NULL DEFAULT NULL,
  `type` varchar(100) CHARACTER SET utf8mb4 COLLATE utf8mb4_0900_ai_ci NULL DEFAULT NULL,
  `description` varchar(100) CHARACTER SET utf8mb4 COLLATE utf8mb4_0900_ai_ci NULL DEFAULT NULL,
  PRIMARY KEY (`id`) USING BTREE
) ENGINE = InnoDB CHARACTER SET = utf8mb4 COLLATE = utf8mb4_0900_ai_ci ROW_FORMAT = Dynamic;

-- ----------------------------
-- Records of tbl_book
-- ----------------------------
INSERT INTO `tbl_book` VALUES (1, '三体', '科幻', '大刘的巅峰之作,将中国科幻推向世界舞台。总共分为三部曲:《地球往事》、《黑暗森林》、《死神永生》。');
INSERT INTO `tbl_book` VALUES (2, '格林童话', '童话', '睡前故事。');
INSERT INTO `tbl_book` VALUES (3, 'Spring 5设计模式', '计算机理论', '深入Spring源码剖析Spring源码中蕴含的10大设计模式');
INSERT INTO `tbl_book` VALUES (4, 'Spring MVC+ MyBatis开发从入门到项目实战', '计算机理论', '全方位解析面向Web应用的轻量级框架,带你成为Spring MVC开发高手');
INSERT INTO `tbl_book` VALUES (5, '轻量级Java Web企业应用实战', '计算机理论', '源码级剖析Spring框架,适合已掌握Java基础的读者');
INSERT INTO `tbl_book` VALUES (6, 'Java核心技术卷|基础知识(原书第11版)', '计算机理论', 'Core Java第11版,Jolt大奖获奖作品,针对Java SE9、10、 11全面更新');
INSERT INTO `tbl_book` VALUES (7, '深入理解Java虚拟机', '计算机理论', '5个维度全面剖析JVM,面试知识点全覆盖');
INSERT INTO `tbl_book` VALUES (8, 'Java编程思想(第4版)', '计算机理论', 'Java学习必读经典殿堂级著作!赢得了全球程序员的广泛赞誉');
INSERT INTO `tbl_book` VALUES (9, '零基础学Java (全彩版)', '计算机理论', '零基础自学编程的入门]图书,由浅入深,详解Java语言的编程思想和核心技术');
INSERT INTO `tbl_book` VALUES (10, '直播就该这么做:主播高效沟通实战指南', '市场营销', '李子柒、李佳琦、薇娅成长为网红的秘密都在书中');
INSERT INTO `tbl_book` VALUES (11, '直播销讲实战一本通', '市场营销', '和秋叶一起学系列网络营销书籍');
INSERT INTO `tbl_book` VALUES (12, '直播带货:淘宝、天猫直播从新手到高手', '市场营销', '一本教你如何玩转直播的书, 10堂课轻松实现带货月入3W+');
INSERT INTO `tbl_book` VALUES (13, 'Spring实战第5版', '计算机理论', 'Spring入门经典教程,深入理解Spring原理技术内幕');
INSERT INTO `tbl_book` VALUES (14, 'Spring 5核心原理与30个类手写实战', '计算机理论', '十年沉淀之作,写Spring精华思想');

SET FOREIGN_KEY_CHECKS = 1;
P29 基础篇-26-SpringBoot整合MyBatis常见问题处理
P30 基础篇-27-SpringBoot整合MyBatisPlus
P40 基础篇-37-业务层快速开发(基于MyBatisPlus构建)
P56 运维实用篇-53-Boot工程快速启动(Linux版)
# 后台启动springboot项目jar包
nohup java -jar springboot_08_ssmp-0.0.1-SNAPSHOT.jar > server.log 2>&1 &
# 终止程序
# 查看java -jar 命令对应的进程号
ps -ef | grep "java -jar"
# 终止对应进程
kill -9 <pid>
--spring.config.name=ebank
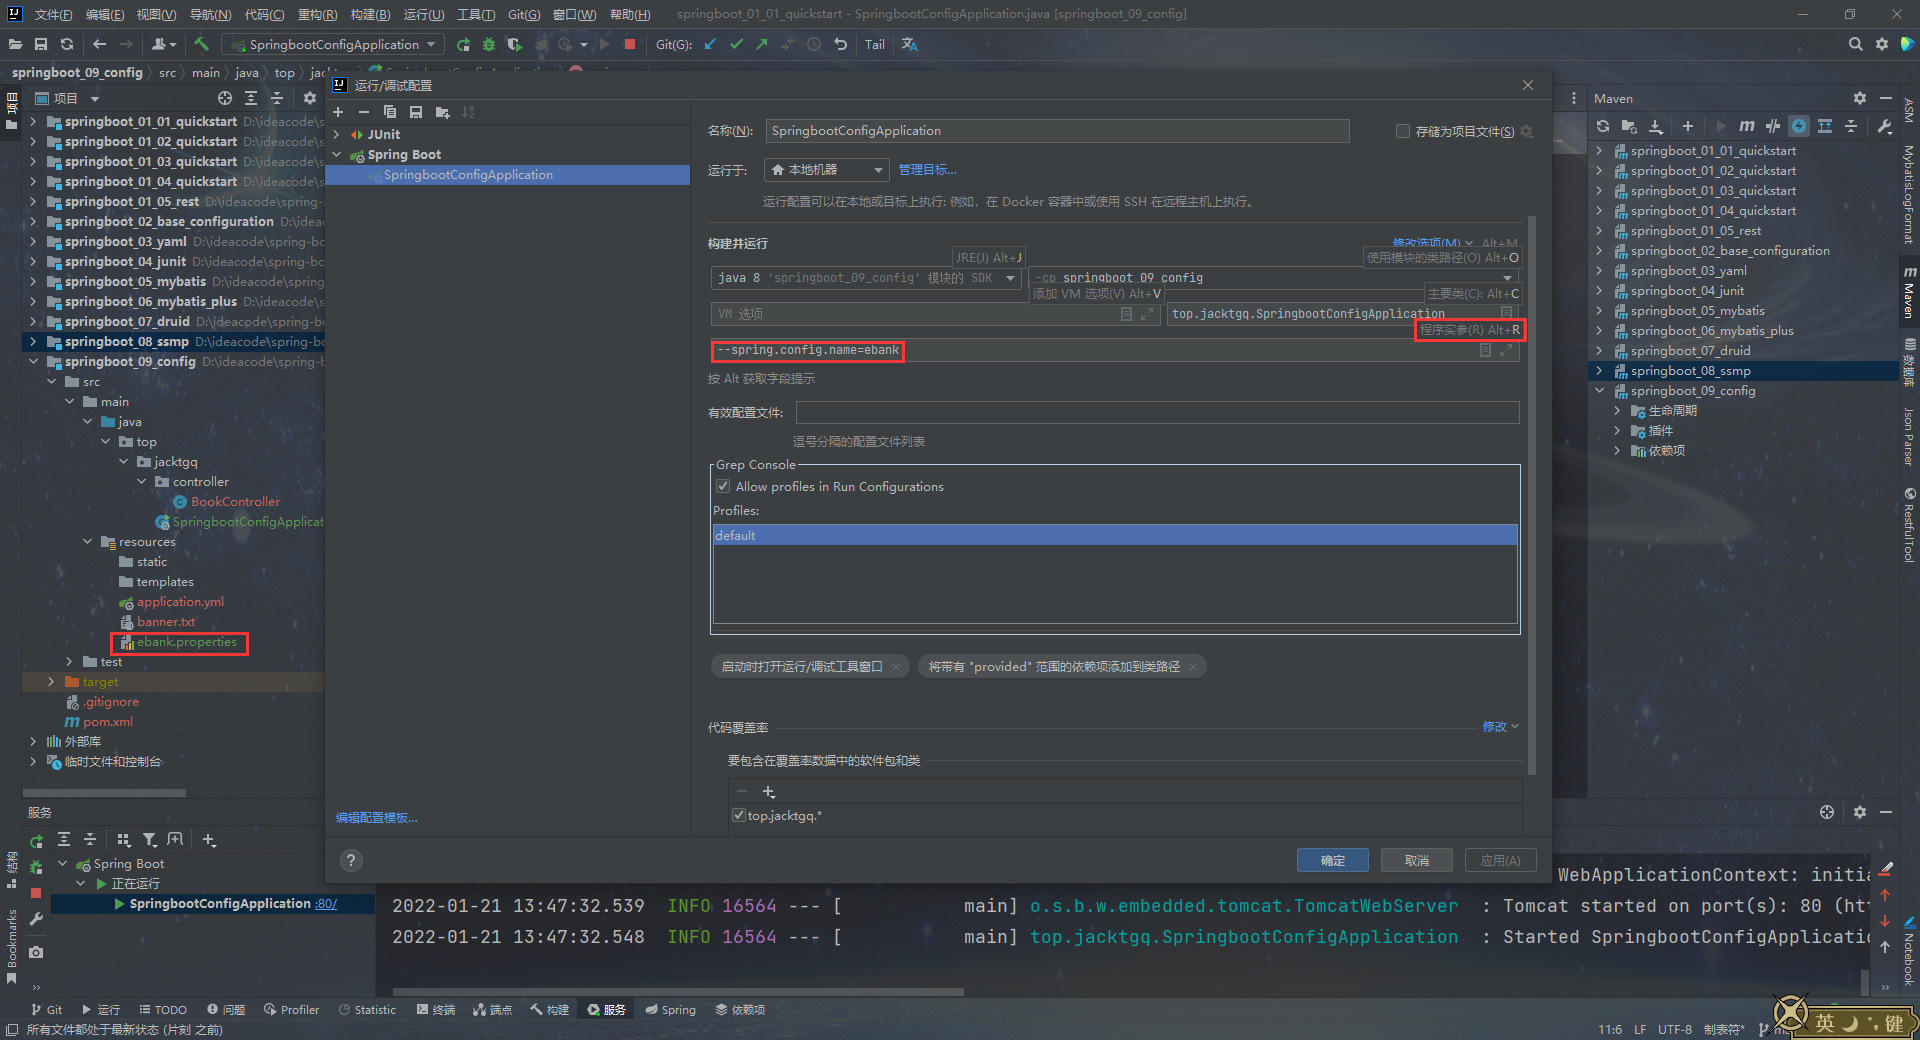
--spring.config.location=classpath:/ebank.yml

--spring.config.location=classpath:/ebank.yml,classpath:/ebank-server.yml

单文件版:
application.yml文件:
# 应用环境
# 公共配置
spring:
  profiles:
    active: dev
---
# 生产环境
spring:
  config:
    activate:
      on-profile: pro
server:
  port: 80
---
spring:
  config:
    activate:
      on-profile: dev
server:
  port: 8080
---
# 测试环境
spring:
  config:
    activate:
      on-profile: test
server:
  port: 8888
application.yml
# 应用环境
# 公共配置
spring:
  profiles:
    active: test
application-dev.yml
# 开发环境
server:
  port: 8080
application-pro.yml
# 生产环境
server:
  port: 80
application-test.yml
# 测试环境
server:
  port: 8888
P63 运维实用篇-60-多环境开发多文件版(properties版)
application.properties
# 应用环境
spring.profiles.active=test
application-dev.properties
# 开发环境
server.port=80
application-pro.properties
# 生产环境
server.port=8080
application-test.properties
# 测试环境
server.port=8888
使用group属性配置同组的配置文件,active可以直接使一组配置文件同时生效
application.yml
#spring:
#  profiles:
#    active: dev
#    include: devDB, devMVC

spring:
  profiles:
    active: dev
    group:
      "dev": devDB, devMVC
      "pro": proDB, proMVC
      "test": testDB, TestMVC
application-dev.yml
server:
  port: 80
application-devDB.yml
server:
  port: 81
application-devMVCyml
server:
  servlet:
    context-path: /ebank
  port: 82
观察启动日志,配置文件加载的顺序为 : The following profiles are active: dev,devDB,devMVC
maven中使用多环境,然后在springboot中读取maven中的配置
pom.xml中的配置
<!--设置多环境-->
<profiles>
    <profile>
        <id>env_dev</id>
        <properties>
            <profile.active>dev</profile.active>
        </properties>
        <activation>
            <activeByDefault>true</activeByDefault>
        </activation>
    </profile>
    <profile>
        <id>env_pro</id>
        <properties>
            <profile.active>pro</profile.active>
        </properties>

    </profile>
    <profile>
        <id>env_test</id>
        <properties>
            <profile.active>test</profile.active>
        </properties>
        <activation>
            <activeByDefault>true</activeByDefault>
        </activation>
    </profile>
</profiles>
application.yml中的配置
#spring:
#  profiles:
#    active: dev
#    include: devDB, devMVC

spring:
  profiles:
    active: @profile.active@
    group:
      "dev": devDB, devMVC
      "pro": proDB, proMVC
      "test": testDB, TestMVC
想要拥有热部署的功能,需要在pom.xml文件中添加如下依赖:
<dependency>
    <groupId>org.springframework.boot</groupId>
    <artifactId>spring-boot-devtools</artifactId>
    <optional>true</optional>
</dependency>
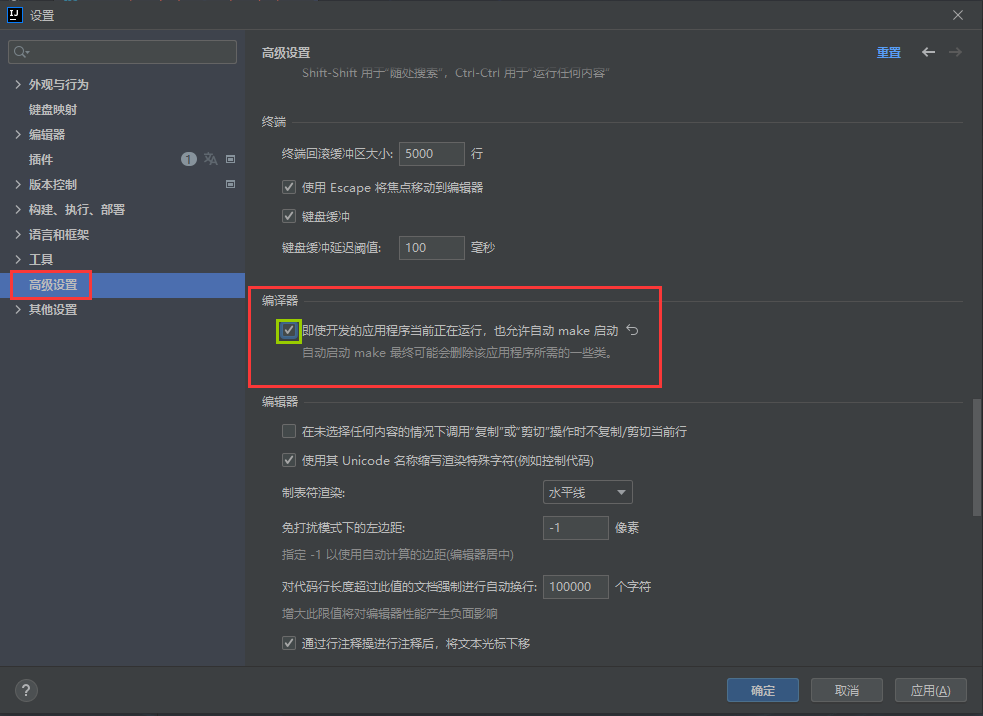
自动启动热部署,即,CTRL + F9编译的操作操作由程序自动完成,需要进行如下配置:
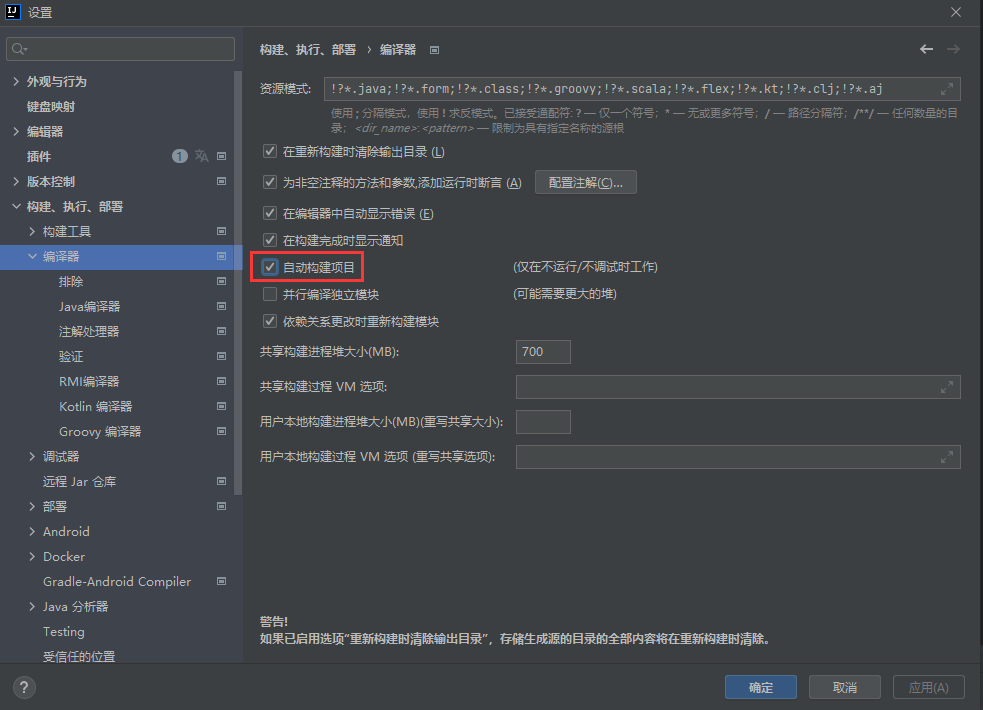
CTRL + SHIFT + ALT + /,在弹出的菜单中选择第一项,注册表,或者直接按CTRL + ALT + M调出注册表;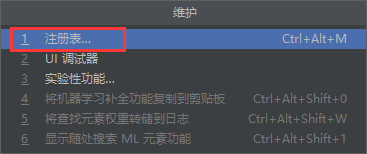
compiler.automake.allow.when.app.running
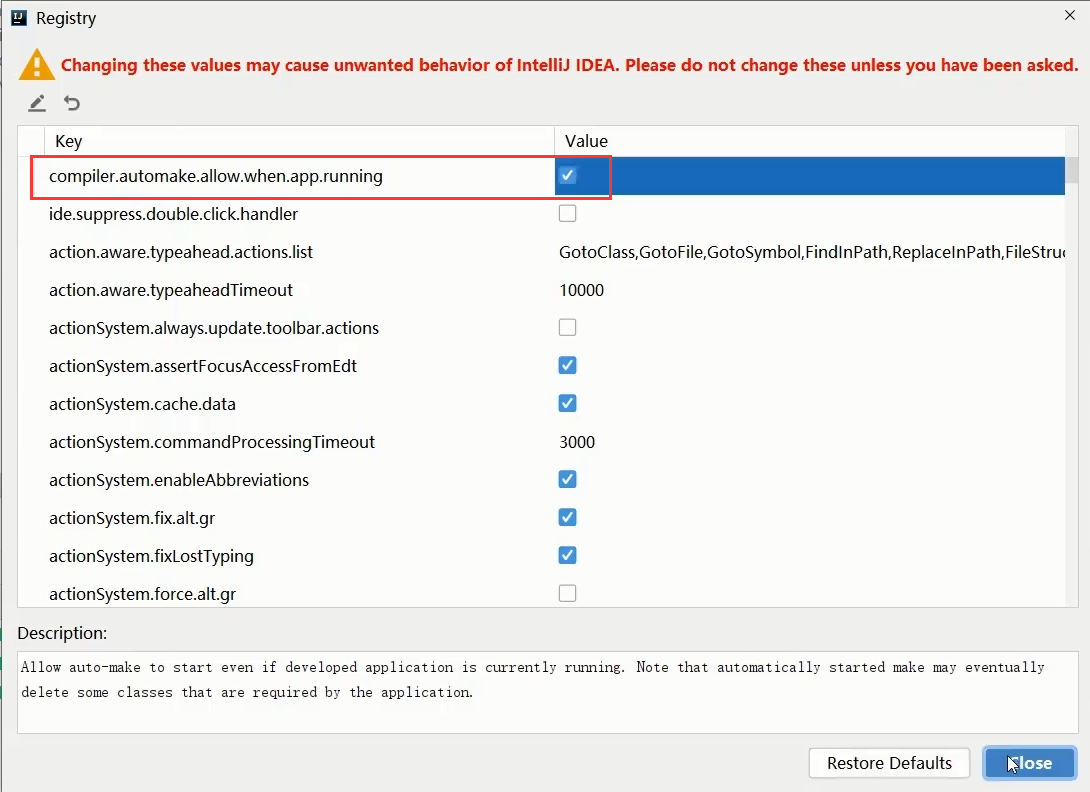
2021.3.1中在注册表中找不到改选项,需要在高级设置中进行设置。
application.yml
spring:
  # 热部署范围配置
  devtools:
    restart:
      # 设置不参与热部署的文件和文件夹(即修改后不重启)
      exclude: static/**,public/**,config/application.yml
      #是否可用
      enabled: false
如果配置文件比较多的时候找热部署对应配置比较麻烦,可以在springboot启动类的main方法中设置,此处设置的优先级将比配置文件高,一定会生效。
System.setProperty("spring.devtools.restart.enabled", "false");
先在要配置的类上面加@Component注解将该类交由spring容器管理;
@ConfigurationProperties(prefix="xxx"),xxx跟application.yml配置文件中的属性对应;
如果多个配置类想统一管理也可以通过@EnableConfigurationProperties({xxx.class, yyy.class})的方式完成配置,不过该注解会与@Component配置发生冲突,二选一即可;
第三方类对象想通过配置进行属性注入,可以通过创建一个方法,在方法体上加@Bean和@ConfigurationProperties(prefix="xxx")注解,然后方法返回这个第三方对象的方式。
使用@ConfigurationProperties(prefix="xxx")注解后idea工具会报一个警告Spring Boot Configuration Annotation Processor not configured
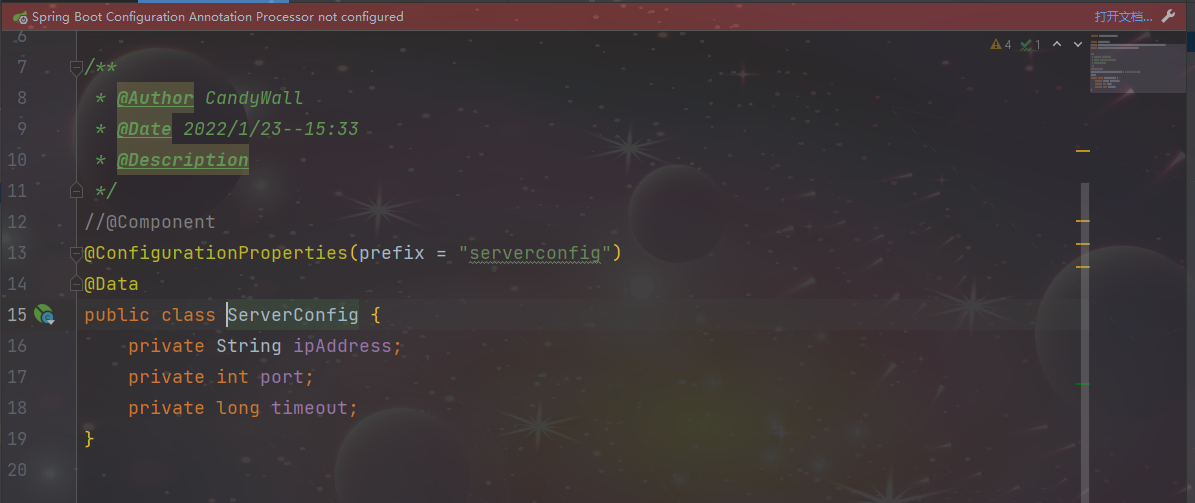
只需要在pom.xml中加上如下依赖刷新即可消除该警告
<dependency>
    <groupId>org.springframework.boot</groupId>
    <artifactId>spring-boot-configuration-processor</artifactId>
</dependency>
@ConfigurationProperties绑定属性支持属性名宽松绑定,又叫松散绑定。
比如要将ServerConfig.class作为配置类,并通过配置文件application.yml绑定属性
ServerConfig.class
@Component
@ConfigurationProperties(prefix = "serverconfig")
@Data
public class ServerConfig {
    private String ipAddress;
    private int port;
    private long timeout;
}
application.yml
serverConfig:
  # ipAddress: 192.168.0.1 # 驼峰模式
  # ipaddress: 192.168.0.1
  # IPADDRESS: 192.168.0.1
  ip-address: 192.168.0.1 # 主流配置方式,烤肉串模式
  # ip_address: 192.168.0.1 # 下划线模式
  # IP_ADDRESS: 192.168.0.1 # 常量模式
  # ip_Add_rEss: 192.168.0.1
  # ipaddress: 192.168.0.1
  port: 8888
  timeout: -1
以ipAddress属性为例,上面的多种配置方式皆可生效,这就是松散绑定。而@Value不支持松散绑定,必须一一对应。
@ConfigurationProperties(prefix="serverconfig")中的prefix的值为serverconfig或者server-config,如果是serverConfig就会报错,这与松散绑定的前缀命名规范有关:仅能使用纯小写字母、数字、中划线作为合法的字符
//@Component
@ConfigurationProperties(prefix = "server-config")
@Data
public class ServerConfig {
   private String ipAddress;
   private int port;
   @DurationUnit(ChronoUnit.MINUTES)
   private Duration timeout;

   @DataSizeUnit(DataUnit.MEGABYTES)
   private DataSize dataSize;
}
引入Bean属性校验框架的步骤:
pom.xml中添加JSR303规范和hibernate校验框架的依赖:<!--导入JSR303规范-->
<dependency>
<groupId>javax.validation</groupId>
<artifactId>validation-api</artifactId>
</dependency>
<!--使用hibernate框架提供的校验器-->
<dependency>
<groupId>org.hibernate.validator</groupId>
<artifactId>hibernate-validator</artifactId>
</dependency>
@Validated注解@Max(value=8888, message="最大值不能超过8888")
@ConfigurationProperties(prefix = "server-config")
@Data
// 2.开启对当前bean的属性注入校验
@Validated
public class ServerConfig {
    private String ipAddress;
    // 设置具体的规则
    @Max(value = 8888, message = "最大值不能超过8888")
    @Min(value = 1000, message = "最小值不能低于1000")
    private int port;
    @DurationUnit(ChronoUnit.MINUTES)
    private Duration timeout;

    @DataSizeUnit(DataUnit.MEGABYTES)
    private DataSize dataSize;
}
进制转换中的一些问题:
如application.yml文件中对数据库有如下配置:
datasource:
  driverClassName: com.mysql.cj.jdbc.Driver123
  # 不加引号读取的时候默认解析为了8进制数,转成十进制就是87
  # 所以想让这里正确识别,需要加上引号
  # password: 0127
  password: "0127"
@SpringBootTest注解中可以设置properties和args属性,这里的args属性的作用跟idea工具中自带的程序参数类似,只不过这里的配置是源码级别的,会随着源码的移动而跟随,而idea中的程序参数的配置会丢失。并且这里的args属性的配置的作用范围比较小,仅在当前测试类生效。
application.yml
test:
  prop: testValue
PropertiesAndArgsTest.java
// properties属性可以为当前测试用例添加临时的属性配置
//@SpringBootTest(properties = {"test.prop=testValue1"})
// args属性可以为当前测试用例添加临时的命令行参数
//@SpringBootTest(args = {"--test.prop=testValue2"})
// 优先级排序: args > properties > 配置文件
@SpringBootTest(args = {"--test.prop=testValue2"}, properties = {"test.prop=testValue1"})
class PropertiesAndArgsTest {
    @Value("${test.prop}")
    private String prop;
    @Test
    public void testProperties() {
        System.out.println("prop = " + prop);
    }
}
某些测试类中需要用到第三方的类,而其他测试类则不需要用到,这里可以在类上加载@Import({xxx.class, yyy.class})
表现层BookController.java
@RestController
@RequestMapping("/books")
public class BookController {
    /*@GetMapping("/{id}")
    public String getById(@PathVariable int id) {
        System.out.println("id = " + id);
        return "getById...";
    }*/

    @GetMapping("/{id}")
    public Book getById(@PathVariable int id) {
        System.out.println("id = " + id);
        Book book = new Book();
        book.setId(5);
        book.setName("神秘岛");
        book.setType("科幻");
        book.setDescription("《神秘岛》是法国科幻小说家儒勒·凡尔纳创作的长篇小说,是他写的三部曲之一。");

        return book;
    }
}
对应的测试类WebTest.java
@SpringBootTest(webEnvironment = SpringBootTest.WebEnvironment.RANDOM_PORT)
// 开启虚拟mvc调用
@AutoConfigureMockMvc
public class WebTest {
    @Test
    public void testRandomPort() {
    }

    @Test
    public void testWeb(@Autowired MockMvc mvc) throws Exception {
        // 创建虚拟请求,当前访问 /books
        MockHttpServletRequestBuilder builder = MockMvcRequestBuilders.get("/books/5");
        mvc.perform(builder);
    }

    @Test
    public void testStatus(@Autowired MockMvc mvc) throws Exception {
        MockHttpServletRequestBuilder builder = MockMvcRequestBuilders.get("/books1/6");
        ResultActions action = mvc.perform(builder);
        // 设定预期值,与真实值进行比较,成功测试通过,失败测试不通过
        // 定义本次调用的预期值
        StatusResultMatchers srm = MockMvcResultMatchers.status();
        // 预计本次调用成功的状态码:200
        ResultMatcher ok = srm.isOk();
        // 添加预计值到本次调用过程中进行匹配
        action.andExpect(ok);
    }

    @Test
    public void testBody(@Autowired MockMvc mvc) throws Exception {
        MockHttpServletRequestBuilder builder = MockMvcRequestBuilders.get("/books/6");
        ResultActions action = mvc.perform(builder);
        // 设定预期值,与真实值进行比较,成功测试通过,失败测试不通过
        // 定义本次调用的预期值
        ContentResultMatchers crm = MockMvcResultMatchers.content();
        // 预计本次调用成功的状态码:200
        ResultMatcher rm = crm.string("getById...");
        // 添加预计值到本次调用过程中进行匹配
        action.andExpect(rm);
    }

    @Test
    public void testJson(@Autowired MockMvc mvc) throws Exception {
        MockHttpServletRequestBuilder builder = MockMvcRequestBuilders.get("/books/7");
        ResultActions action = mvc.perform(builder);
        // 设定预期值,与真实值进行比较,成功测试通过,失败测试不通过
        // 定义本次调用的预期值
        ContentResultMatchers jsonMatcher = MockMvcResultMatchers.content();
        ResultMatcher rm = jsonMatcher.json("{\"id\":5,\"name\":\"神秘岛\",\"type\":\"科幻\",\"description\":\"《神秘岛》是法国科幻小说家儒勒·凡尔纳创作的长篇小说,是他写的三部曲之一。1\"}");
        action.andExpect(rm);
    }

    @Test
    public void testContentType(@Autowired MockMvc mvc) throws Exception {
        MockHttpServletRequestBuilder builder = MockMvcRequestBuilders.get("/books/7");
        ResultActions action = mvc.perform(builder);
        // 设定预期值,与真实值进行比较,成功测试通过,失败测试不通过
        // 定义本次调用的预期值
        HeaderResultMatchers hrm = MockMvcResultMatchers.header();
        ResultMatcher rm = hrm.string("Content-Type", "application/json");
        action.andExpect(rm);
    }

    @Test
    // 完整测试
    public void testGetById(@Autowired MockMvc mvc) throws Exception {
        MockHttpServletRequestBuilder builder = MockMvcRequestBuilders.get("/books/8");
        ResultActions action = mvc.perform(builder);

        // 1、比较状态码
        StatusResultMatchers statusResultMatchers = MockMvcResultMatchers.status();
        ResultMatcher statusResultMatcher = statusResultMatchers.isOk();
        action.andExpect(statusResultMatcher);

        // 2、比较返回值类型
        HeaderResultMatchers headerResultMatchers = MockMvcResultMatchers.header();
        ResultMatcher headerResultMatcher = headerResultMatchers.string("Content-Type", "application/json");
        action.andExpect(headerResultMatcher);

        /// 3、比较json返回值
        ContentResultMatchers contentResultMatchers = MockMvcResultMatchers.content();
        ResultMatcher jsonResultMatcher = contentResultMatchers.json("{\"id\":5,\"name\":\"神秘岛\",\"type\":\"科幻\",\"description\":\"《神秘岛》是法国科幻小说家儒勒·凡尔纳创作的长篇小说,是他写的三部曲之一。\"}");
        action.andExpect(jsonResultMatcher);
    }
}
测试过程中对数据库的增删改操作的影响是否回滚,由下面两个注解控制,需要在测试类上加:
@Transactional,@Rollback(value=true):回滚,@Rollback(value=true)为默认值,也可以省略;
@Transactional,@Rollback(value=false):不回滚,跟什么注解都不加的效果一样。
可以把测试用例中的属性值都按照一定规则设置成随机值,可以让测试结果更具有普适性。并且可以把测试用例的属性的随机规则写在配置文件中,方便更改。
application.yml
testcase:
  randomBook:
    id: ${random.int}
    id2: ${random.int(10)} # 生成10以内的整数
    type: ${random.int(5, 10)} # 生成5-10之间的整数
    name: 糖果墙${random.value}
    uuid: ${random.uuid}
    publicTime: ${random.long}
BookCase.java
@Data
@Component
@ConfigurationProperties(prefix = "test-case.random-book")
public class BookCase {
    private Integer id;
    private Integer id2;
    private String type;
    private String name;
    private String uuid;
    private Long publishTime;
}
在springboot项目中使用Druid数据源,需要先在pom.xml中加上Druid的依赖:
<dependency>
    <groupId>com.alibaba</groupId>
    <artifactId>druid-spring-boot-starter</artifactId>
    <version>1.2.8</version>
</dependency>
然后在application.yml中有两种配置方法,两种方法实现的效果一样
# 配法1:
spring:
  datasource:
    druid:
      driver-class-name: com.mysql.cj.jdbc.Driver
      url: jdbc:mysql://localhost:3306/springboot_db?serverTimezone=UTC
      username: root
      password: 123

# 配法2:
spring:
  datasource:
    driver-class-name: com.mysql.cj.jdbc.Driver
    url: jdbc:mysql://localhost:3306/springboot_db?serverTimezone=UTC
    username: root
    password: 123
    type: com.alibaba.druid.pool.DruidDataSource # 去掉type属性,Druid数据源依然会启用
配法2去掉type属性后,再启动项目,发现Druid数据源依然启用了,这是由于引入了Druid数据源的依赖后,springboot会自动配置Druid。
如果不引入Druid数据源的依赖,springboot默认的数据源是Hikari数据源
# 默认为Hikari数据源
spring:
  datasource:
    driver-class-name: com.mysql.cj.jdbc.Driver
    url: jdbc:mysql://localhost:3306/springboot_db?serverTimezone=UTC
    username: root
    password: 123

# Hikari数据源详细配置,这里需要注意url需要和Hikari属性并列,而Hikari下的jdbc-url无效
spring:
  datasource:
    url: jdbc:mysql://localhost:3306/springboot_db?serverTimezone=UTC
    hikari:
      # jdbc-url: jdbc:mysql://localhost:3306/springboot_db?serverTimezone=UTC # 此项无效
      driver-class-name: com.mysql.cj.jdbc.Driver
      username: root
      password: 123
      maximum-pool-size: 50
      minimum-idle: 30
      idle-timeout: 30000
使用JdbcTemplate
在pom.xml中加入相关依赖
application.yml中配置数据源,另外还可以对JdbcTemplate进行一些简单的配置
# 配置数据库和连接池
spring:
  datasource:
    url: jdbc:mysql://localhost:3306/springboot_db?serverTimezone=UTC
    hikari:
      driver-class-name: com.mysql.cj.jdbc.Driver
      username: root
      password: TGQ@candywall123
      maximum-pool-size: 50
      minimum-idle: 30
      # idle-timeout: 30000

  # JdbcTemplate的一些配置
  jdbc:
    template:
      query-timeout: 30s # 指定查询超时时间
      max-rows: 500 # 最大查询条数
      fetch-size: 500 # 数据条数比较多的时候,一次拿多少条数据
测试类
@SpringBootTest
class JdbcTemplateApplicationTests {
    @Autowired
    private JdbcTemplate jdbcTemplate;
    @Test
    void testJdbcTemplateSelect() {
        String sql = "select * from tbl_book";
        // List<Map<String, Object>> maps = jdbcTemplate.queryForList(sql);
        // System.out.println(maps);
        RowMapper<Book> rm = new RowMapper<Book>() {
            @Override
            public Book mapRow(ResultSet rs, int rowNum) throws SQLException {
                Book book = new Book();
                book.setId(rs.getInt("id"));
                book.setName(rs.getString("name"));
                book.setType(rs.getString("type"));
                book.setDescription(rs.getString("description"));
                return book;
            }
        };
        List<Book> bookList = jdbcTemplate.query(sql, rm);
        bookList.forEach(System.out::println);
    }

    @Test
    void testJdbcTemplateInsert() {
        String sql = "insert into tbl_book values(null, ?, ?, ?)";
        jdbcTemplate.update(sql, "springboot1", "springboot2", "springboot3");
    }
}
使用H2数据库
在pom.xml中加入相关依赖
在application.yml中配置数据源并且启用H2数据库的控制台
server:
  port: 80

spring:
  # 配置数据库和连接池
  datasource:
    url: jdbc:h2:~/test
    hikari:
      driver-class-name: org.h2.Driver
      username: sa
      password: 123456

  # 启用H2的控制台
  h2:
    console:
      enabled: true
      path: /h2
在浏览器中输入访问H2控制台地址
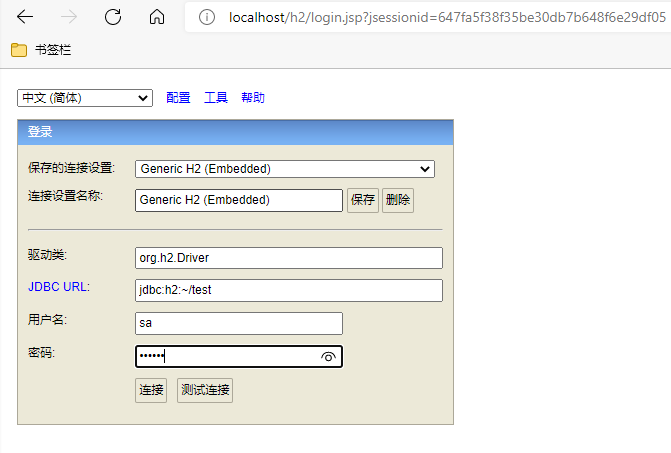
输入默认密码:123456,然后点连接,会跳转到控制台主页
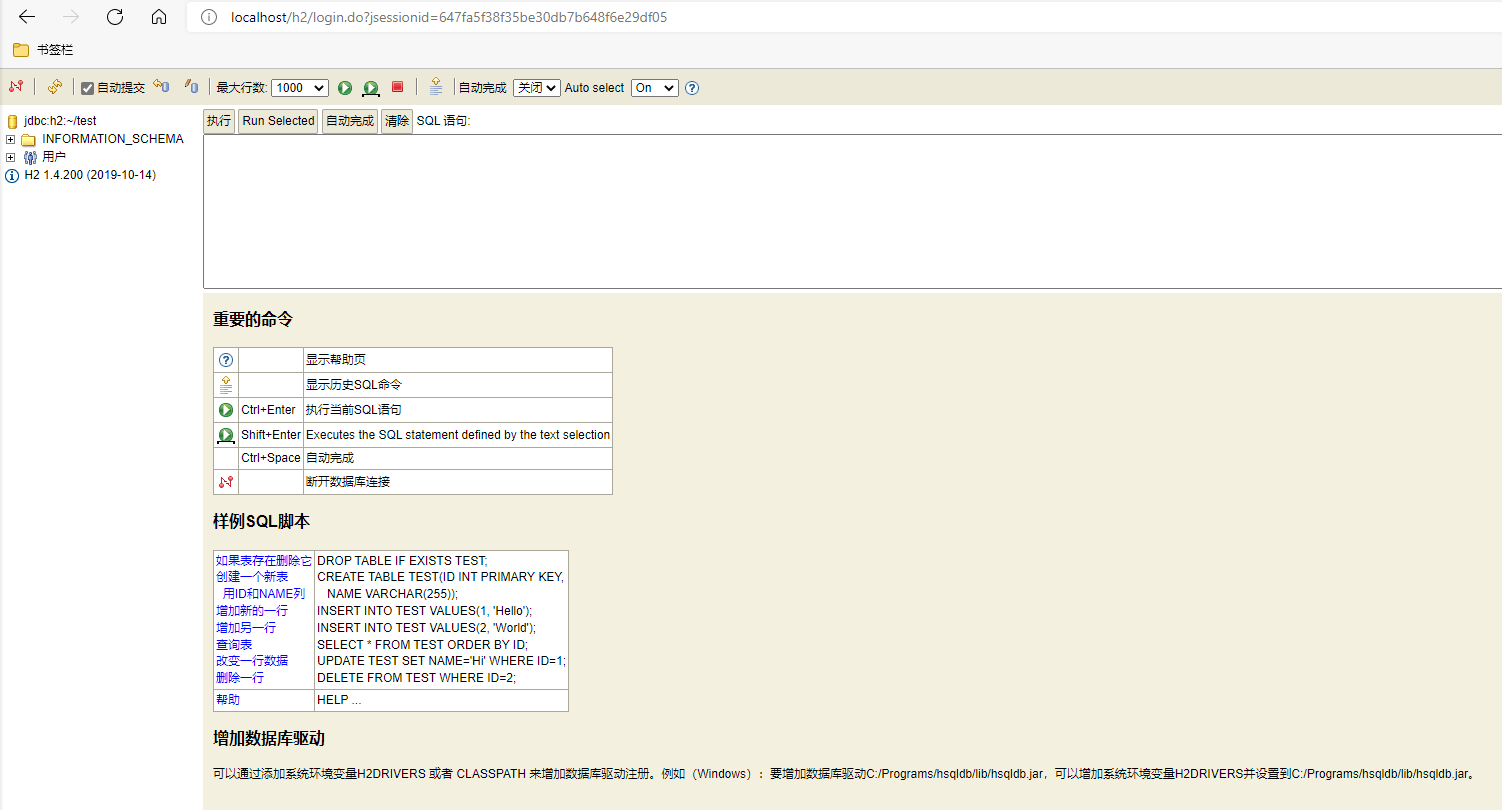
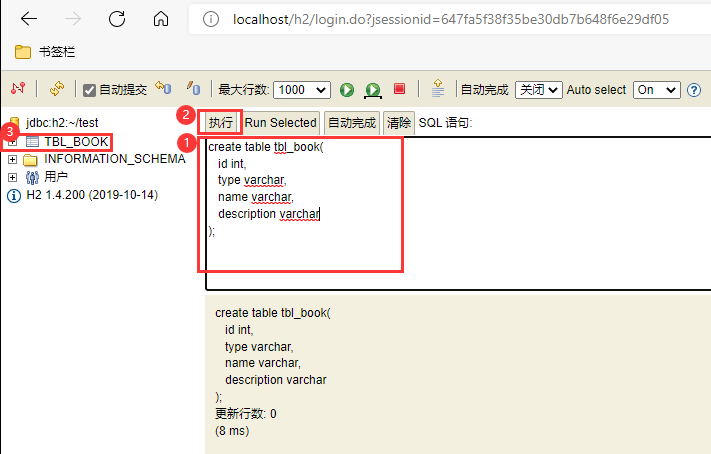
可以写sql语句建表,并插入几条数据
create table tbl_book(
id int,
type varchar,
name varchar,
description varchar
);
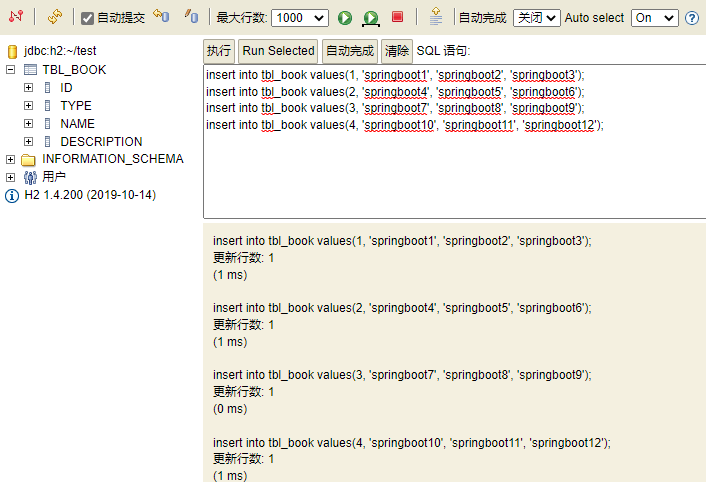
insert into tbl_book values(1, 'springboot1', 'springboot2', 'springboot3');
insert into tbl_book values(2, 'springboot4', 'springboot5', 'springboot6');
insert into tbl_book values(3, 'springboot7', 'springboot8', 'springboot9');
insert into tbl_book values(4, 'springboot10', 'springboot11', 'springboot12');
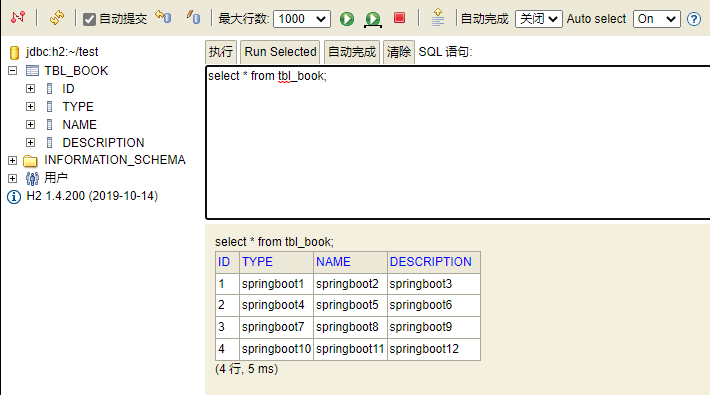
查询tbl_book表中的数据
select * from tbl_book;
写代码连接H2数据库,需要注意启动测试类连接H2数据库的时候需要将之前的H2控制台的springboot程序先停止,否则会造成端口占用,测试类报错。
测试类:
@SpringBootTest
class H2ApplicationTests {
    @Autowired
    private JdbcTemplate jdbcTemplate;

    @Test
    public void testH2Select() {
        String sql = "select * from tbl_book";

        RowMapper<Book> rm = new RowMapper<Book>() {
            @Override
            public Book mapRow(ResultSet rs, int rowNum) throws SQLException {
                Book book = new Book();
                book.setId(rs.getInt("id"));
                book.setName(rs.getString("name"));
                book.setType(rs.getString("type"));
                book.setDescription(rs.getString("description"));
                return book;
            }
        };
        List<Book> bookList = jdbcTemplate.query(sql, rm);
        bookList.forEach(System.out::println);
    }

    @Test
    public void testH2Save() {
        String sql = "insert into tbl_book values(?, ? ,? ,?)";
        jdbcTemplate.update(sql, 5, "啊哈算法", "计算机", "数据结构和算法");
    }
}
H2数据库线上运行时请务必关闭。
bind 0.0.0.0
protected-mode no
port 6379
timeout 0
save 900 1 # 900s内至少一次写操作则执行bgsave进行RDB持久化
save 300 10
save 60 10000
rdbcompression yes
dbfilename dump.rdb
dir /data
appendonly yes
appendfsync everysec
requirepass 12345678
windows版下载地址:https://github.com/tporadowski/redis/releases
linux版下载地址:https://redis.io/
在linux上安装redis除了最原始的方法外,推荐使用docker-compose一键启动redis,非常方便
redis.conf
bind 0.0.0.0
protected-mode no
port 6379
timeout 0
save 900 1 # 900s内至少一次写操作则执行bgsave进行RDB持久化
save 300 10
save 60 10000
rdbcompression yes
dbfilename dump.rdb
dir /data
appendonly yes
appendfsync everysec
requirepass 123456
docker-compose.yml
version: '3'

services:
  redis:
    image: redis:latest
    container_name: redis
    restart: always
    ports:
      - 6379:6379
    volumes:
      - ./redis.conf:/etc/redis/redis.conf:rw
      - ./data:/data:rw
    command: ["redis-server","/etc/redis/redis.conf"]
我的redis安装在虚拟机中的linux系统上,可以通过以下两种方式测试连通性:
windows版redis自带的redis-cli来远程连接linux上的redis服务,指令如下:redis-cli.exe -h 192.168.0.110 -p 6379 -a "123456" # 123456是密码
AnotherRedisDesktopManager:这是一款非常稳定并且拥有美观的图形界面的redis客户端,操作起来也是相当简单,一看就会用,下载地址:https://github.com/qishibo/AnotherRedisDesktopManager/releases
P93 实用开发篇-90-SpringBoot整合Redis
在pom.xml中加入spring整合redis的依赖
<!--springboot整合redis-->
<dependency>
    <groupId>org.springframework.boot</groupId>
    <artifactId>spring-boot-starter-data-redis</artifactId>
</dependency>
application.yml
spring:
  # redis配置
  redis:
    host: 192.168.0.110
    port: 6379
    password: 123456
测试类
@SpringBootTest
class RedisApplicationTests {
    @Autowired
    private StringRedisTemplate redisTemplate;

    @Test
    public void testSet() {
        ValueOperations valueOperations = redisTemplate.opsForValue();

        valueOperations.set("age", "41");
    }
    @Test
    public void testGet() {
        ValueOperations valueOperations = redisTemplate.opsForValue();
        System.out.println("age = " + valueOperations.get("age"));
        System.out.println("username = " + valueOperations.get("username"));
    }
}
注:这里如果使用RedisTemplate而不使用StringRedisTemplate,去redis客户端里面查看会发现键值包含\xac\xed\x00\x05t\x00\特殊字符,这是由于RedisTemplate<K, V>模板类在操作redis时默认使用JdkSerializationRedisSerializer来进行序列化。而存取序列化的方式从org.springframework.data.redis.serializer.JdkSerializationRedisSerializer
将序列化的方式改为 org.springframework.data.redis.serializer.StringRedisSerializer 会自动去掉\xac\xed\x00\x05t\x00前缀,所以有两种解决方法:
直接使用StringRedisTemplate;
方案2 修改默认的序列化方式:
private RedisTemplate redisTemplate;
@Autowired(required = false)
public void setRedisTemplate(RedisTemplate redisTemplate) {
    RedisSerializer stringSerializer = new StringRedisSerializer();
    redisTemplate.setKeySerializer(stringSerializer);
    redisTemplate.setValueSerializer(stringSerializer);
    redisTemplate.setHashKeySerializer(stringSerializer);
    redisTemplate.setHashValueSerializer(stringSerializer);
    this.redisTemplate = redisTemplate;
}
P94 实用开发篇-91-SpringBoot读写Redis的客户端
P95 实用开发篇-92-SpringBoot操作Redis客户端实现技术切换(jedis)
java操作redis底层有两种实现分别为lettuce和jedis,其中lettuce为springboot的RedisTemplate默认使用的技术。如果想要切换到jedis:
引入jedis的jar包
在application.yml中加入配置
spring:
  # redis配置
  redis:
    host: 192.168.0.110
    port: 6379
    password: 123456
    client-type: jedis # 默认为lettuce
    # 还可以进一步配置
    jedis:
      pool:
        enabled: true
        max-active: 16
        min-idle: 8
解压mongodb安装包,然后在软件根目录下新建data\db,进入到bin目录下启动黑窗口,输入如下命令,启动mongodb数据库,并指定数据保存到data\db目录下。
.\mongod.exe --dbpath=..\data\db
在bin目录下再开一个黑窗口,然后输入
.\mongo.exe
会默认连接ip为localhost,port为27017的mongodb服务,连接成功会输出mongodb的版本等信息。
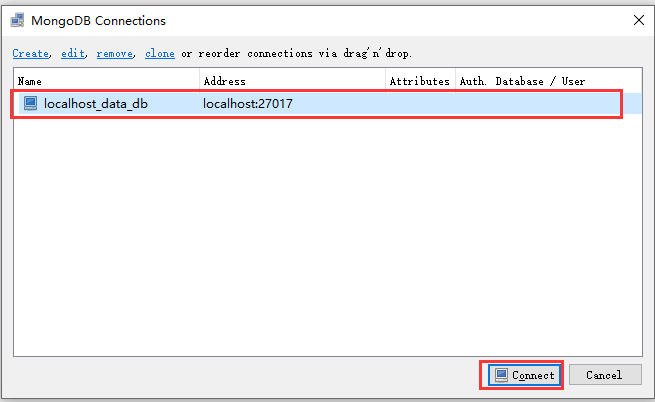
由于黑窗口操作较为繁琐,这里推荐使用带图形化界面的客户端robo3t,启动robo3t,创建一个连接
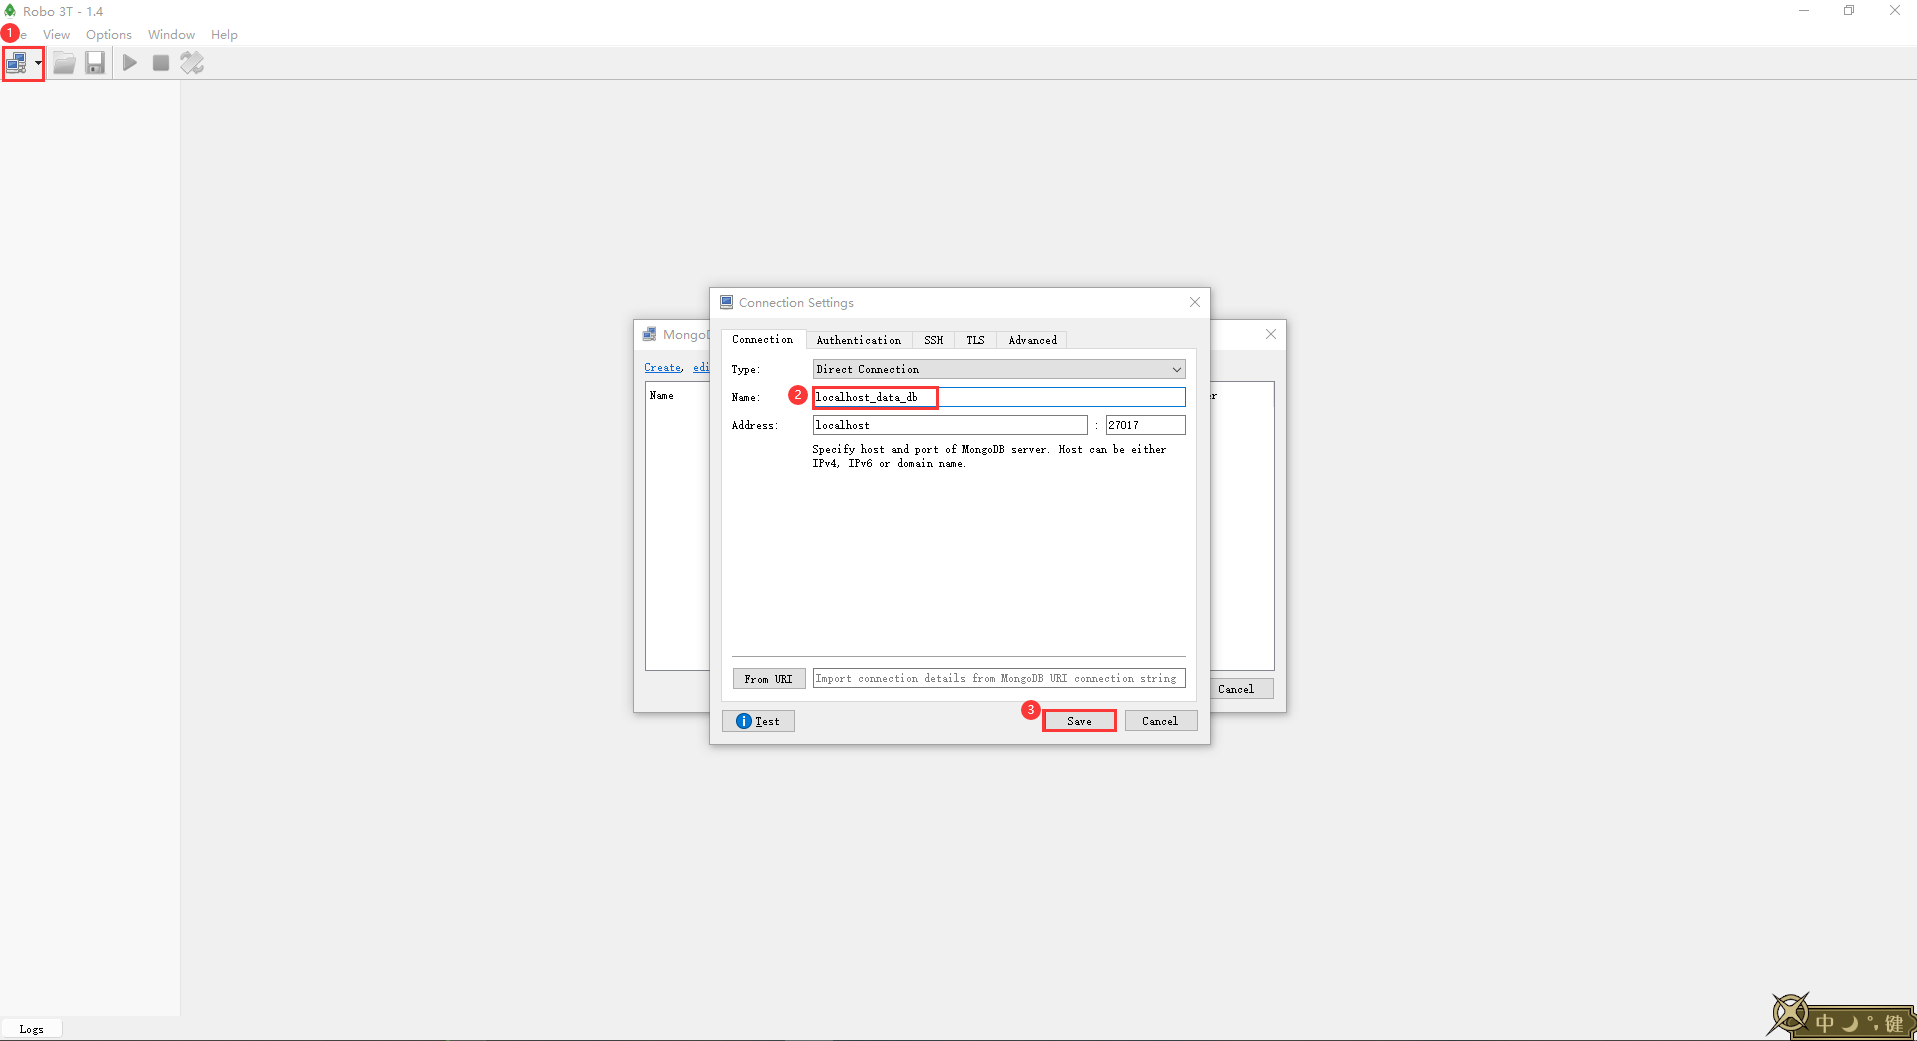 打开这个连接
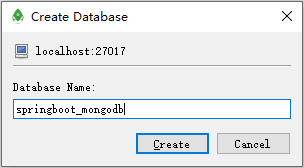
右击左侧连接名,在右键菜单中选择Create Database,新建一个数据库

填写数据库名称
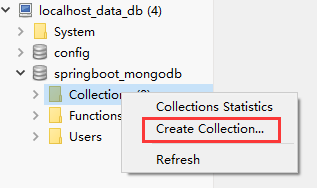
展开数据库名,右击Collections再新建一个Collection
填写collection名称
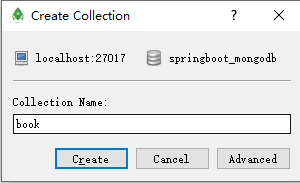
右击新建的Collection book,会弹出一个查询界面,可以在文本框中填写指令对Collection book进行操作
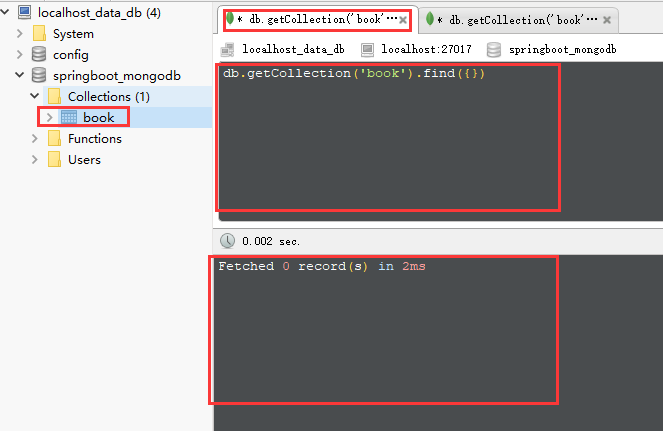
// 查询所有
db.getCollection('book').find({})
// 可以简写为
db.book.find();
// 条件查询
db.book.find({type: "springboot"})

// 保存文档
db.book.save({"name": "springboot", type: "springboot"})

// 删除操作
db.book.remove({type: "springboot"});

// 修改操作
// 修改满足条件的第一条数据
db.book.update({name: "springboot"}, {$set:{name: "springboot2"}});
// 修改满足条件的所有数据
db.book.updateMany({name: "springboot"}, {$set:{name: "springboot2"}});
P99 实用开发篇-96-SpringBoot整合Mongodb
在pom.xml中加入springboot整合MongoDB的依赖
<dependency>
    <groupId>org.springframework.boot</groupId>
    <artifactId>spring-boot-starter-data-mongodb</artifactId>
</dependency>
在application.yml中进行MongoDB的配置
spring:
  data:
    mongodb:
      uri: mongodb://localhost/springboot_mongodb
测试代码
@SpringBootTest
class MongodbApplicationTests {
    @Autowired
    private MongoTemplate mongoTemplate;

    @Test
    void testSave() {
        Book book = new Book();
        book.setId(2);
        book.setName("springboot2");
        book.setType("springboot2");
        book.setDescription("springboot2");
        mongoTemplate.save(book);
    }

    @Test
    public void testFindAll() {
        List<Book> books = mongoTemplate.findAll(Book.class);
        books.forEach(System.out::println);
    }
}
安装
解压es的安装包,然后去bin目录下双击elasticsearch.bat启动es服务器,然后就可以去浏览器输入http://localhost:9200/
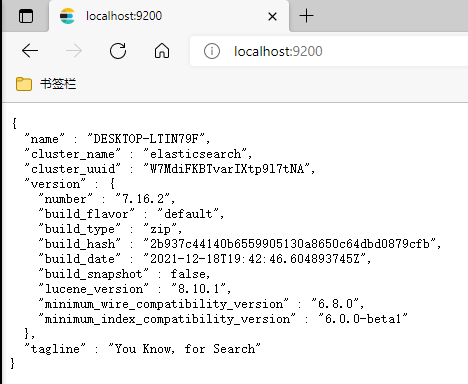
如果有正常的json返回值,那么说明es启动正常
安装IK分词器插件
我们希望
es再新建索引的时候应用分词效果,所以需要先给es安装IK分词器插件
下载地址:https://github.com/medcl/elasticsearch-analysis-ik/releases
在es的plugin目录下新建一个ik文件夹(建文件夹是为了方便管理),然后把下载好的ik分词器压缩包中的内容解压到ik目录下
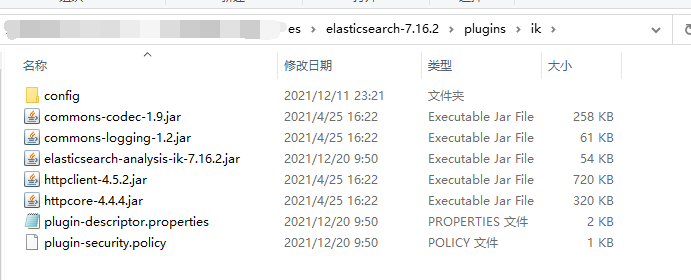
关闭当前es启动的黑窗口,去es的bin目录下,双击elasticsearch.bat,重新启动es
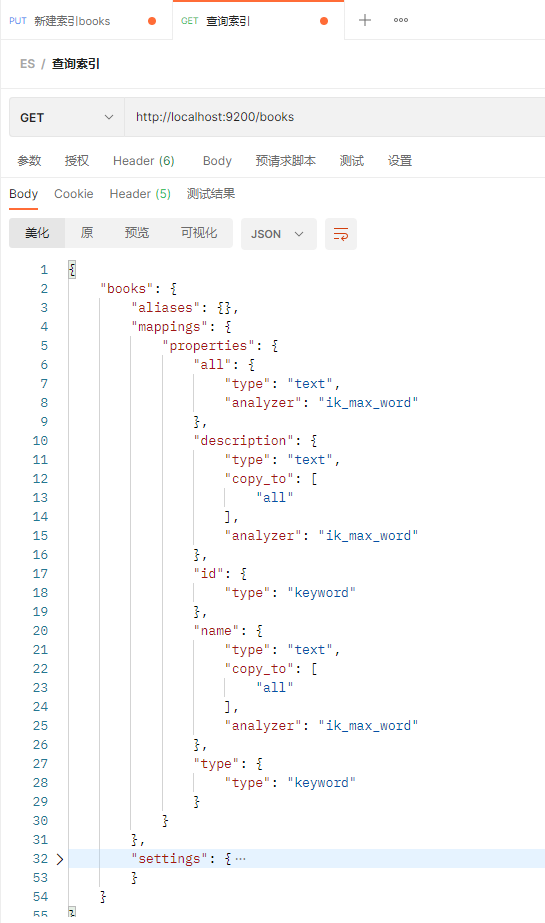
新建索引
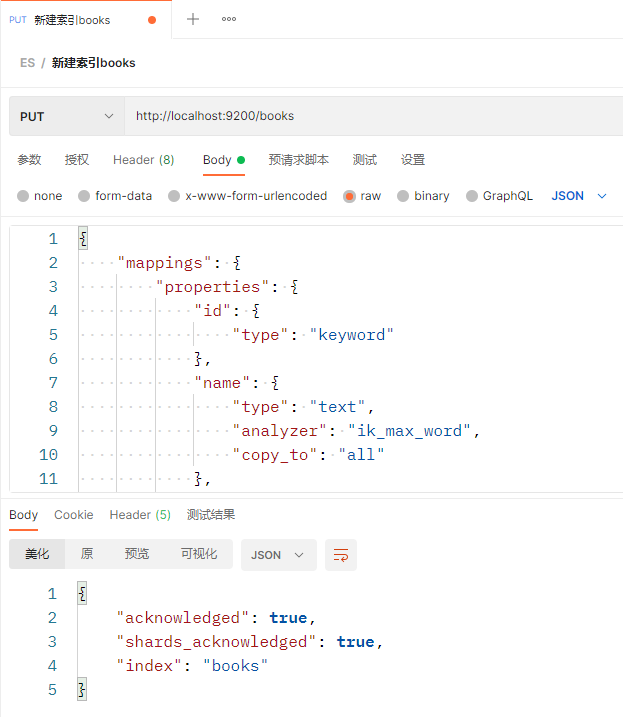
打开postman,发送一个PUT请求,新建一个books索引
请求参数
{
    "mappings": {
        "properties": {
            "id": {
                "type": "keyword"
            },
            "name": {
                "type": "text",
                "analyzer": "ik_max_word",
                "copy_to": "all"
            },
            "type": {
                "type": "keyword"
            },
            "description": {
                "type": "text",
                "analyzer": "ik_max_word",
                "copy_to": "all"
            },
            "all": {
                "type": "text",
                "analyzer": "ik_max_word"
            }
        }
    }
}

返回如下提示就表示新建索引成功
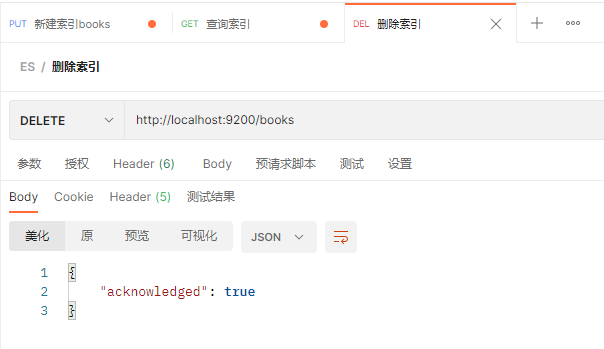
删除索引
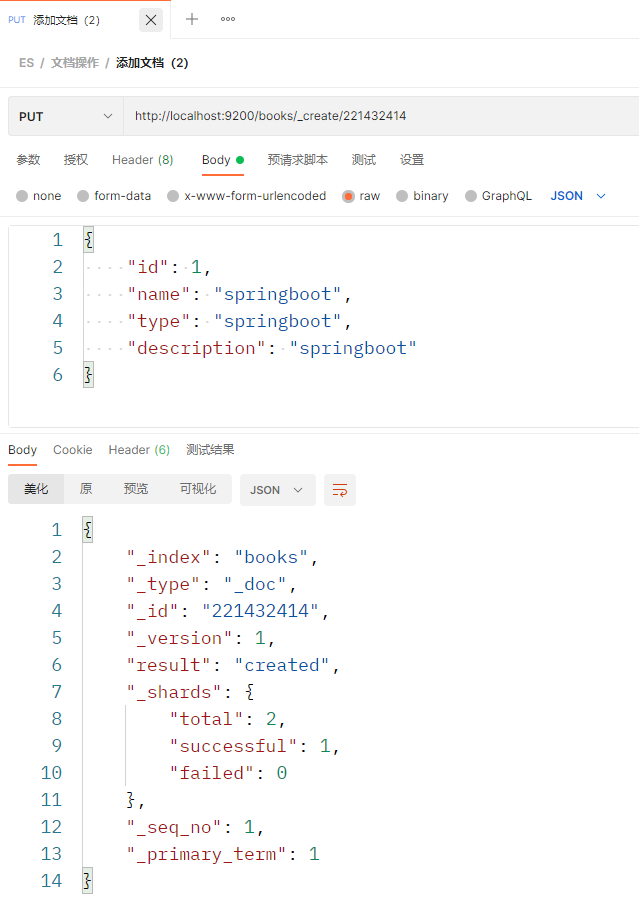
新建文档
有3种请求方式:
方式1:http://localhost:9200/books/_doc
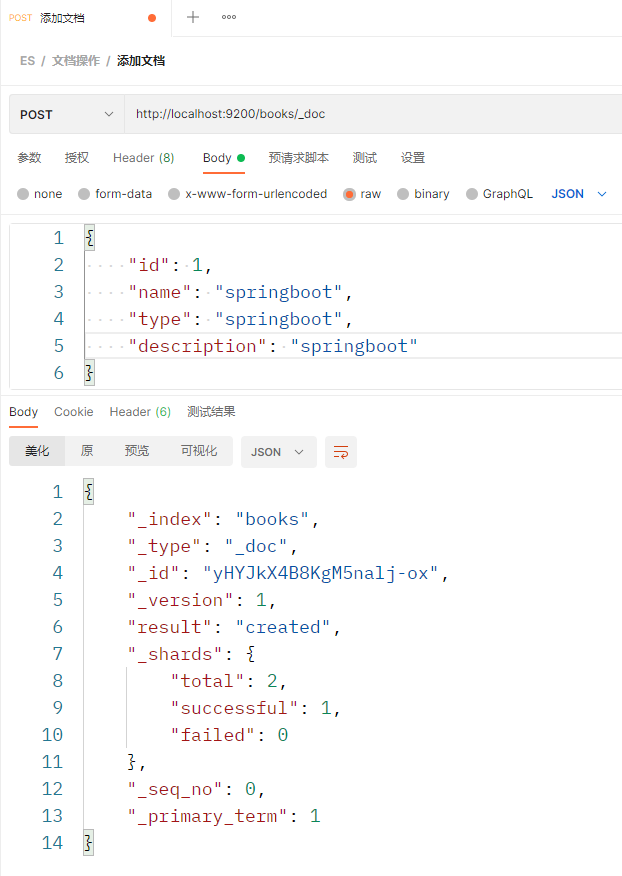
方式2:http://localhost:9200/books/_doc/221432414,其中221432414是文档中的_id属性,如果不指定,则随机生成
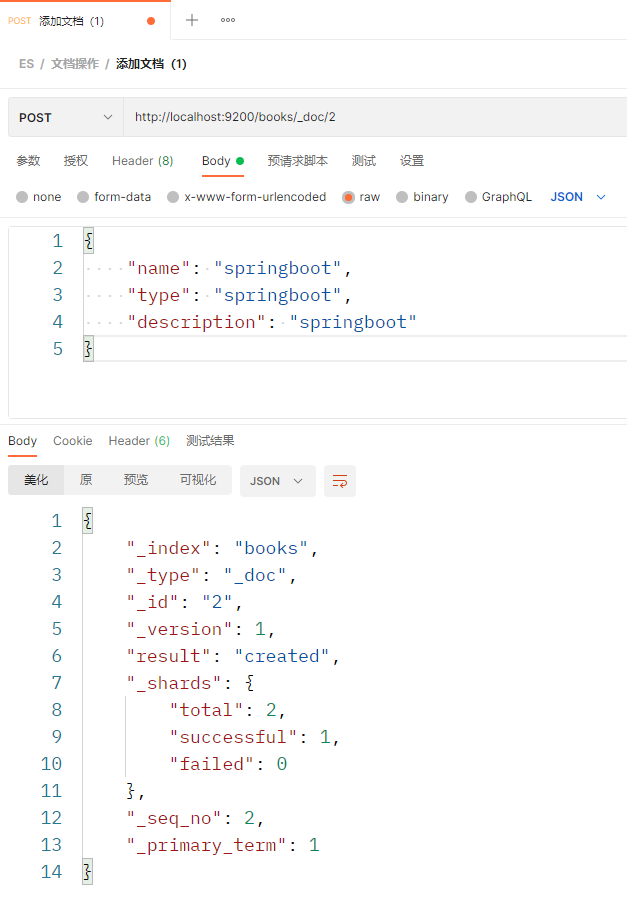
方式3:http://localhost:9200/books/_create/221432414,其中221432414是文档中的_id属性,这里不指定会报错
注:如果在新建的过程中出现[TOO_MANY_REQUESTS/12/disk usage exceeded flood-stage watermark, index has read-only-allow-delete block]的问题,可以发送下面的请求解决
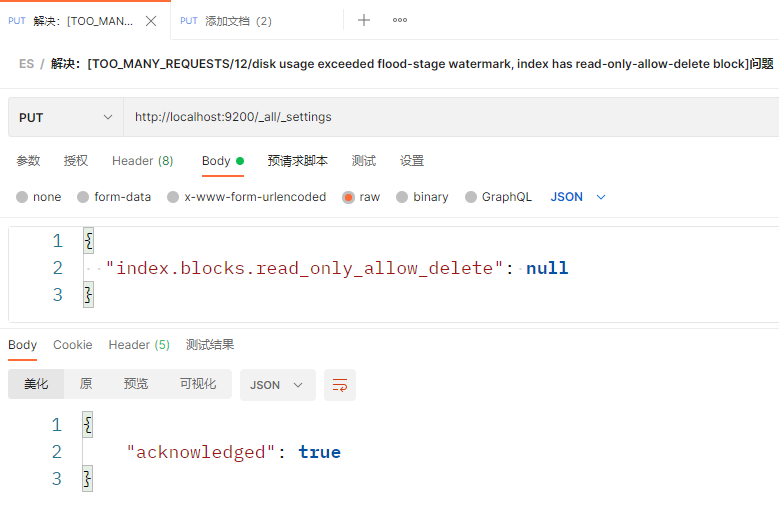
如果上面的方法也不能解决,检查一下自己的es安装目录所在磁盘的可用空间是否太小,默认必须大于5%才可以,比如磁盘空间500G, 需要至少25G的可用空间才可以。后来清了磁盘大于5%也不行,后来用这个方法解决了:Elasticsearch flood stage disk watermark exceeded
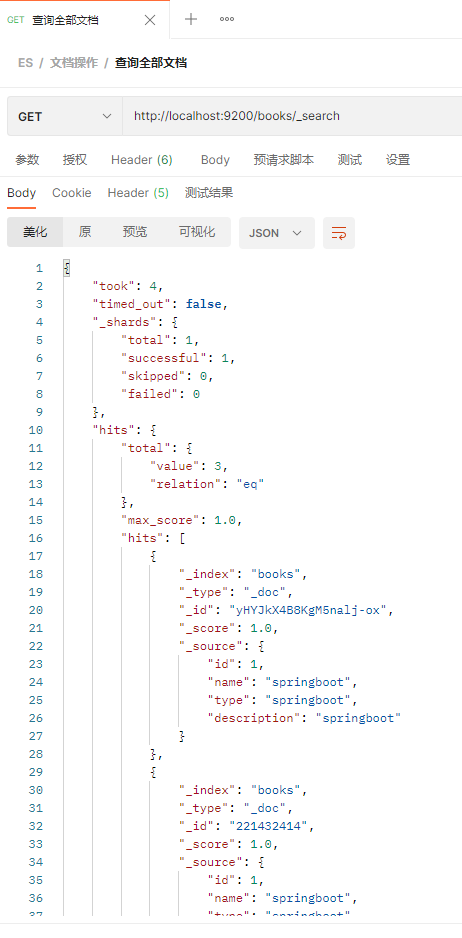
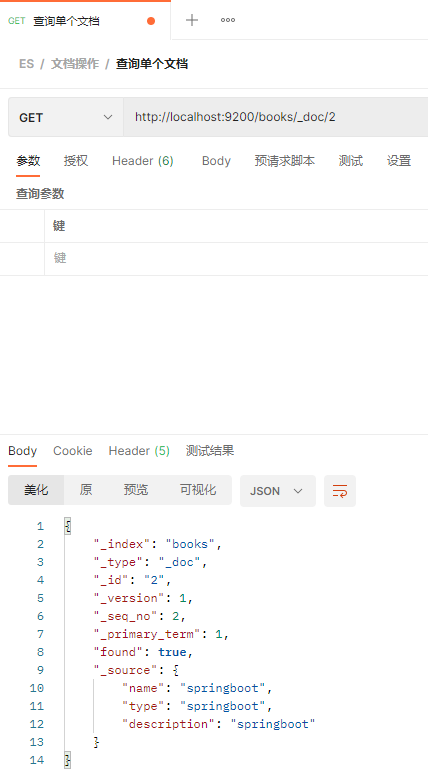
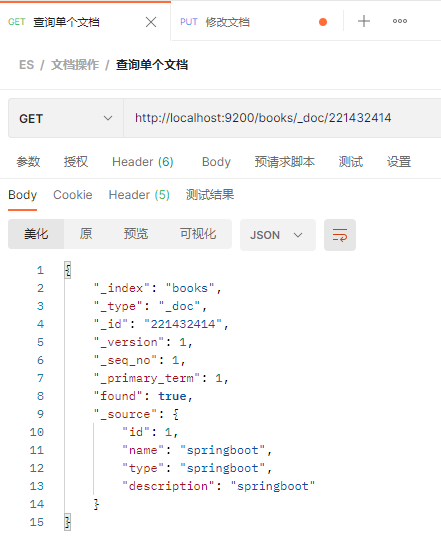
查询文档
按条件查询
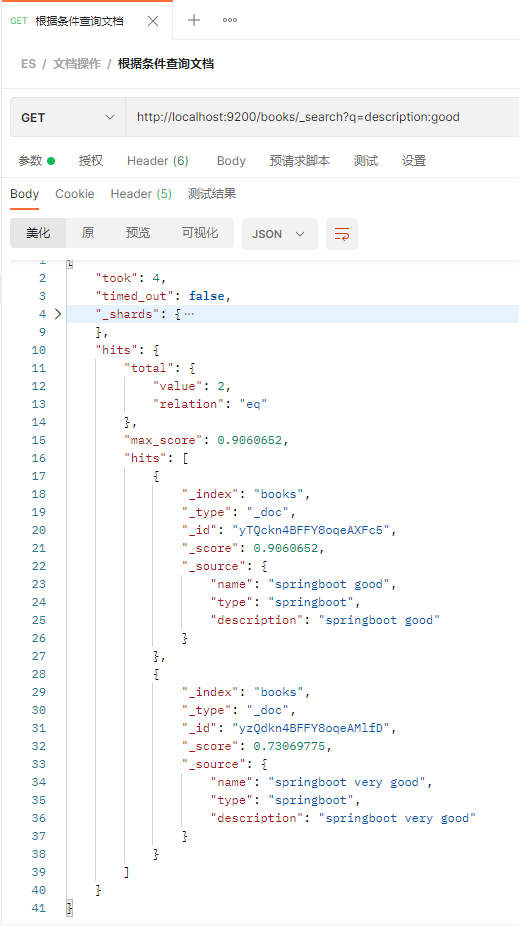
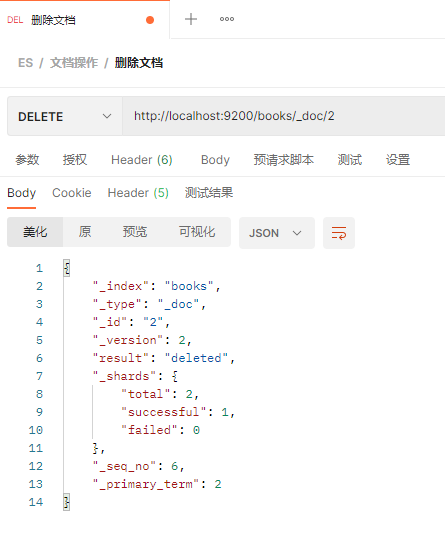
删除文档
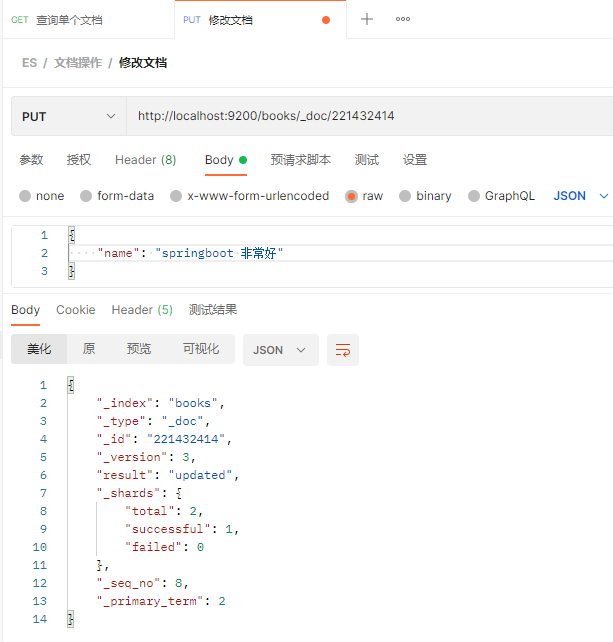
修改文档
将_id为221432414的文档的name修改的值修改为springboot 非常好
先查询一下
发起请求执行修改操作,这里请求体里面只填写要修改的属性
再查询一下
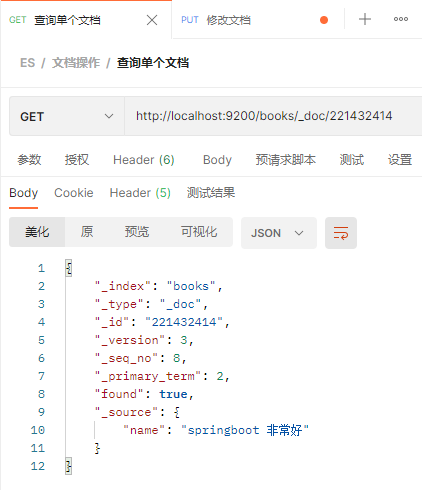
发现修改后的文档,另外两个没有修改的属性没有了,这不是期望的效果,这种请求的修改方式是全覆盖方式的修改。
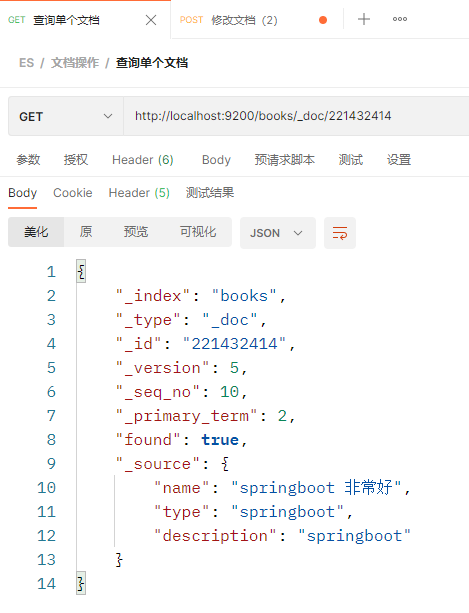
如果要想只修改文档中name属性的值,需要使用新的请求方式(操作之前先将_id为221432414的文档数据恢复一下)
注意:这里发送的是POST请求,而上面的全量修改发送的是PUT请求

修改之后再查询一下
P104 实用开发篇-101-SpringBoot整合ES客户端操作
参考整合h2、redis、mongodb的方式,整合es的时候应该先在pom.xml中加入spring整合es的依赖,spring-boot-starter-data-elasticsearch,然后再去application.yml中编写es的配置,最后再去测试类里面注入es的template对象,进行相关操作。可是需要注意的是,springboot整合es有两套整合方案,一个是整合低级别的es客户端,另一个是整合高级别的es客户端。而开头所说的是springboot整合低级别的方式,这里不采用这种方式。直接整合高级别的es客户端,分为以下几个步骤:
在pom.xml中加入es的依赖,由于测试的过程中还要用到对象转json字符串,所以这里把json解析的依赖也一同加上
<dependency>
    <groupId>org.elasticsearch.client</groupId>
    <artifactId>elasticsearch-rest-high-level-client</artifactId>
</dependency>
<dependency>
    <groupId>com.fasterxml.jackson.core</groupId>
    <artifactId>jackson-databind</artifactId>
</dependency>
整合高级别的es客户端,意味着springboot没有提供默认的配置,所以就不能在application.yml中配置有关访问es客户端的url等参数了,这里直接编写测试类,采用硬编码的方式指定这些参数。
@SpringBootTest
class ElasticsearchApplicationTests {
//    @Autowired
//    private ElasticsearchRestTemplate esTemplate;
    @Autowired
    private BookMapper bookMapper;
    private RestHighLevelClient client;
    // json转换工具
    private static ObjectMapper objectMapper;

    @Test
    public void testConnect() throws IOException {
        HttpHost host = HttpHost.create("http://localhost:9200");
        RestClientBuilder builder = RestClient.builder(host);
        client = new RestHighLevelClient(builder);

        client.close();
    }

    @Test
    // 创建索引
    public void testCreateIndex() throws IOException {
        CreateIndexRequest request = new CreateIndexRequest("books");
        client.indices().create(request, RequestOptions.DEFAULT);
    }

    @Test
    // 使用IK分词器创建索引
    public void testCreateIndexByIK() throws IOException {
        CreateIndexRequest request = new CreateIndexRequest("books");
        // 设置请求参数
        String jsonParam = "{\n" +
                "    \"mappings\": {\n" +
                "        \"properties\": {\n" +
                "            \"id\": {\n" +
                "                \"type\": \"keyword\"\n" +
                "            },\n" +
                "            \"name\": {\n" +
                "                \"type\": \"text\",\n" +
                "                \"analyzer\": \"ik_max_word\",\n" +
                "                \"copy_to\": \"all\"\n" +
                "            },\n" +
                "            \"type\": {\n" +
                "                \"type\": \"keyword\"\n" +
                "            },\n" +
                "            \"description\": {\n" +
                "                \"type\": \"text\",\n" +
                "                \"analyzer\": \"ik_max_word\",\n" +
                "                \"copy_to\": \"all\"\n" +
                "            },\n" +
                "            \"all\": {\n" +
                "                \"type\": \"text\",\n" +
                "                \"analyzer\": \"ik_max_word\"\n" +
                "            }\n" +
                "        }\n" +
                "    }\n" +
                "}";
        request.source(jsonParam, XContentType.JSON);
        client.indices().create(request, RequestOptions.DEFAULT);
    }

    @Test
    public void testCreateDoc() throws Exception {
        Book book = bookMapper.selectById(1);

        IndexRequest request = new IndexRequest("books").id(book.getId() + "");
        String jsonParams = objectMapper.writeValueAsString(book);
        request.source(jsonParams, XContentType.JSON);
        client.index(request, RequestOptions.DEFAULT);
    }

    @Test
    // 将mysql数据库tbl_book表中的数据都存到es中
    public void testCreateDocAllFromMySQL() throws Exception {
        List<Book> books = bookMapper.selectList(null);
        // 批处理请求,相当于一个request容器,可以把单个请求加进来
        BulkRequest requests = new BulkRequest();
        for (Book book : books) {
            IndexRequest request = new IndexRequest("books").id(book.getId() + "");
            String jsonParams = objectMapper.writeValueAsString(book);
            request.source(jsonParams, XContentType.JSON);
            requests.add(request);
        }
        client.bulk(requests, RequestOptions.DEFAULT);
    }

    @Test
    // 按ID查询
    public void testGet() throws IOException {
        GetRequest request = new GetRequest("books", "1");
        GetResponse response = client.get(request, RequestOptions.DEFAULT);
        System.out.println("book:" + response.getSourceAsString());
    }

    @Test
    public void testSearch() throws IOException {
        SearchRequest request = new SearchRequest("books");

        SearchSourceBuilder builder = new SearchSourceBuilder();
        builder.query(QueryBuilders.termQuery("all", "spring"));
        request.source(builder);

        SearchResponse response = client.search(request, RequestOptions.DEFAULT);
        SearchHits hits = response.getHits();
        for (SearchHit hit : hits) {
            System.out.println(hit.getSourceAsString());
        }
    }

    @BeforeEach
    void setUp() {
        objectMapper = new ObjectMapper();
        HttpHost host = HttpHost.create("http://localhost:9200");
        RestClientBuilder builder = RestClient.builder(host);
        client = new RestHighLevelClient(builder);
    }

    @AfterEach
    void tearDown() throws IOException {
        client.close();
    }
}
先自己用java的HashMap模拟一个缓存
BookController.java
@GetMapping("{id}")
// 模拟缓存
public R getById(@PathVariable Integer id) {
    return new R(true, bookService.getById(id));
}
BookServiceImpl.java
@Override
// 模拟缓存
private HashMap<Serializable, Book> cache = new HashMap<>();

public Book getById(Serializable id) {
    // 如果当前缓存中没有本次要查询的数据,则进行查询,否则直接从缓存中获取数据返回
    Book book = cache.get(id);
    if (book == null) {
        book = super.getById(id);
        cache.put(id, book);
    }
    return book;
}
使用spring中自带的缓存技术
在pom.xml中添加如下依赖
<!--cache-->
<dependency>
    <groupId>org.springframework.boot</groupId>
    <artifactId>spring-boot-starter-cache</artifactId>
</dependency>
在springboot启动类上加@EnableCaching注解
在业务层要使用缓存的方法上加上@Cacheable(value = "cacheSpace", key = "#id")注解,如下所示
@Cacheable(value = "cacheSpace", key = "#id")
public Book getById(Serializable id) {
    System.out.println("id = " + id);
    return super.getById(id);
}
其中value表示缓存空间,key=“#id”,表示将方法参数id的值作为缓存中的一个key。
手机验证码案例基础代码准备
存储手机号和验证码的实体类SMSCode.java
@Data
public class SMSCode {
    private String phone;
    private String code;
}
生成验证码的工具类CodeUtils.java
@Component
public class CodeUtils {
    private final String padding = "000000";
    // 生成验证码(位数少于6位左边填充0,填充方法1)
    public String generateCode(String phone) {
        int hash = phone.hashCode();
        int encryption = 20228888;
        long result = hash ^ encryption;
        long nowTime = System.nanoTime();
        result = (result ^ nowTime) % 1000000;
        String code = result + "";
        // code = phone;
        // padding.substring(code.length())   code.length()
        //                                         6
        //             0                           5
        //             00                          4
        //             000                         3
        //             000                         3
        //             0000                        2
        //             00000                       1
        //             000000                      0
        code = padding.substring(code.length()) + code;
        // System.out.println(code);
        return code;
    }

    private final String[] patch = {"000000", "00000", "0000", "000", "00", "0", ""};
    // 生成验证码(位数少于6位左边填充0,填充方法2)
    public String generateCode1(String phone) {
        int hash = phone.hashCode();
        int encryption = 20228888;
        long result = hash ^ encryption;
        long nowTime = System.nanoTime();
        result = (result ^ nowTime) % 1000000;
        String code = result + "";
        // code = phone;
        // patch[code.length]    code.length()
        //   000000                    0
        //   00000                     1
        //   0000                      2
        //   000                       3
        //   00                        4
        //   0                         5
        //                             6
        code = patch[code.length()] + code;
        // System.out.println(code);
        return code;
    }

    // 根据手机号从缓存中获取验证码,缓存中有的话返回缓存中的值,没有的话就返回null
    @Cacheable(value = "smsCode", key = "#phone")
    public String getCodeByPhoneFromCache(String phone) {
        return null;
    }
}
业务层接口SMSCodeService.java
public interface SMSCodeService {
    String sendCodeToSMS(String phone);

    boolean checkCode(SMSCode smsCode);
}
业务层接口实现类SMSCodeServiceImpl.java
@Service
public class SMSCodeServiceImpl implements SMSCodeService {
    @Autowired
    private CodeUtils codeUtils;

    @Override
    public String sendCodeToSMS(String phone) {
        return codeUtils.generateCode(phone);
    }

    @Override
    public boolean checkCode(SMSCode smsCode) {
        return false;
    }
}
加入spring默认的缓存功能
在pom.xml中添加缓存依赖
<!--cache-->
<dependency>
    <groupId>org.springframework.boot</groupId>
    <artifactId>spring-boot-starter-cache</artifactId>
</dependency>
在SMSCodeServiceImpl的sendCodeToSMS()方法上添加@CachePut(value = "smsCode", key = "#phone"),如下所示
@Override
// @Cacheable(value = "smsCode", key = "#phone")
// 这里@Cacheable注解不适用,因为@Cacheable注解的功能是:如果缓存中没有值就去执行一次方法,然后将值存到缓存中,
// 如果有值就直接从缓存中取值并返回,并不会执行方法,因而缓存中值不会发生改变。
// 而用户点击界面发送一次验证码就调用了一次该方法,需要获取到新的验证码。
// 使用新的缓存注解@CachePut可以解决这个问题,每次调用都会执行方法,向缓存中存新的值并返回
@CachePut(value = "smsCode", key = "#phone")
public String sendCodeToSMS(String phone) {
    return codeUtils.generateCode(phone);
}
编写checkCode()方法:校验验证码是否正确
错误的写法:
@Override
public boolean checkCode(SMSCode smsCode) {
    // 取出缓存中的验证码并与传递过来的验证码比对,如果相同,返回true,否则,返回false
    // 用户填写的验证码
    String code = smsCode.getCode();
    // 缓存中存的验证码
    String cacheCode = getCodeByPhoneFromCache(smsCode.getPhone());
    return cacheCode.equals(code);
}

// 根据手机号从缓存中获取验证码,缓存中有的话返回缓存中的值,没有的话就返回null
@Cacheable(value = "cacheSpace", key = "#phone")
public String getCodeByPhoneFromCache(String phone) {
    return null;
}
在getCodeByPhoneFromCache()方法上加了@Cacheable(value = "cacheSpace", key = "#phone"),然后在checkCode()方法中调用getCodeByPhoneFromCache()方法,这种方式看似是正确的,实际上@Cacheable注解不会生效,导致getCodeByPhoneFromCache()的返回值始终是null。这是由于被spring管理的类内的方法互调注解不会被解析。
由此可以想到解决办法,将getCodeByPhoneFromCache()放到另外一个类(这里为了方便起见,直接放到CodeUtils类中),并将这个类交由spring管理(在类上面加@Component注解),然后再用codeUtils.getCodeByPhoneFromCache(smsCode.getPhone())即可正常从缓存中拿到值。代码如下:
@Override
public boolean checkCode(SMSCode smsCode) {
    // 取出缓存中的验证码并与传递过来的验证码比对,如果相同,返回true,否则,返回false
    // 用户填写的验证码
    String code = smsCode.getCode();
    // 缓存中存的验证码
    String cacheCode = codeUtils.getCodeByPhoneFromCache(smsCode.getPhone());
    return cacheCode.equals(code);
}
基于验证码案例的代码和配置,使用ehcache替换spring默认的simple缓存
在pom.xml中加入ehcache的依赖
<!--ehcache-->
<dependency>
    <groupId>net.sf.ehcache</groupId>
    <artifactId>ehcache</artifactId>
</dependency>
在application.yml中加入如下配置
spring:
  cache:
    type: ehcache
    # 如果配置文件改名了,可以打开下面的配置指定配置文件路径
    # ehcache:
      # config: ehcache-xxx.xml
在resources目录下新建一个ehcache.xml配置文件,内容如下:
<?xml version="1.0" encoding="UTF-8"?>
<ehcache xmlns:xsi="http://www.w3.org/2001/XMLSchema-instance"
         xsi:noNamespaceSchemaLocation="https://www.ehcache.org/ehcache.xsd"
         updateCheck="false">
    <diskStore path="D:\ehcache" />

    <!--默认缓存策略 -->
    <!-- external:是否永久存在,设置为true则不会被清除,此时与timeout冲突,通常设置为false-->
    <!-- diskPersistent:是否启用磁盘持久化-->
    <!-- maxElementsInMemory:最大缓存数量-->
    <!-- overflowToDisk:超过最大缓存数量是否持久化到磁盘-->
    <!-- timeToIdleSeconds:最大不活动间隔,设置过长缓存容易溢出,设置过短无效果,可用于记录时效性数据,例如验证码-->
    <!-- timeToLiveSeconds:最大存活时间-->
    <!-- memoryStoreEvictionPolicy:缓存清除策略-->
    <defaultCache
        eternal="false"
        diskPersistent="false"
        maxElementsInMemory="1000"
        overflowToDisk="false"
        timeToIdleSeconds="60"
        timeToLiveSeconds="60"
        memoryStoreEvictionPolicy="LRU" />

    <cache
        name="smsCode"
        eternal="false"
        diskPersistent="false"
        maxElementsInMemory="1000"
        overflowToDisk="false"
        timeToIdleSeconds="10"
        timeToLiveSeconds="10"
        memoryStoreEvictionPolicy="LRU" />

</ehcache>
直接启动项目,并且验证码获取和验证的过程不报错,说明缓存替换成成功。
基于验证码案例的代码和配置,使用redis替换spring默认的simple缓存
在pom.xml中加入redis的依赖
<!--redis-->
<dependency>
    <groupId>org.springframework.boot</groupId>
    <artifactId>spring-boot-starter-data-redis</artifactId>
</dependency>
在application.yml中加入如下配置
spring:
  cache:
    type: redis
    redis:
      # 是否使用缓存命名空间作为前缀,如:smsCode::18866668888,默认为true
      use-key-prefix: true
      cache-null-values: true # 是否缓存空值
      key-prefix: aa # use-key-prefix为false的时候该项不生效
      time-to-live: 10s # 缓存失效时间
  redis:
    host: 192.168.0.110
    port: 6379
    password: 123456
直接启动项目,并且验证码获取和验证的过程不报错,说明缓存替换成成功。
安装步骤以及下载地址:https://www.runoob.com/memcached/window-install-memcached.html
P115 实用开发篇-111-变更缓存供应商memcached
基于验证码案例的代码和配置,使用memcached替换spring默认的simple缓存,memcached最新的客户端技术是xmemcached
在pom.xml中加入xmemcached的依赖
<!-- xmemcached -->
<dependency>
    <groupId>com.googlecode.xmemcached</groupId>
    <artifactId>xmemcached</artifactId>
    <version>2.4.7</version>
</dependency>
由于springboot并未收录memcached,所以只能通过硬编码的方式完成相关配置
XMemcachedConfig.java
@Component
public class XMemcachedConfig {
    @Bean
    public MemcachedClient getMemcachedClient() throws IOException {
        MemcachedClientBuilder memcachedClientBuilder = new XMemcachedClientBuilder("192.168.0.102:11211");
        MemcachedClient memcachedClient = memcachedClientBuilder.build();
        return memcachedClient;
    }
}
SMSCodeServiceImpl.java
@Service
public class SMSCodeServiceImpl implements SMSCodeService {
    @Autowired
    private CodeUtils codeUtils;

    @Autowired
    private MemcachedClient memcachedClient;

    @Override
    public String sendCodeToSMS(String phone) {
        String code = codeUtils.generateCode(phone);
        try {
            memcachedClient.set(phone, 10, code);
        } catch (Exception e) {
            e.printStackTrace();
        }
        return code;
    }

    @Override
    public boolean checkCode(SMSCode smsCode) {
        String code = null;
        try {
            code = memcachedClient.get(smsCode.getPhone()).toString();
        } catch (Exception e) {
            e.printStackTrace();
        }
        return smsCode.getCode().equals(code);
    }
}
直接启动项目,并且验证码获取和验证的过程不报错,说明缓存替换成成功。
到这里整合memcached算是成功了,可是配置都写死在代码中了,不太方便,这里可以结合前面的Configuration属性绑定的内容将配置抽取到application.yml文件中。
先定义一个实体类XMemcachedProperties,保存XMemcached的配置属性,并加上@Component和@ConfigurationProperties(prefix = "memcached")注解
@Component
@ConfigurationProperties(prefix = "memcached")
@Data
public class XMemcachedProperties {
    private String addressList;
    private int poolSize;
    private long opTimeout;
}
在application.yml中加入如下配置:
memcached:
  address-list: 192.168.0.102:11211
  poolSize: 10
  opTimeout: 3000
在XMemcachedConfig类中使用XMemcachedProperties类中封装的配置属性
@Component
public class XMemcachedConfig {
    @Autowired
    private XMemcachedProperties xMemcachedProperties;

    @Bean
    public MemcachedClient getMemcachedClient() throws IOException {
        MemcachedClientBuilder memcachedClientBuilder = new XMemcachedClientBuilder(xMemcachedProperties.getAddressList());
        memcachedClientBuilder.setConnectionPoolSize(xMemcachedProperties.getPoolSize());
        memcachedClientBuilder.setOpTimeout(xMemcachedProperties.getOpTimeout());
        MemcachedClient memcachedClient = memcachedClientBuilder.build();
        return memcachedClient;
    }
}
jetcache是阿里巴巴公司的缓存技术,可以同时支持本地和远程两种缓存,所谓本地就是使用HashMap类似的技术做的缓存,远程就是可以连接到redis。
基于验证码案例的代码和配置,使用jetcache替换spring默认的simple缓存
springboot整合jetcache的时候使用2.6.3版本会报循环依赖的错误,我在网上搜索了一个解决循环依赖的方法,链接地址:https://blog.csdn.net/chengxuyuanjava123/article/details/122459521较复杂,仅供参考。教程的弹幕中有个小伙伴讲
springboot 2.5.4版本和jetcache整合不会出现这个问题,我就尝试了一下,居然真的可以,所以我就暂时使用了这个简单的方法。使用了springboot 2.5.4,有更好的办法解决这个问题的小伙伴,可以评论区告知,谢谢。
首先用jetcache的远程方案,也就是底层用redis作为真正的缓存工具。
在pom.xml中加入jetcache的依赖
<!--jetcache-->
<dependency>
    <groupId>com.alicp.jetcache</groupId>
    <artifactId>jetcache-starter-redis</artifactId>
    <version>2.6.2</version>
</dependency>
在application.yml中加入如下配置
# 配置jetcache
jetcache:
  areaInCacheName: false # 是否把area加入的缓存的key中,默认为true
  # 远程方案
  remote:
    default:
      type: redis
      host: 192.168.0.110
      port: 6379
      password: 123456
      # keyConvertor: fastjson
      # valueEncoder: java
      # valueDecoder: java
      poolConfig:
        # minIdle: 5
        # maxIdle: 20
        maxTotal: 50
      # 如果自定义命名空间,需要在@CreateCache注解中添加area=“sms”,不写默认为default
#    sms:
#      type: redis
#        host: localhost
#        port: 6379
#        password: 123456
#        poolConfig:
#          maxTotal: 50
在springboot启动类上加@EnableCreateCacheAnnotation注解
在业务层类SMSCodeServiceImpl中使用缓存
@Service
public class SMSCodeServiceImpl implements SMSCodeService {
    @Autowired
    private CodeUtils codeUtils;

    // 1、定义一个缓存
    @CreateCache(name = "jetCache_", expire = 10, timeUnit = TimeUnit.SECONDS)
    private Cache<String, String> jetCache;

    @Override
    public String sendCodeToSMS(String phone) {
        String code = codeUtils.generateCode(phone);
        // 2、向缓存中存值
        jetCache.put(phone, code);
        return code;
    }

    @Override
    public boolean checkCode(SMSCode smsCode) {
        if (smsCode == null) {
            return false;
        }
        // 取出缓存中的验证码并与传递过来的验证码比对,如果相同,返回true,否则,返回false
        // 用户填写的验证码
        String code = smsCode.getCode();
        // 3、获取缓存中存的验证码
        String cacheCode = jetCache.get(smsCode.getPhone());
        return code.equals(cacheCode);
    }
}
直接启动项目,并且验证码获取和验证的过程不报错,说明缓存替换成成功。
再使用jetcache的本地方案
修改application.yml中jetcache的配置
# 配置jetcache
jetcache:
  areaInCacheName: false # 是否把area加入的缓存的key中,默认为true
  # 本地方案
  local:
    default:
      type: linkedhashmap
      keyConvertor: fastjson # 将对象转换成key使用的技术,这里转成json
      # limit: 100
  # 远程方案
  remote:
    default:
      type: redis
      host: 192.168.0.110
      port: 6379
      password: 123456
      # keyConvertor: fastjson
      # valueEncoder: java
      # valueDecoder: java
      poolConfig:
        # minIdle: 5
        # maxIdle: 20
        maxTotal: 50
      # 如果自定义命名空间,需要在@CreateCache注解中添加area=“sms”,不写默认为default
#    sms:
#      type: redis
#        host: localhost
#        port: 6379
#        password: 123456
#        poolConfig:
#          maxTotal: 50
将SMSCodeServiceImpl.java中的@CreateCache注解中指定cacheType = CacheType.LOCAL
@Service
public class SMSCodeServiceImpl implements SMSCodeService {
    @Autowired
    private CodeUtils codeUtils;

    // 1、定义一个缓存
    // remote方案
    // @CreateCache(area="sms", name = "jetCache_", expire = 10, timeUnit = TimeUnit.SECONDS)
    // 本地方案(查看源码知晓,如果不指定cacheType = CacheType.LOCAL,默认为远程。)
    @CreateCache(name = "jetCache_", expire = 10, timeUnit = TimeUnit.SECONDS, cacheType = CacheType.LOCAL)
    // 还可以指定远程和本地两种缓存方案共存
    // @CreateCache(name = "jetCache_", expire = 10, timeUnit = TimeUnit.SECONDS, cacheType = CacheType.BOTH)
    private Cache<String, String> jetCache;

    @Override
    public String sendCodeToSMS(String phone) {
        String code = codeUtils.generateCode(phone);
        // 2、向缓存中存值
        jetCache.put(phone, code);
        return code;
    }

    @Override
    public boolean checkCode(SMSCode smsCode) {
        if (smsCode == null) {
            return false;
        }
        // 取出缓存中的验证码并与传递过来的验证码比对,如果相同,返回true,否则,返回false
        // 用户填写的验证码
        String code = smsCode.getCode();
        // 3、获取缓存中存的验证码
        String cacheCode = jetCache.get(smsCode.getPhone());
        return code.equals(cacheCode);
    }
}
如果远程和本地两种方案都启用,只需要将SMSCodeServiceImpl.java中的@CreateCache注解中指定cacheType = CacheType.BOTH即可。
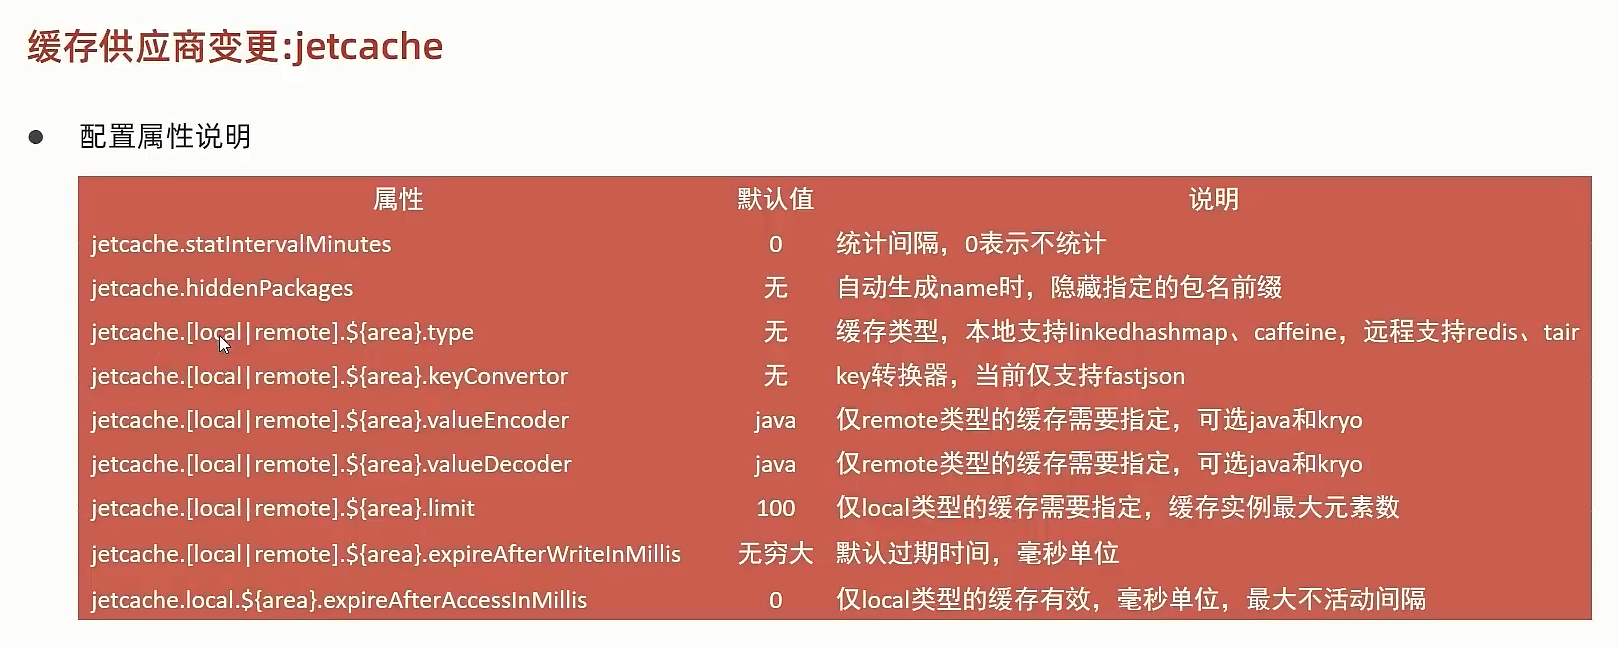
另附:jetcache详细配置属性
jetcache也可以和spring默认的simple-cache一样在方法上加上缓存注解。这里为了体现对缓存的增删改查更多的操作,基于springboot_16_01_02_cache_Book_simple案例的代码进行修改。
在pom.xml中加入jetcache的依赖
<!--jetcache-->
<dependency>
    <groupId>com.alicp.jetcache</groupId>
    <artifactId>jetcache-starter-redis</artifactId>
    <version>2.6.2</version>
</dependency>
在application.yml中加入如下配置
# 配置jetcache
jetcache:
  statIntervalMinutes: 1 # 按照统计间隔打印输出缓存命中率,0表示不统计,默认为0
  areaInCacheName: false # 是否把area加入的缓存的key中,默认为true
  # 远程方案
  remote:
    default:
      type: redis
      host: 192.168.0.110
      port: 6379
      password: 123456
      keyConvertor: fastjson
      valueEncoder: java
      valueDecoder: java
      poolConfig:
        # minIdle: 5
        # maxIdle: 20
        maxTotal: 50
      # 如果自定义命名空间,需要在@CreateCache注解中添加area=“sms”,不写默认为default
#    sms:
#      type: redis
#        host: localhost
#        port: 6379
#        password: 123456
#        poolConfig:
#          maxTotal: 50
在springboot的启动类上加@EnableMethodCache(basePackages = "top.jacktgq"),其中basePackages=“top.jacktgq"中的包名需要覆盖到用到缓存的业务类,另外@EnableMethodCache注解需要依赖@EnableCreateCacheAnnotation注解。如下所示。
@SpringBootApplication
// jetcache启用缓存的主开关
@EnableCreateCacheAnnotation
// 开启方法缓存注解,
@EnableMethodCache(basePackages = "top.jacktgq")
public class CacheApplication {
    public static void main(String[] args) {
        SpringApplication.run(CacheApplication.class, args);
    }
}
在BookServiceImpl类中添加方法缓存注解
这里需要参考springboot_16_01_03_cache_smscode,在CodeUtils.java的getCodeByPhoneFromCache()方法上添加@Cached(name = "smsCode", key = "#", expire = 10),其中name和之前的spring自带缓存的@Cacheable注解中的value一样都表示缓存的命名空间,key和@Cacheable中的key一样,expire表示缓存失效时间,默认单位为秒,不指定就是永不失效。如下所示。
如果在修改操作后想更新缓存,可以在修改方法上加上@CacheUpdate(name = "book_", key = "#book.id", value = "#book")注解;
如果想在删除操作后删除对应缓存,可以在删除方法上加上@CacheInvalidate(name = "book_", key = "#id")注解。
如果数据库由多个业务系统共用,一个系统对数据库的修改不能同步到另一个系统的缓存,这时就需要使用的到@CacheRefresh(refresh = 5),其中refresh=5,表示每隔5秒钟刷新一次缓存。
具体代码如下:
@Override
@Cached(name = "book_", key="#id", expire = 3600)
@CacheRefresh(refresh = 5)
public Book getById(Serializable id) {
    return super.getById(id);
}

@Override
@CacheUpdate(name = "book_", key = "#book.id", value = "#book")
public boolean updateById(Book book) {
    return super.updateById(book);
}

@Override
@CacheInvalidate(name = "book_", key = "#id")
public boolean removeById(Serializable id) {
    return super.removeById(id);
}

@Override
public IPage<Book> getPage(int currentPage, int pageSize) {
    IPage<Book> page = new Page<>(currentPage, pageSize);
    bookMapper.selectPage(page, null);
    return page;
}
注:如果这里被
@Cache注解修饰的方法的返回值为普通的实体类,那么这个实体类需要实现Serializable接口,并且在application.yml配置文件的jetcache下配置keyConvertor: fastjson,valueEncoder: java,valueDecoder: java,否则会报错。
Book实体类要实现
Serializable接口@Component @Data public class Book implements Serializable { private Integer id; private String name; private String type; private String description; }在
application.yml配置文件的jetcache下配置valueEncoder: java,valueDecoder: java# 配置jetcache jetcache: statIntervalMinutes: 1 # 按照统计间隔打印输出缓存命中率,0表示不统计,默认为0 areaInCacheName: false # 是否把area加入的缓存的key中,默认为true # 本地方案 local: default: type: linkedhashmap keyConvertor: fastjson # 将对象转换成key使用的技术,这里转成json # limit: 100 # 远程方案 remote: default: type: redis host: 192.168.0.110 port: 6379 password: 123456 keyConvertor: fastjson valueEncoder: java valueDecoder: java poolConfig: # minIdle: 5 # maxIdle: 20 maxTotal: 50
j2cache是一个缓存整合框架,可以提供缓存的整合方案,使个各种缓存搭配使用,自身不提供缓存功能。
这里基于验证码案例的代码和配置,使用j2cache整合ehcache和redis替换spring原有的simple缓存。
在pom.xml中加入j2cache的相关依赖
<!--j2cache-->
<dependency>
    <groupId>net.oschina.j2cache</groupId>
    <artifactId>j2cache-core</artifactId>
    <version>2.8.4-release</version>
</dependency>
<dependency>
    <groupId>net.oschina.j2cache</groupId>
    <artifactId>j2cache-spring-boot2-starter</artifactId>
    <version>2.8.0-release</version>
</dependency>
<!--j2cache默认帮忙引入了redis的依赖-->
<!--ehcache-->
<dependency>
    <groupId>net.sf.ehcache</groupId>
    <artifactId>ehcache</artifactId>
</dependency>
在resources目录下创建配置文件
ehcache.xml
<?xml version="1.0" encoding="UTF-8"?>
<ehcache xmlns:xsi="http://www.w3.org/2001/XMLSchema-instance"
         xsi:noNamespaceSchemaLocation="https://www.ehcache.org/ehcache.xsd"
         updateCheck="false">
    <diskStore path="D:\ehcache" />

    <!--默认缓存策略 -->
    <!-- external:是否永久存在,设置为true则不会被清除,此时与timeout冲突,通常设置为false-->
    <!-- diskPersistent:是否启用磁盘持久化-->
    <!-- maxElementsInMemory:最大缓存数量-->
    <!-- overflowToDisk:超过最大缓存数量是否持久化到磁盘-->
    <!-- timeToIdleSeconds:最大不活动间隔,设置过长缓存容易溢出,设置过短无效果,可用于记录时效性数据,例如验证码-->
    <!-- timeToLiveSeconds:最大存活时间-->
    <!-- memoryStoreEvictionPolicy:缓存清除策略-->
    <defaultCache
        eternal="false"
        diskPersistent="false"
        maxElementsInMemory="1000"
        overflowToDisk="false"
        timeToIdleSeconds="60"
        timeToLiveSeconds="60"
        memoryStoreEvictionPolicy="LRU" />

    <cache
        name="smsCode"
        eternal="false"
        diskPersistent="false"
        maxElementsInMemory="1000"
        overflowToDisk="false"
        timeToIdleSeconds="10"
        timeToLiveSeconds="10"
        memoryStoreEvictionPolicy="LRU" />

</ehcache>
j2cache.properties
# 一级缓存
j2cache.L1.provider_class = ehcache
ehcache.configXml = ehcache.xml
# 二级缓存
j2cache.L2.provider_class = net.oschina.j2cache.cache.support.redis.SpringRedisProvider
j2cache.L2.config_section = redis
redis.hosts = 192.168.0.110:6379
redis.timeout = 2000
redis.password = 123456

# 指定模式,可以消除一行警告信息
redis.mode = single

# 一级缓存中的数据如何到达二级缓存
j2cache.broadcast = net.oschina.j2cache.cache.support.redis.SpringRedisPubSubPolicy
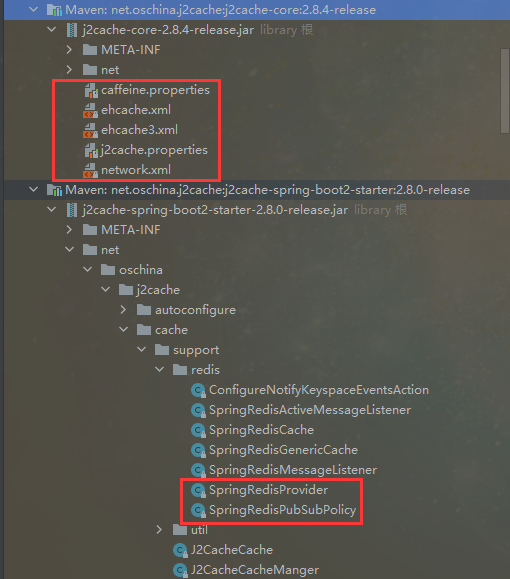
更详细的配置内容可以去j2cache的jar包路径下寻得
在SMSCodeServiceImpl类中编写j2cache相关代码
@Service
public class SMSCodeServiceImpl implements SMSCodeService {
    @Autowired
    private CodeUtils codeUtils;

    @Autowired
    private CacheChannel cacheChannel;

    @Override
    public String sendCodeToSMS(String phone) {
        String code = codeUtils.generateCode(phone);
        cacheChannel.set("sms", phone, code);
        return code;
    }

    @Override
    public boolean checkCode(SMSCode smsCode) {
        if (smsCode == null) {
            return false;
        }
        // 取出缓存中的验证码并与传递过来的验证码比对,如果相同,返回true,否则,返回false
        // 用户填写的验证码
        String code = smsCode.getCode();
        // 缓存中存的验证码
        String cacheCode = cacheChannel.get("sms", smsCode.getPhone()).asString();
        return code.equals(cacheCode);
    }
}
注:如果运行工过程中报如下错误:
Caused by: net.sf.ehcache.CacheException: Another unnamedCacheManager already exists in the same VM. Please provide uniquenames for each CacheManagerxxxxxxxxxx1 1Caused by: net.sf.ehcache.CacheException: Another unnamed CacheManager alreadyCaused by: net.sf.ehcache.CacheException: Another unnamedCacheManager already exists in the same VM. Please provide uniquenames for each CacheManager
检查一下springboot启动类上面有没有多余的缓存注解,如@EnableCaching,这会跟j2cache发生冲突,j2cache不需要在springboot启动类上面加注解,复制项目的时候需要小心。
消除一些警告日志
到此项目是可以正常启动的,功能也正常,但是控制台报了一些警告信息
日志冲突异常
SLF4J: Class path contains multiple SLF4J bindings.
SLF4J: Found binding in [jar:file:/D:/repository/ch/qos/logback/logback-classic/1.2.10/logback-classic-1.2.10.jar!/org/slf4j/impl/StaticLoggerBinder.class]
SLF4J: Found binding in [jar:file:/D:/repository/org/slf4j/slf4j-simple/1.7.33/slf4j-simple-1.7.33.jar!/org/slf4j/impl/StaticLoggerBinder.class]
SLF4J: See http://www.slf4j.org/codes.html#multiple_bindings for an explanation.
SLF4J: Actual binding is of type [ch.qos.logback.classic.util.ContextSelectorStaticBinder]
冲突的意思是slf4j-simple和logback-classic发生了冲突,这里选择保留springboot默认的logback日志,排除slf4j-simple。打开maven面板,选中项目,然后点击显示依赖项按钮,

会弹出一个依赖项拓扑图,在拓扑图中寻找到slf4j-simple的上层包为j2cache-core

去pom.xml中的j2cache-core的依赖中排除slf4j-simple即可
<dependency>
    <groupId>net.oschina.j2cache</groupId>
    <artifactId>j2cache-core</artifactId>
    <version>2.8.4-release</version>
    <exclusions>
        <exclusion>
            <groupId>org.slf4j</groupId>
            <artifactId>slf4j-simple</artifactId>
        </exclusion>
    </exclusions>
</dependency>
再启动项目,就不会再报这个警告了。
在application.yml中对j2cache的其他配置
# 指定命名空间,可以作为key的公共前缀
redis.namespace = j2cache
# 设置是否启用二级缓存,默认为true
j2cache.l2-cache-open = false
P121 实用开发篇-117-springboot整合quartz
springboot整合quartz分为以下几个步骤:
在pom.xml中加入Springboot整合quartz的依赖
<!--quartz-->
<dependency>
    <groupId>org.springframework.boot</groupId>
    <artifactId>spring-boot-starter-quartz</artifactId>
</dependency>
在springboot程序启动类上加@EnableScheduling注解,开启定时任务功能
//开启定时任务功能
@EnableScheduling
编写一个类MyQuartz继承QuartzJobBean,作为Quartz要执行的工作(任务)
public class MyQuartz extends QuartzJobBean {
    @Override
    protected void executeInternal(JobExecutionContext context) throws JobExecutionException {
        System.out.println("Quartz task run...");
    }
}
编写一个QuartzConfig类,配置Quartz具体的执行过程,并加上@Configuration注解
@Configuration
public class QuartzConfig {
    @Bean
    public JobDetail printJobDetail() {
        //绑定具体的工作
        return JobBuilder.newJob(MyQuartz.class).storeDurably().build();
    }

    @Bean
    public Trigger printJobTrigger() {
        CronScheduleBuilder scheduleBuilder = CronScheduleBuilder.cronSchedule("0/5 * * * * ?");
        // 绑定具体的工作明细
        return TriggerBuilder.newTrigger().forJob(printJobDetail()).withSchedule(scheduleBuilder).build();
    }
}
直接启动springboot程序,任务便会自动执行
P122 实用开发篇-118-springboot整合task
使用springboot自带的定时任务
在springboot程序启动类上加@EnableScheduling注解,开启定时任务功能
//开启定时任务功能
@EnableScheduling
编写一个任务类,加上@Component注解,要定时执行的方法上加上@Scheduled(cron = "0/3 * * * * ?"),用cron表达式指定执行的周期
@Component
public class MyTask {
    @Scheduled(cron = "0/3 * * * * ?")
    public void print() {
        System.out.println("spring task run...");
    }
}
直接启动springboot程序,任务便会自动执行
Spring Task还可以在application.yml文件中进行更细致的配置
spring:
  task:
    scheduling:
      # 任务调度的线程池的大小
      pool:
        size: 1
      # 调度线程名称前缀 默认 scheduling-,方便调试时使用
      thread-name-prefix: spring_task_
      shutdown:
        # 线程池关闭时等待所有任务完成
        await-termination: false
        # 调度线程关闭前最大等待时间,确保最后一定关闭
        await-termination-period: 10s
完成代码发邮件案例之前先准备好两个邮箱,这里采用一个QQ邮箱和一个163邮箱,后面用这两个邮箱互相发送消息。
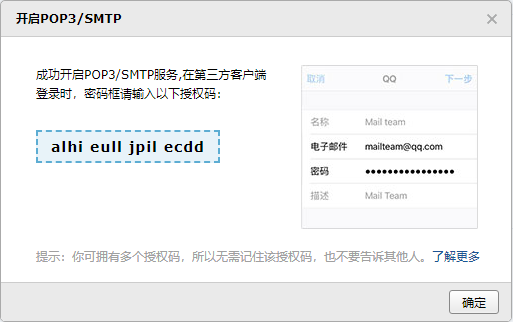
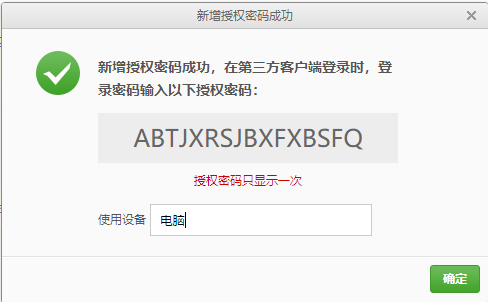
代码发邮件采用的是SMTP协议,收邮件采用的是POP3或者IMAP协议,使用代码发邮件需要在配置文件中填写账号和授权码,授权码需要去邮箱管理后台界面进行设置。
QQ邮箱开启POP3/SMTP服务,获取授权码
进入QQ邮箱主页,找到设置,然后点击账户选项
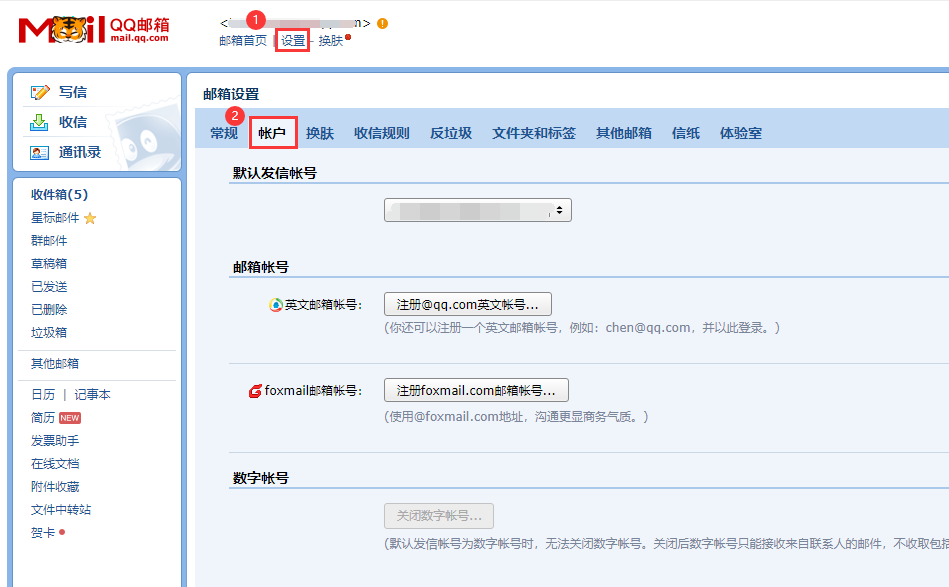
鼠标滚轮往下滑,找到POP3/SMTP服务开启的地方

163邮箱开启POP3/SMTP服务,获取授权码
进入163邮箱主页,点击设置,选择POP3/SMTP/IMAP

点击开启IMAP/SMTP服务

发送短信获取授权码
spring整合mail
在pom.xml中加入spring整合mail的依赖
<!--mail-->
<dependency>
    <groupId>org.springframework.boot</groupId>
    <artifactId>spring-boot-starter-mail</artifactId>
</dependency>
在application.yml中添加邮箱的相关配置
spring:
  mail:
    host: smtp.qq.com # 邮件服务供应商
    username: xxxxxxxx@qq.com # 邮箱账号
    password: xxxxxxxxxxxx # 授权码
业务层接口
public interface MailService {
    // 发送简单消息
    void sendMail();
}
业务层实现类,实现sendMail()方法,使用JavaMailSender类对象进行邮件的发送,这里先发送一个简单的邮件,仅包含发送人、接收人、主题、正文四项,消息需要设置到SimpleMailMessage类对象中。
@Service
public class MailServiceImpl implements MailService {
@Autowired
private JavaMailSender javaMailSender;
// 发送人
private String from = "xxxxxxxx@qq.com";
// 接收人
private String to = "xxxxxxxx@163.com";
// 主题
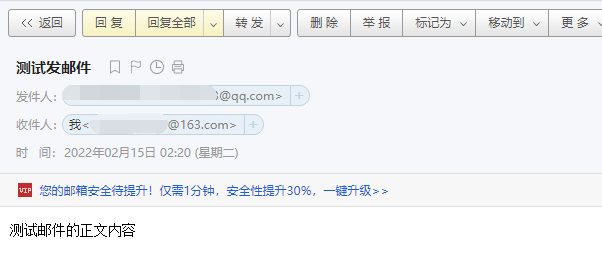
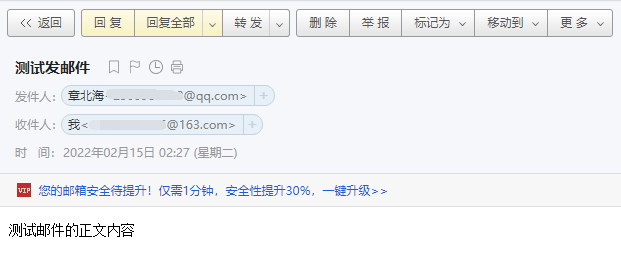
private String subject = "测试发邮件";
// 正文
private String context = "测试邮件的正文内容";
@Override
public void sendMail() {
SimpleMailMessage msg = new SimpleMailMessage();
msg.setFrom(from);
msg.setTo(to);
msg.setSubject(subject);
msg.setText(context);
javaMailSender.send(msg);
}
}
测试类
@SpringBootTest
class MailApplicationTests {
	@Autowired
	private MailService mailService;

	@Test
	void contextLoads() {
		mailService.sendMail();
	}
}
运行测试类,去收件邮箱中查看消息接收到了
如果msg.setFrom(from + "(章北海)"),那么会将收件人的邮箱前加上这个备注名称
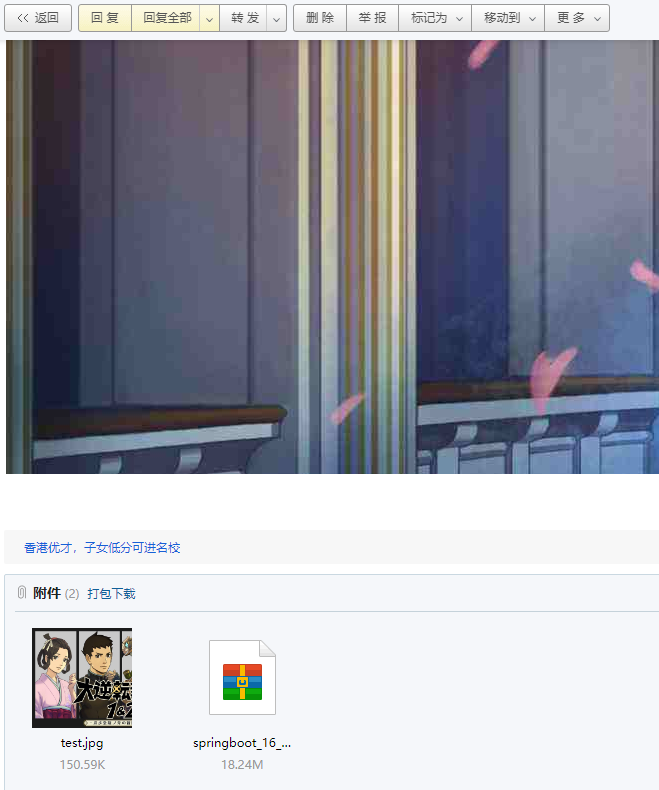
要想在发送邮件的时候可以带上图片或者文件等附件,需要使用MimeMessage类对象封装消息
要想正文以html格式解析,需要指定第二个参数为true
要想发送附件,需要指定第二个参数为true
具体代码如下:
@Override
// 发送带链接和附件的消息
public void sendMailWithLinkAttachment() throws MessagingException {
    MimeMessage msg = javaMailSender.createMimeMessage();
    // 要想发送附件,需要指定第二个参数为true
    MimeMessageHelper msgHelper = new MimeMessageHelper(msg, true);
    msgHelper.setFrom(from + "(章北海)");
    msgHelper.setTo(to);
    // 主题
    String subject = "测试发送带链接和附件的消息";
    // 正文
    String context = "<a href='https://www.baidu.com'>百度一下</a><br><img src='https://gimg2.baidu.com/image_search/src=http%3A%2F%2Fimg01.vgtime.com%2Fgame%2Fcover%2F2021%2F06%2F09%2F210609232854124_u93176.jpg&refer=http%3A%2F%2Fimg01.vgtime.com&app=2002&size=f9999,10000&q=a80&n=0&g=0n&fmt=jpeg?sec=1647456598&t=8808f4643e61d9d2790f9f83d9f620a5'>";
    msgHelper.setSubject(subject);
    // 要想正文以html格式解析,需要指定第二个参数为true
    msgHelper.setText(context, true);

    // 添加附件
    File file1 = new File("D:\\ideacode\\spring-boot-study\\springboot_16_03_mail\\src\\main\\resources\\test.jpg");
    File file2 = new File("D:\\ideacode\\spring-boot-study\\springboot_16_03_mail\\target\\springboot_16_03_mail-0.0.1-SNAPSHOT.jar");
    msgHelper.addAttachment(file1.getName(), file1);
    msgHelper.addAttachment(file2.getName(), file2);

    javaMailSender.send(msg);
}
去邮箱中查看消息,图片和文件都顺利接收到了


购物订单案例-发送短信基础代码准备
发送短信的业务层接口MessageService.java
public interface MessageService {
    void sendMessage(String orderId);

    String doMessage();
}
发送短信的业务层实现类MessageServiceImpl.java
@Service
public class MessageServiceImpl implements MessageService {
    private ArrayList<String> msgList = new ArrayList<String>();
    @Override
    public void sendMessage(String orderId) {
        System.out.println("待发送短信的订单已纳入处理队列,id:" + orderId);
        msgList.add(orderId);
    }

    @Override
    public String doMessage() {
        String orderId = msgList.remove(0);
        System.out.println("已发送短信发送业务,id:" + orderId);
        return orderId;
    }
}
发送短信的表现层控制类MessageController.java
@RestController
@RequestMapping("/msgs")
public class MessageController {
    @Autowired
    private MessageService messageService;

    @GetMapping
    public String doMessage() {
        String id = messageService.doMessage();
        return id;
    }
}
处理订单的业务层接口OrderService.java
public interface OrderService {
    void order(String id);
}
处理订单的业务层实现类OrderServiceImpl.java
@Service
public class OrderServiceImpl implements OrderService {
    @Autowired
    private MessageService messageService;

    @Override
    public void order(String orderId) {
        // 一系列的操作,包含各种服务调用,处理各种业务
        System.out.println("订单开始处理");
        // 短信消息处理
        messageService.sendMessage(orderId);

        System.out.println("订单处理结束");
        System.out.println();
    }
}
处理订单的表现层控制类OrderController.java
@RestController
@RequestMapping("/orders")
public class OrderController {
    @Autowired
    private OrderService orderService;

    @PostMapping("{id}")
    public void order(@PathVariable String orderId) {
        orderService.order(orderId);
    }
}
到此案例基础代码准备完成
下载地址:https://activemq.apache.org/components/classic/download/
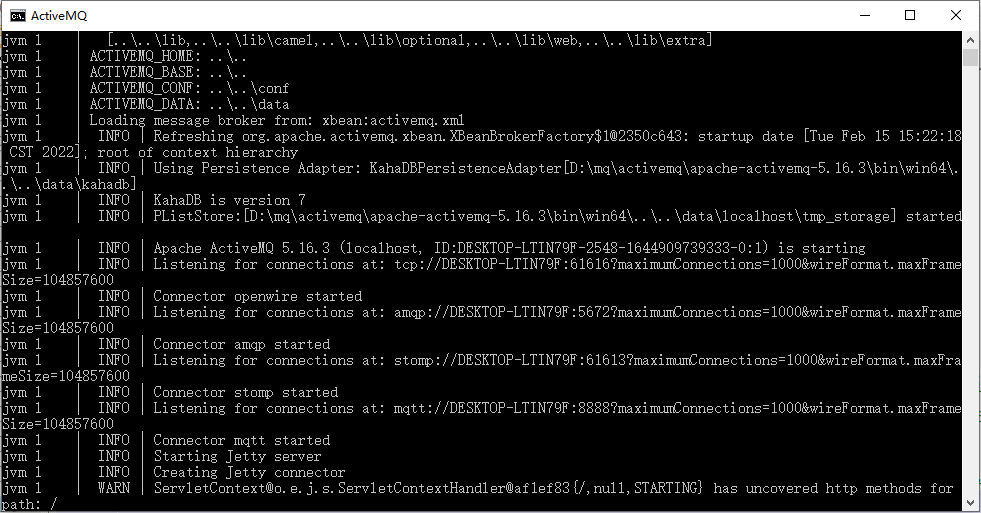
这里以windows平台为例,下载好安装包以后解压缩,去软件目录的bin\win64下面双击activemq.bat即可启动。
运行过程中报错了,发现了我电脑上的1883端口被占用
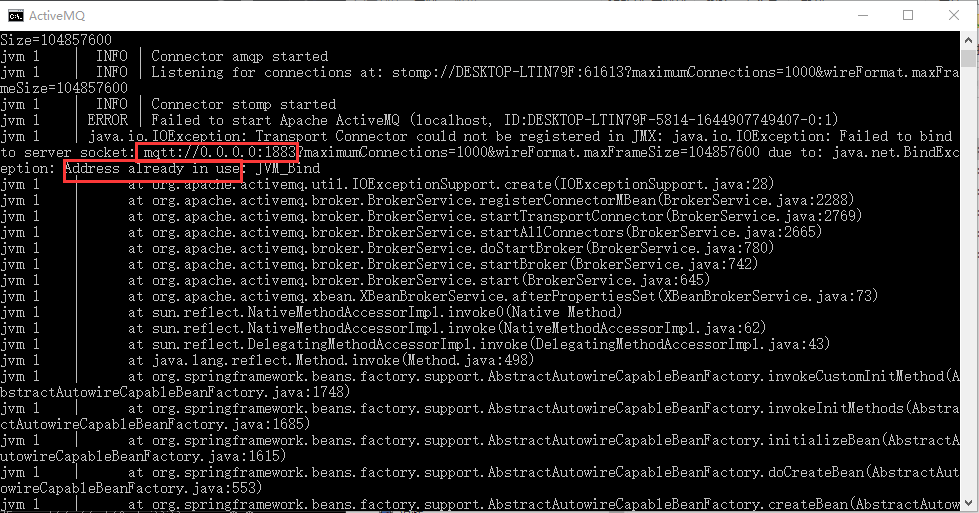
启动一个命令行,输入netstat -ano | findstr "1883"
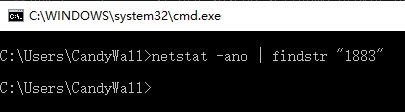
结果居然什么也没查出来,这就奇怪了。没办法先去配置文件里面改个端口吧,编辑软件目录的conf\activemq.xml文件,然后找到标签下面的mqtt的那一项,将uri里面的端口改成8888,
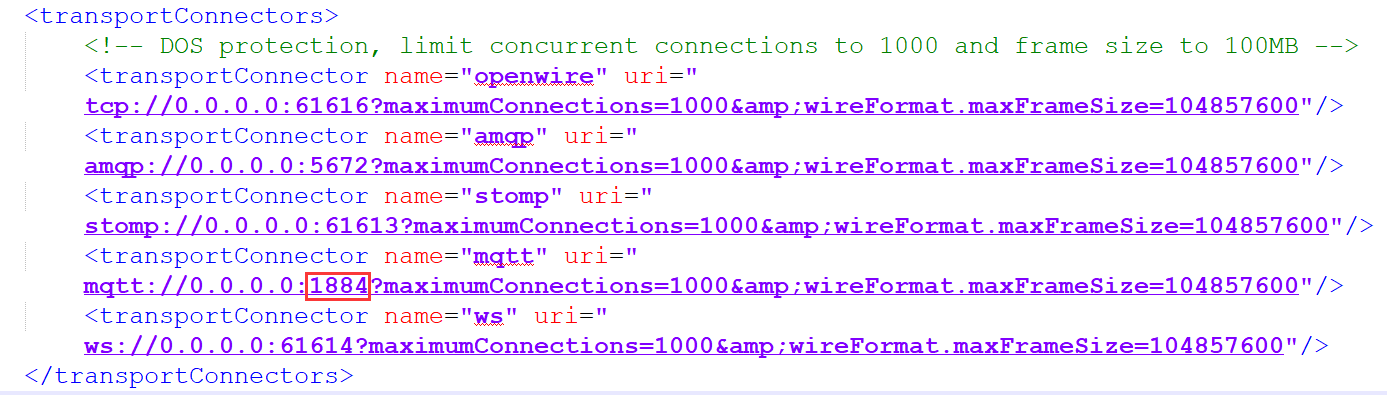
改完后再启动一下ActiveMQ,没有报错
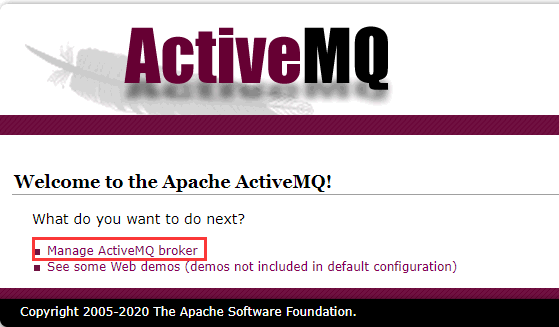
去浏览器输入http://localhost:8161,账号密码都是admin,可以登录到主界面,表示ActiveMQ启动正常
注:如果ActiveMQ不是安装在本地,比如阿里云或者局域网,需要修改软件目录的conf\jetty.xml的jettyPort属性,将默认的localhost改成实际IP地址即可。

P128 实用开发篇-124-springboot整合ActiveMQ
基于购物订单案例-发送短信案例的代码,整合ActiveMQ
在pom.xml中加入springboot整合ActiveMQ的依赖
<!--ActiveMQ-->
<dependency>
    <groupId>org.springframework.boot</groupId>
    <artifactId>spring-boot-starter-activemq</artifactId>
</dependency>
在application.yml中加入activemq的配置
spring:
  activemq:
    broker-url: tcp://192.168.0.102:61616
  jms:
    template:
      # 指定消息队列的名字
      default-destination: jacktgq
编写业务层接口MessageService的实现类MessageServiceActivemqImpl,注意需要将上个案例中的MessageServiceImpl类上的@Service注解去掉,要不然自动注入的时候会发生冲突。
@Service
public class MessageServiceActivemqImpl implements MessageService {
    @Autowired
    private JmsMessagingTemplate messagingTemplate;

    @Override
    public void sendMessage(String orderId) {
        System.out.println("待发送短信的订单已纳入处理队列,id:" + orderId);
        // 将消息存到消息队列的时候如果不指定destination,也就是队列名,就会存到默认的队列中, 如果application.yml中没有配置默认的队列名, 就会报错
        // messagingTemplate.convertAndSend(orderId);
        // 也可以手动指定队列名
        messagingTemplate.convertAndSend("order.queue.id", orderId);
    }

    @Override
    public String doMessage() {
        // 从默认队列中获取消息
        // String orderId = messagingTemplate.receiveAndConvert(String.class);
        // 从指定队列中获取消息
        String orderId = messagingTemplate.receiveAndConvert("order.queue.id", String.class);
        System.out.println("已发送短信发送业务,id:" + orderId);
        return orderId;
    }
}
启动项目,访问下面的地址,往MQ中存取一些消息
http://localhost:8080/orders/1
http://localhost:8080/orders/2
http://localhost:8080/orders/3
http://localhost:8080/orders/4
http://localhost:8080/msgs/
去MQ的后台管理页面查看一下数据储存情况
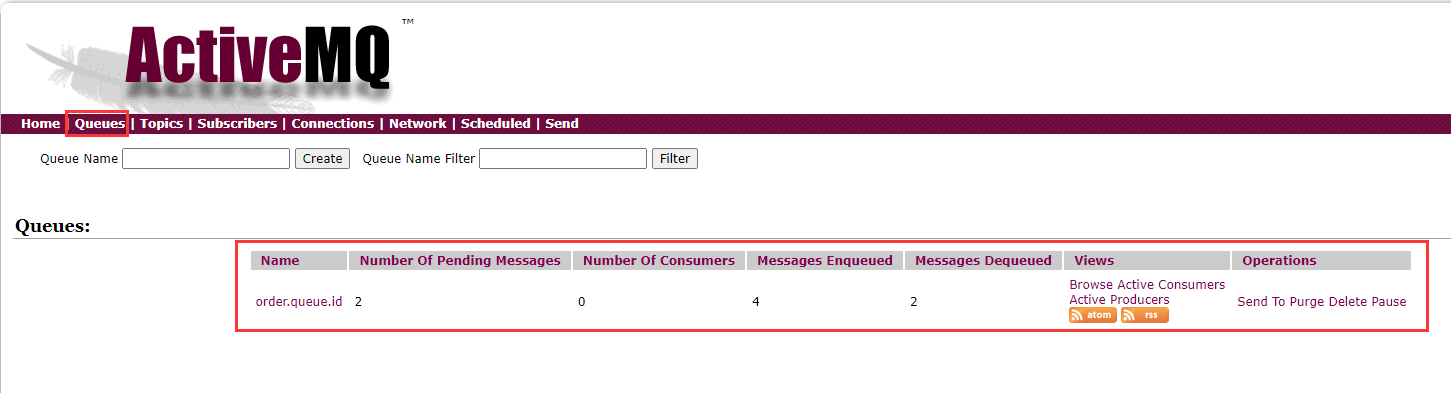
消息存取正常。
要想消息存到MQ中以后自动去消费,就要用到JMS的消息监听器技术,只要被监听的队列中接收到新的数据就会去取出来执行。
MessageListener类,在类头上加上@Component注解,将这个类交给spring管理receive(String orderId), 在方法上加上@JmsListener(destination = "order.queue.id"),需要指定队列名称。@SendTo("order.other.queue.id")注解将当前方法的返回值再发送到其他队列@Component
public class MessageListener {
@JmsListener(destination = "order.queue.id")
// 还可以将当前方法的返回值再发送到其他队列
@SendTo("order.other.queue.id")
public String receive(String orderId) {
System.out.println("已完成短信发送业务,id:" + orderId);
return "done::id::" + orderId;
}
}
在application.yml文件中使用pub-sub-domain属性设置消息模型
spring:
  activemq:
    broker-url: tcp://192.168.0.102:61616
  jms:
    # 是否使用发布订阅模型,默认为false,点对点模型
    pub-sub-domain: true
    template:
      # 指定消息队列的名字
      default-destination: jacktgq
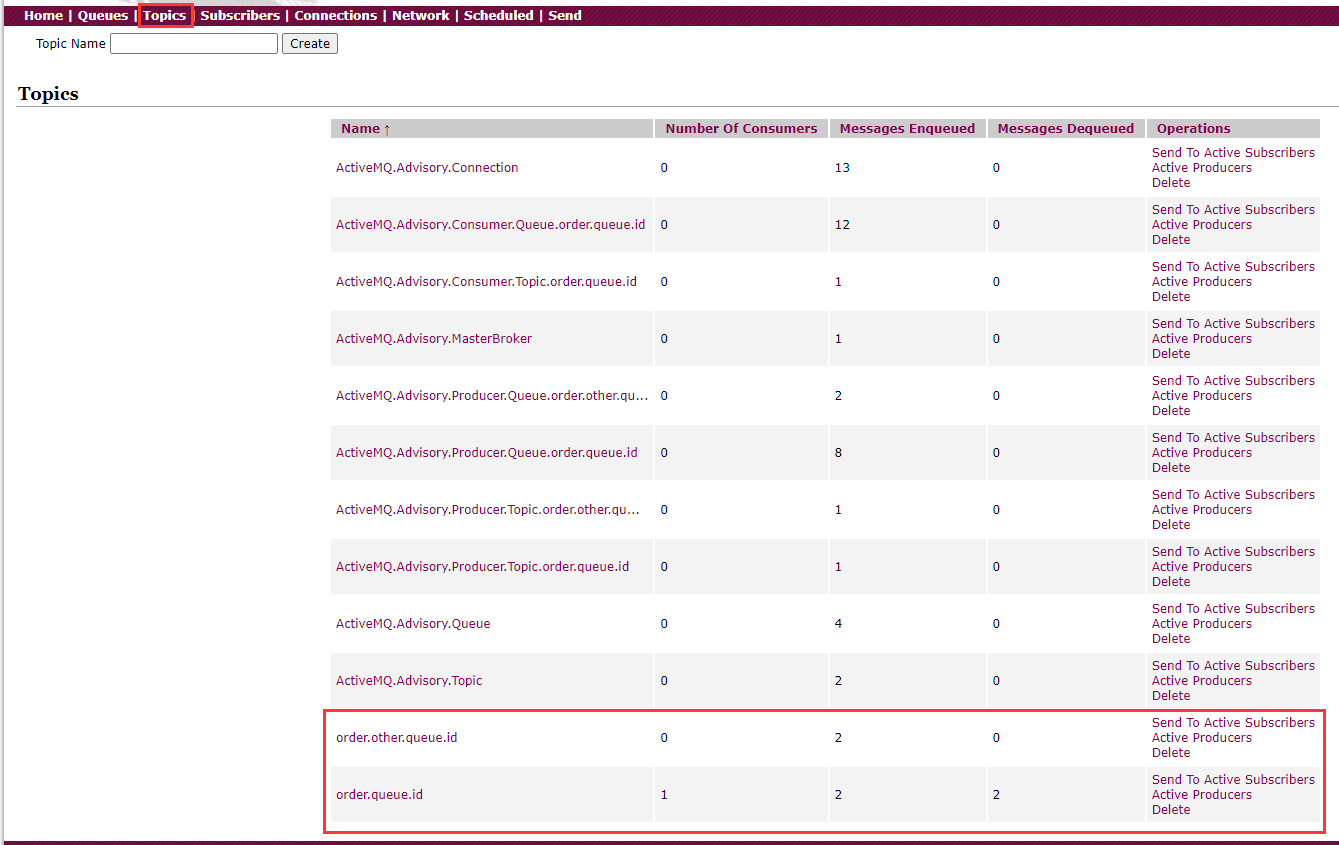
如果使用了发布订阅模型,那么在ActiveMQ的管理界面中查看消息,需要在Topics选项下面查找(不会发到Queues选项下面)。
RabbitMQ基于Erlang语言编写,需要先安装Erlang环境,类似执行java程序需要先安装jdk(jre)。
Erlang安装
下载地址:https://www.erlang.org/downloads
安装:一键傻瓜式安装,安装完毕需要重启,需要依赖windows组件
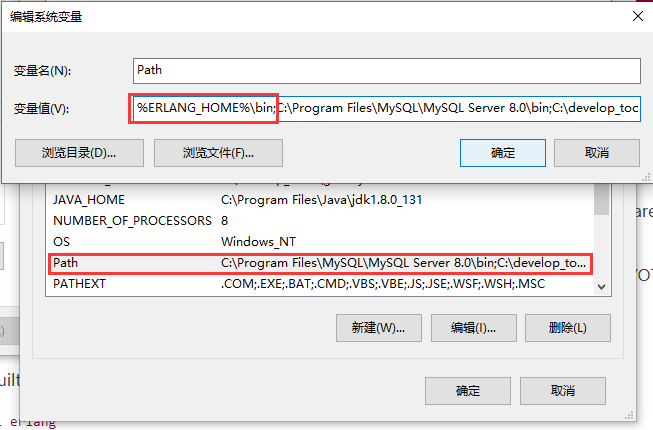
配置环境变量:ERLANG_HOME、PATH

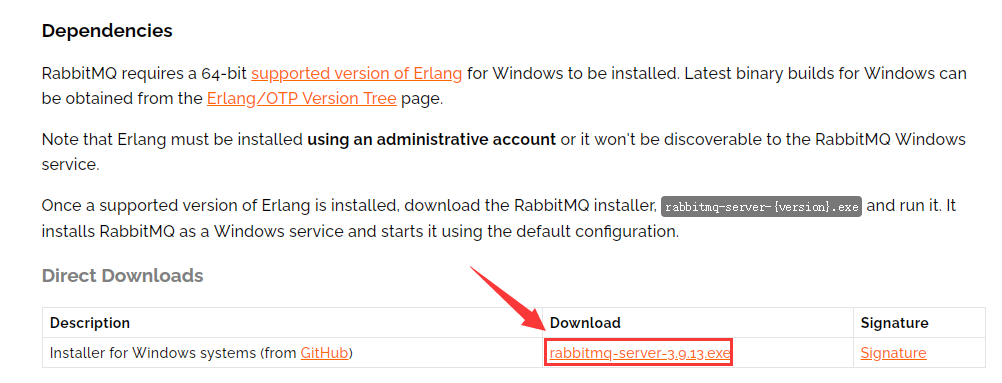
安装RabbitMQ
找到Direct Downloads的地方,点击直接下载exe文件
安装:一键傻瓜式安装
启动:先以管理员权限启动一个黑窗口,cd到软件安装目录的rabbitmq_server-3.9.13\sbin下,输入rabbitmq-service.bat start,提示服务已经启动即可。

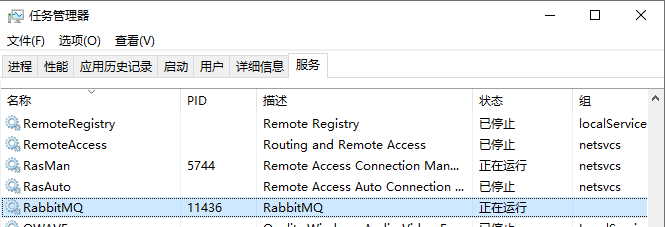
在任务管理器的服务选项下面也可以找到RabbitMQ服务,以后启动和停止就可以在这里操作了
开启图形化管理页面插件
继续在刚才上面的黑窗口中输入rabbitmq-plugins.bat list,会以列表的形式枚举自带的所有插件,找到rabbitmq_management就是我们需要开启的插件。
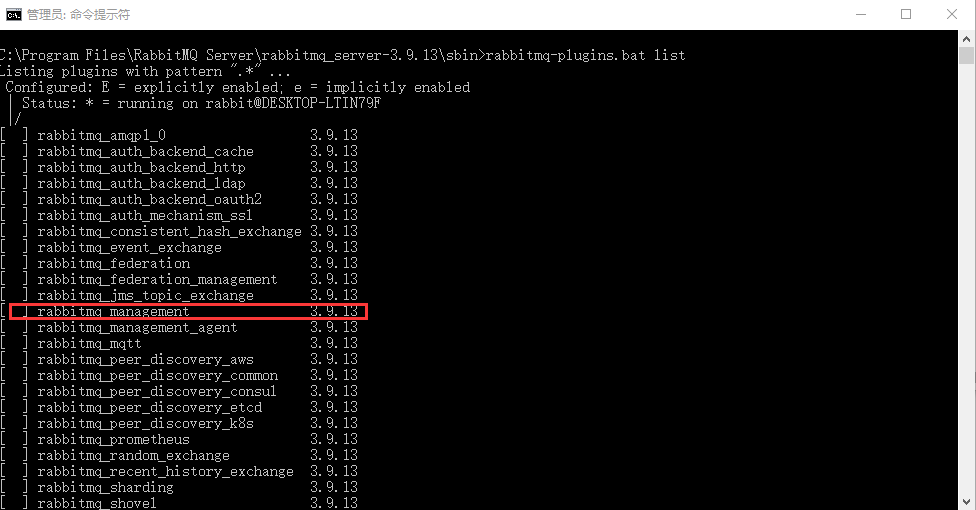
继续输入命令rabbitmq-plugins.bat enable rabbitmq_management,然后回车,会显示开启了三个关联的插件。
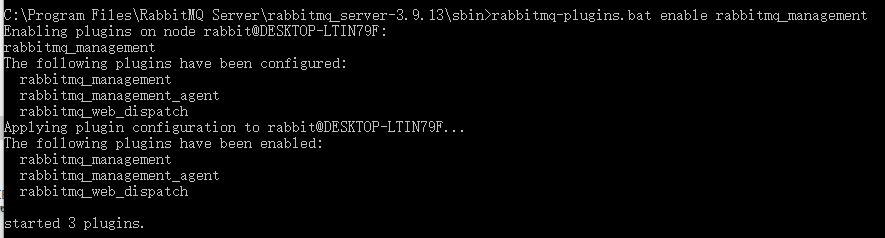
再次输入rabbitmq-plugins.bat list,这次列表中显示rabbitmq_management前面多了E*,表示这个插件处于启用状态。
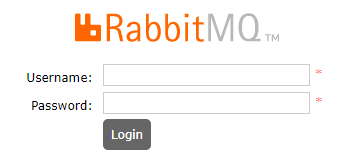
去浏览器中输入http://localhost:15672/,会显示登录界面
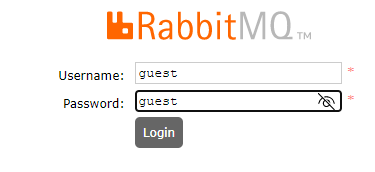
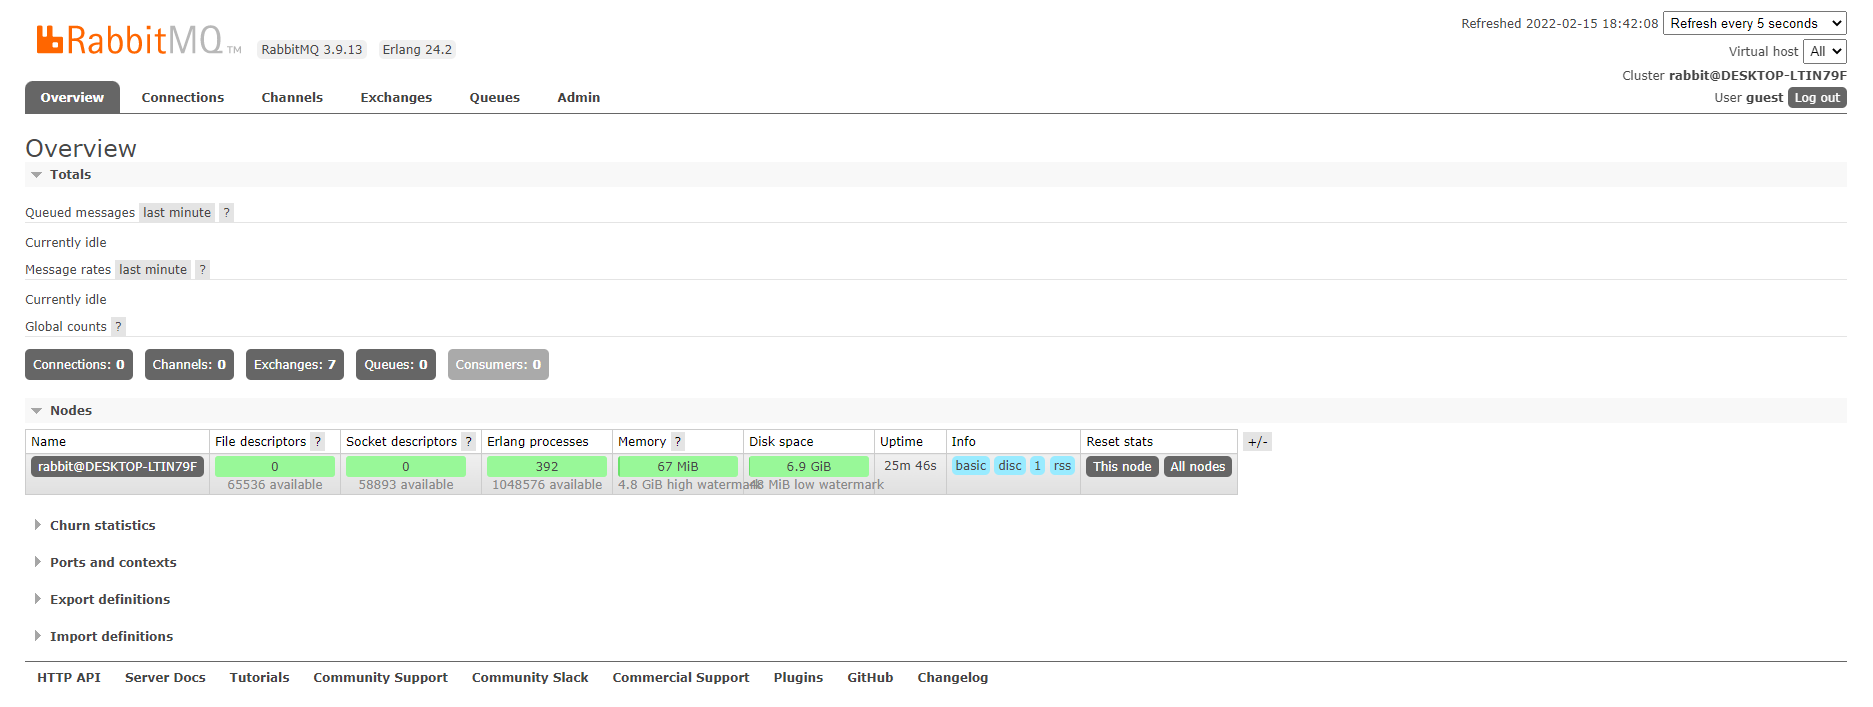
输入账号密码(都是guest),会跳转到RabbitMQ管理页面
P130 实用开发篇-126-springboot整合RabbitMQ(direct模式)
在pom.xml中加入springboot整合RabbitMQ的依赖
<!--RabbitMQ-->
<dependency>
    <groupId>org.springframework.boot</groupId>
    <artifactId>spring-boot-starter-amqp</artifactId>
</dependency>
在application.yml中加入RabbitMQ的配置
spring:
  rabbitmq:
    host: localhost
    port: 5672
编写RabbitDirectConfig类,配置直连模式的交换机和队列
@Configuration
public class RabbitDirectConfig {
    @Bean
    // Direct模式的队列
    public Queue directQueue() {
        // durable:是否持久化,默认false
        // exclusive:是否当前连接专用,默认False,连接关闭后队列即被删除
        // autoDelete:是否自动删除,当生产者或消费者不再使用此队列,自动删除
        // 一个参数的构造方法内部默认调用了4个参数的构造方法,后三个参数依次为true,false,false
        return new Queue("direct_queue");
    }

    @Bean
    // Direct模式的交换机
    public DirectExchange directExchange() {
        return new DirectExchange("directExchange");
    }

    @Bean
    public Binding bindingDirect() {
        return BindingBuilder.bind(directQueue()).to(directExchange()).with("direct");
    }
}
编写业务层接口MessageService的实现类MessageServiceRabbitmqDirectImpl,注意需要将上个案例中的MessageServiceImpl类上的@Service注解去掉,要不然自动注入的时候会发生冲突。
@Service
public class MessageServiceRabbitmqDirectImpl implements MessageService {
    private AmqpTemplate amqpTemplate;
    @Override
    public void sendMessage(String orderId) {
        System.out.println("待发送短信的订单已纳入处理队列,id:" + orderId);
        // 指定RabbitDirectConfig中的内容
        amqpTemplate.convertAndSend("directExchange", "direct", orderId);
    }

    @Override
    public String doMessage() {
        String orderId = (String) amqpTemplate.receiveAndConvert("directExchange");
        System.out.println("已发送短信发送业务,id:" + orderId);
        return orderId;
    }
}
要想消息存到MQ中以后自动去消费,就要用到JMS的消息监听器技术,只要被监听的队列中接收到新的数据就会去取出来执行。
MessageListener类,在类头上加上@Component注解,将这个类交给spring管理receive(String orderId), 在方法上加上@RabbitListener(queues = "direct_queue"),需要指定队列名称。@Component
public class MessageListener {
@RabbitListener(queues = "direct_queue")
public void receive(String orderId) {
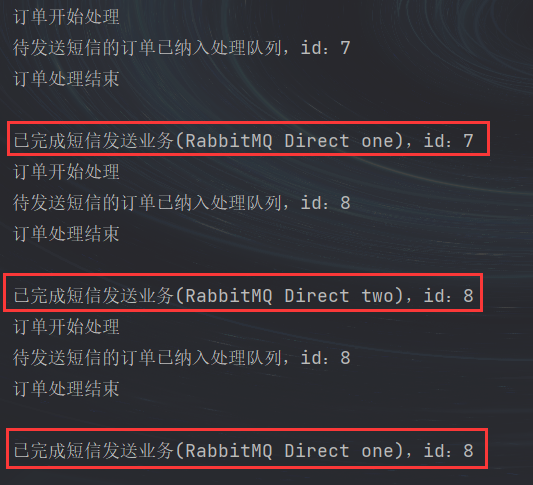
System.out.println("已完成短信发送业务(RabbitMQ Direct one),id:" + orderId);
}
}
注: 如果这里receive()方法带了返回值,则会报错如下错误:
Caused by: org.springframework.amqp.AmqpException: Cannot determine ReplyTo message
网上查找相关资料后得知,出错的原因是:@RabbitListener注解修饰监听的方法添加了返回值。此方法返回的消息没有设置目的地,解决:只要把监听的方法的返回值改为void即可。
将MessageListener.java复制出来一份,然后把仅修改receive方法中的输出语句,代码如下所示:
@Component
public class MessageListener2 {
    @RabbitListener(queues = "direct_queue")
    public void receive(String orderId) {
        System.out.println("已完成短信发送业务(RabbitMQ Direct two),id:" + orderId);
    }
}
启动项目以后向消息队列中存值,查看控制台的输出语句,可以知道两个监听器轮询交替被调用。
P131 实用开发篇-127-springboot整合RabbitMQ(topic模式)
Topic模式的代码和Direct模式的代码很相似,所以,只需要根据Direct模式的代码复制一份修改即可。
编写RabbitTopicConfig类,配置Topic模式的交换机和队列,这里为了看效果,配置两个队列topic_queue1和topic_queue2
@Configuration
public class RabbitTopicConfig {
    @Bean
    // Topic模式的队列
    public Queue topicQueue1() {
        // durable:是否持久化,默认false
        // exclusive:是否当前连接专用,默认False,连接关闭后队列即被删除
        // autoDelete:是否自动删除,当生产者或消费者不再使用此队列,自动删除
        // 一个参数的构造方法内部默认调用了4个参数的构造方法,后三个参数依次为true,false,false
        return new Queue("topic_queue1");
    }

    @Bean
    // Topic模式的队列
    public Queue topicQueue2() {
        // durable:是否持久化,默认false
        // exclusive:是否当前连接专用,默认False,连接关闭后队列即被删除
        // autoDelete:是否自动删除,当生产者或消费者不再使用此队列,自动删除
        // 一个参数的构造方法内部默认调用了4个参数的构造方法,后三个参数依次为true,false,false
        return new Queue("topic_queue2");
    }

    @Bean
    // Topic模式的交换机
    public TopicExchange topicExchange() {
        return new TopicExchange("topicExchange");
    }

    @Bean
    public Binding bindingTopic1() {
        return BindingBuilder.bind(topicQueue1()).to(topicExchange()).with("topic.order.id");
    }

    @Bean
    public Binding bindingTopic2() {
        return BindingBuilder.bind(topicQueue2()).to(topicExchange()).with("id");
    }
}
编写业务层接口MessageService的实现类MessageServiceRabbitmqTopicImpl
@Service
public class MessageServiceRabbitmqTopicImpl implements MessageService {
    @Autowired
    private AmqpTemplate amqpTemplate;
    @Override
    public void sendMessage(String orderId) {
        System.out.println("待发送短信的订单已纳入处理队列,id:" + orderId);
        // 指定RabbitDirectConfig中的内容
        amqpTemplate.convertAndSend("topicExchange", "top.order.id", orderId);
    }

    @Override
    public String doMessage() {
        String orderId = (String) amqpTemplate.receiveAndConvert("topicExchange");
        System.out.println("已发送短信发送业务,id:" + orderId);
        return orderId;
    }
}
要想消息存到MQ中以后自动去消费,就要用到JMS的消息监听器技术,只要被监听的队列中接收到新的数据就会去取出来执行。
MessageListener类,在类头上加上@Component注解,将这个类交给spring管理receive1(String orderId)和receive2(String orderId), 分别在方法上加上@RabbitListener(queues = "topic_queue1")和@RabbitListener(queues = "topic_queue2")监听两个队列@Component
public class MessageListener {
@RabbitListener(queues = "topic_queue1")
public void receive1(String orderId) {
System.out.println("已完成短信发送业务(RabbitMQ topic_queue111111),id:" + orderId);
}
@RabbitListener(queues = "topic_queue2")
public void receive2(String orderId) {
System.out.println("已完成短信发送业务(RabbitMQ topic_queue222222),id:" + orderId);
}
}
与Direct模式不同的是,Topic模式在定义队列的时候,routingKey支持模糊匹配,比如可以在RabbitTopicConfig类中的bindingTopic1()和bindingTopic2()方法,两个方法里面的routingKey参数的指定都是绝对匹配的,发送消息的时候必须指定成一样routingKey的值才能将消息存到对应的队列中。
@Bean
public Binding bindingTopic1() {
    return BindingBuilder.bind(topicQueue1()).to(topicExchange()).with("topic.order.id");
}

@Bean
public Binding bindingTopic2() {
    return BindingBuilder.bind(topicQueue2()).to(topicExchange()).with("id");
}
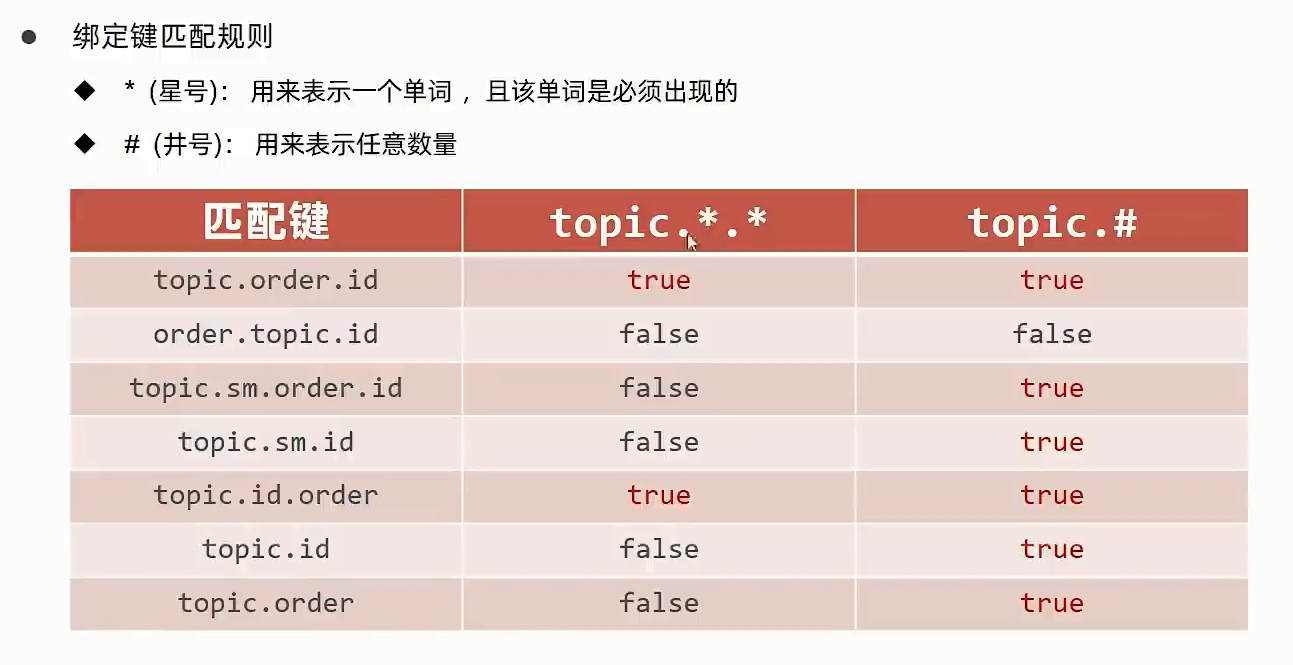
如果对于with里面填的routingKey,bindingTopic1()方法中的配置为topic.*.id,bindingTopic2()方法中的配置为topic.order.*,其中*可以匹配任意单词,具体代码如下:
@Bean
public Binding bindingTopic1() {
    return BindingBuilder.bind(topicQueue1()).to(topicExchange()).with("topic.*.id");
}
@Bean
public Binding bindingTopic2() {
    return BindingBuilder.bind(topicQueue2()).to(topicExchange()).with("topic.order.*");
}
这样修改后,MessageServiceRabbitmqTopicImpl类中的消息发送到消息队列的时候,amqpTemplate.convertAndSend()方法的第二个参数routingKey的值,
如果指定为topic.order.ids,那么top.order.*能匹配上,而topic.*.id不能匹配上,消息会存到名字为topic_queue2的消息队列中;
如果routingKey的值指定为top.orders.id,那么只有topic.*.id能匹配上,消息会存到名字为topic_queue1 ;
如果routingKey的值指定为top.orders.id,那么top.order.*和topic.*.id都能匹配上,消息就会同时存到两个队列中。
@Service
public class MessageServiceRabbitmqTopicImpl implements MessageService {
    @Autowired
    private AmqpTemplate amqpTemplate;
    @Override
    public void sendMessage(String orderId) {
        System.out.println("待发送短信的订单已纳入处理队列,id:" + orderId);
        // 指定routingKey的值为topic.order.id,消息会同时存到两个消息队列中
        amqpTemplate.convertAndSend("topicExchange", "topic.order.id", orderId);
    }

    @Override
    public String doMessage() {
        String orderId = (String) amqpTemplate.receiveAndConvert("topicExchange");
        System.out.println("已发送短信发送业务,id:" + orderId);
        return orderId;
    }
}
令
RocketMQ安装
下载完解压缩即可,默认服务端口:9876
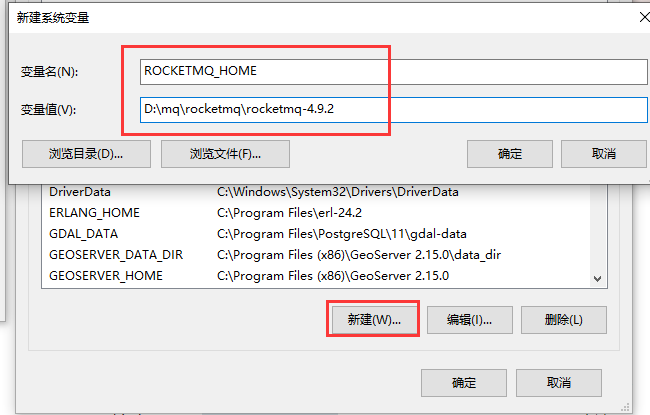
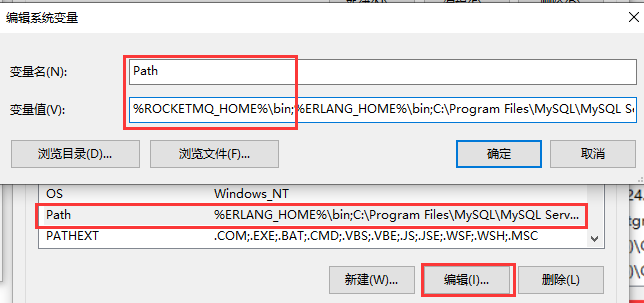
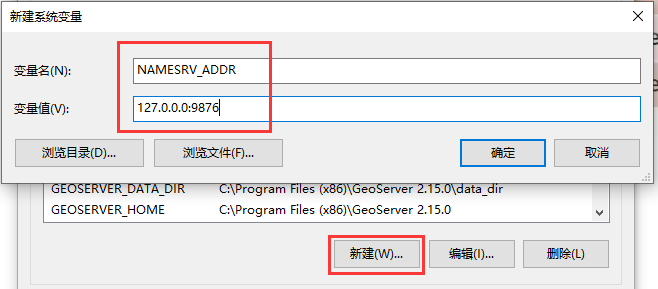
配置环境变量:ROCKETMQ_HOME、PATH、NAMESRV_ADDR(建议):127.0.0.1:9876
RocketMQ启动
RocketMQ的启动分为两部分,包括NameServer服务和Broker服务。
首先启动NameServer服务
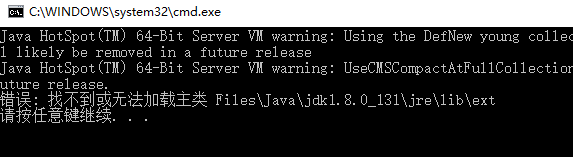
双击安装目录的bin目录下的mqnamesrv.cmd启动命名服务器,这时候发生诡异的事情了,黑窗口一闪而过,根据经验,绝对是报错了。为了看到错误,我编辑了mqnamesrv.cmd文件,在最后加了一句pause,这样执行的时候就算报错了,黑窗口也不会立马关闭。

再次双击mqnamesrv.cmd,看到报了如下的错误:
我先自己排查下原因,

在网上查阅了相关资料后,出现问题的原因是,jdk安装路径的问题,我安装jdk的时候默认了C盘的Program Files目录下,这个目录中间有空格,就是这个空格导致的问题,可是我去黑窗口输入javac、java -version等命令,并且tomcat、maven都可以启动啊,就很奇怪。参考博客:https://blog.csdn.net/weixin_41720239/article/details/118340382,知道了问题,下面就有两种解决方案了:
重装jdk,装到一个纯英文且路径中没有空格的目录下,然后重新配置环境变量,比较麻烦,我没有使用;
经过网上查阅资料,我找到了第二种解决方案,顺便记录一下我为了解决这个问题的思考过程:
首先看最开始报的错误是找不到或无法加载主类 Files\Java\jdk1.8.0_131\jre\lib\ext,这个路径提到了jdk的安装路径的一部分,应该跟Java的环境变量JAVA_HOME有关,而mqnamesrv.cmd中根本没有提到;
而又发现第19行是call "%ROCKETMQ_HOME%\bin\runserver.cmd",调用了另外一个叫runserver.cmd的cmd脚本,所以再编辑当前目录下的runserver.cmd文件,看到第34行%JAVA_HOME%\jre\lib\ext,问题应该就在这里;
JAVA_HOME路径中的Program Files的空格导致的这个问题,那么在JAVA_HOME外面加上双引号不就行了;

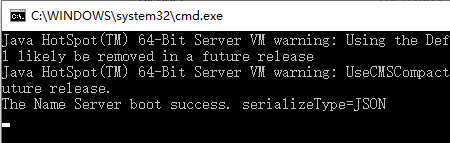
然后再去双击mqnamesrv.cmd,运行成功,如下图所示。
其次再启动Broker服务
同样的,启动Broker服务的时候也会跟上面一样报错,解决方案是修改runbroker.cmd文件,给39行的JAVA_HOME外面加上双引号,如下图所示。

双击mqbroker.cmd文件,等待启动即可,成功的话会提示服务监听在9876端口。

下面验证一下RocketMQ服务是否可用
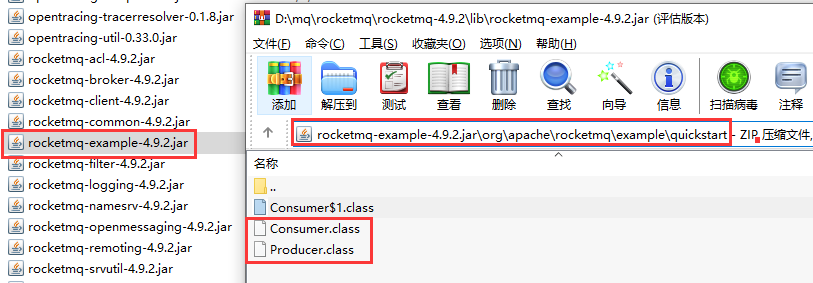
RocketMQ的lib包下自带了一个rocketmq-example-4.9.2.jar的jar包,用压缩软件打开一下,下面将会使用Producer和Comsumer这两个类来验证RocketMQ的可用性。步骤如下:
去RocketMQ的bin目录下,启动黑窗口,敲如下命令:
tools org.apache.rocketmq.example.quickstart.Producer

如果RocketMQ服务正常的话,会生产1000条消息,
可是我报了如下错误:
org.apache.rocketmq.client.exception.MQClientException: Send [3] times, still failed, cost [116]ms, Topic: TopicTest, BrokersSent: [DESKTOP-LTIN79F, DESKTOP-LTIN79F, DESKTOP-LTIN79F]
See http://rocketmq.apache.org/docs/faq/ for further details.
        at org.apache.rocketmq.client.impl.producer.DefaultMQProducerImpl.sendDefaultImpl(DefaultMQProducerImpl.java:681)
        at org.apache.rocketmq.client.impl.producer.DefaultMQProducerImpl.send(DefaultMQProducerImpl.java:1391)
        at org.apache.rocketmq.client.impl.producer.DefaultMQProducerImpl.send(DefaultMQProducerImpl.java:1335)
        at org.apache.rocketmq.client.producer.DefaultMQProducer.send(DefaultMQProducer.java:336)
        at org.apache.rocketmq.example.quickstart.Producer.main(Producer.java:67)
Caused by: org.apache.rocketmq.client.exception.MQBrokerException: CODE: 14  DESC: service not available now. It may be caused by one of the following reasons: the broker's disk is full [CL:  0.97 CQ:  0.97 INDEX: -1.00], messages are put to the slave, message store has been shut down, etc. BROKER: 172.25.96.1:10911
For more information, please visit the url, http://rocketmq.apache.org/docs/faq/
        at org.apache.rocketmq.client.impl.MQClientAPIImpl.processSendResponse(MQClientAPIImpl.java:668)
        at org.apache.rocketmq.client.impl.MQClientAPIImpl.sendMessageSync(MQClientAPIImpl.java:507)
        at org.apache.rocketmq.client.impl.MQClientAPIImpl.sendMessage(MQClientAPIImpl.java:489)
        at org.apache.rocketmq.client.impl.MQClientAPIImpl.sendMessage(MQClientAPIImpl.java:433)
        at org.apache.rocketmq.client.impl.producer.DefaultMQProducerImpl.sendKernelImpl(DefaultMQProducerImpl.java:870)
        at org.apache.rocketmq.client.impl.producer.DefaultMQProducerImpl.sendDefaultImpl(DefaultMQProducerImpl.java:606)
        ... 4 more
如果你在安装的过程中也碰到这个问题可以参考我的解决办法, 如果没有遇到可以跳过这段。
网上查阅相关资料了解到这是由于日志文件所在的磁盘的空间太小,RocketMQ是根据ratio来决定磁盘是否满的,默认是90%,每60秒扫描一次磁盘,如果大于ratio就会对所有的producer发送过来的请求返回磁盘满的错。RocketMQ服务默认的日志位置是user.home,windows上默认在C盘的C:\Users\CandyWall,linux上默认在/root位置,我这里用安装在了windows上,而我C盘装了很多应用,空间已经所剩不多,所以如下两种解决方法:
方法1:清理C盘,腾出更多空间,让C盘的可用空间达到10%以上,较麻烦,有耐心的可以尝试;
方法2:修改RocketMQ的user.home属性,从而修改日志记录位置,将位置改到可用空间较大的其他磁盘,打开runserver.cmd和runbroker.cmd文件,添加一行配置
set "JAVA_OPT=%JAVA_OPT% -Duser.home=D:\mq\rocketmq\rocketmq\"

改完以后,再依次执行mqnamesrv.cmd、mqbroker.cmd,启动一个黑窗口,
输入
tools org.apache.rocketmq.example.quickstart.Producer
可以看到Producer生产的消息发送成功。
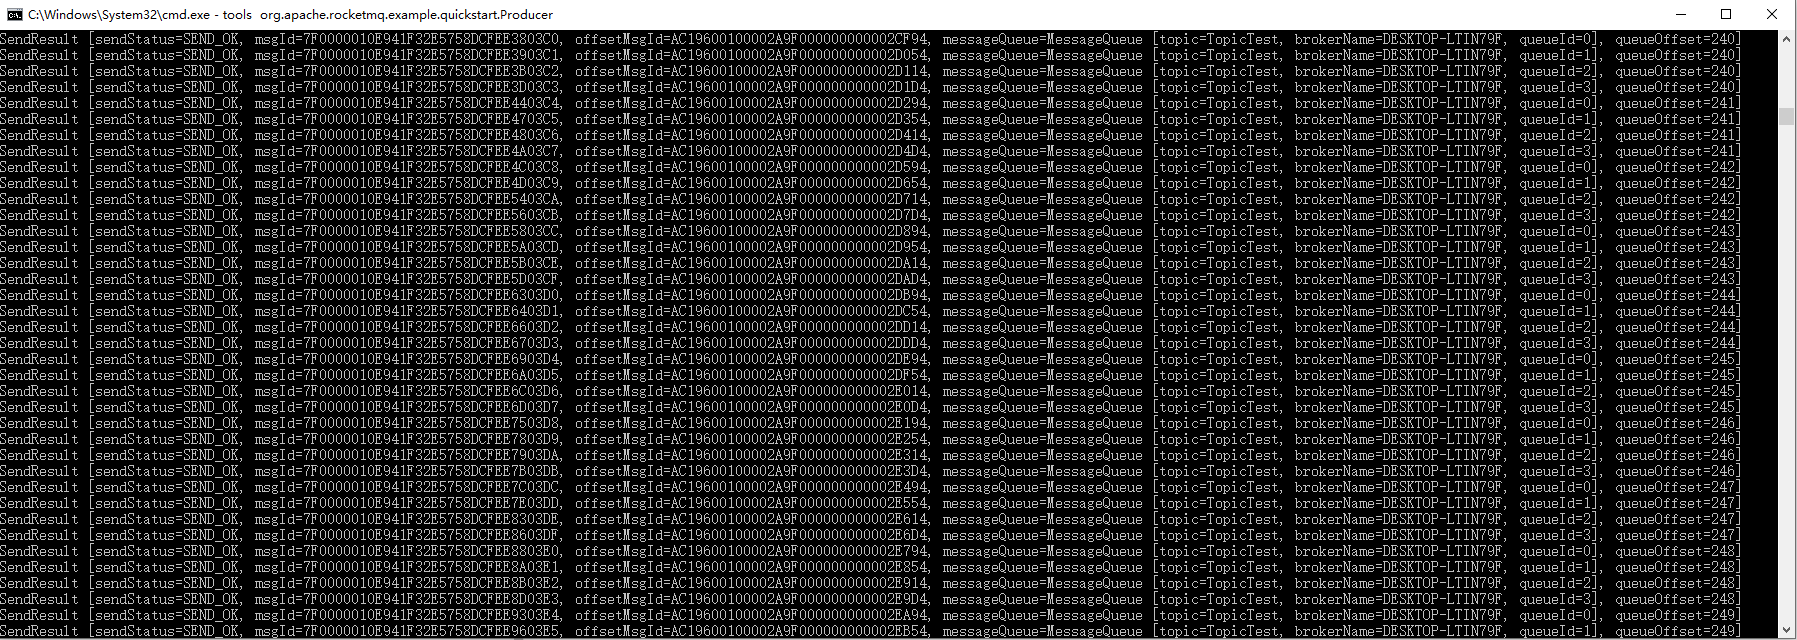
再启动一个黑窗口,输入
tools org.apache.rocketmq.example.quickstart.Consumer
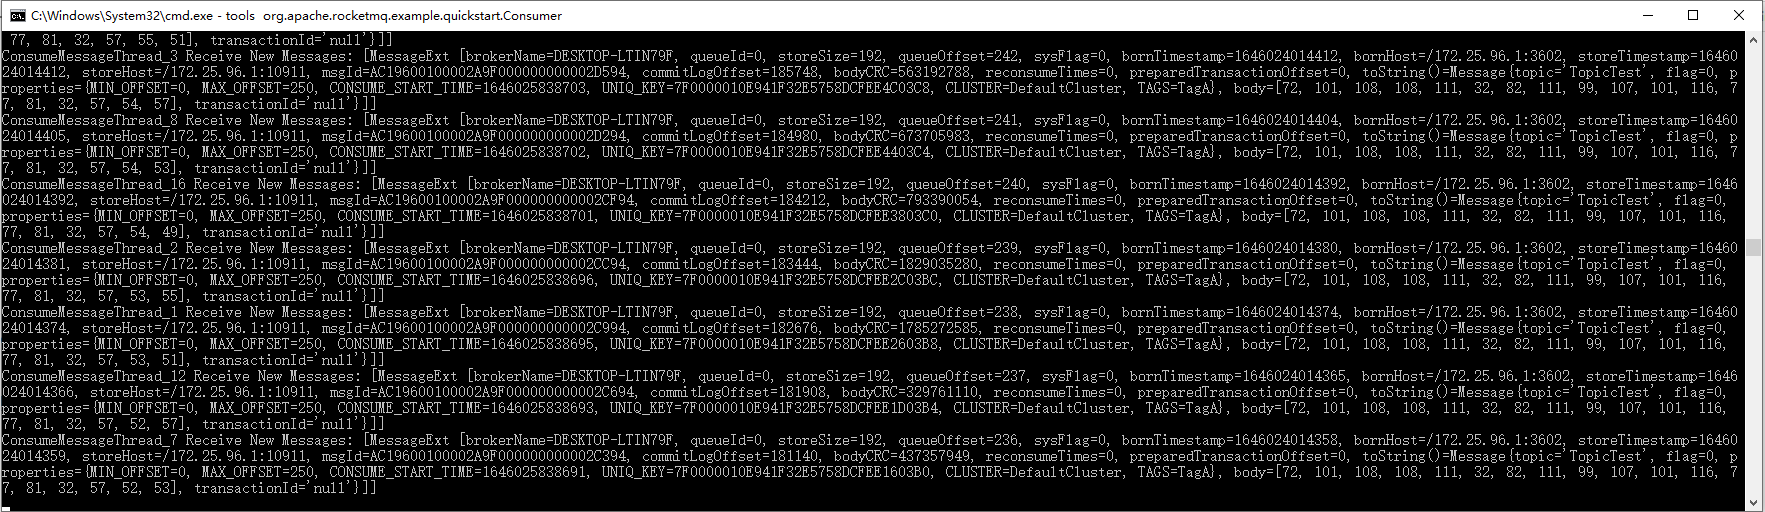
可以看到消息的消费者也是成功取到了消息,到此验证了安装的RocketMQ是可用的。
P133实用开发篇-129-springboot整合RocketMQ
基于购物订单案例-发送短信案例的代码,整合RocketMQ
在pom.xml中加入springboot整合ActiveMQ的依赖
<!--AMQP-->
<dependency>
    <groupId>org.springframework.boot</groupId>
    <artifactId>spring-boot-starter-amqp</artifactId>
</dependency>

<!--RocketMQ-->
<dependency>
    <groupId>org.apache.rocketmq</groupId>
    <artifactId>rocketmq-spring-boot-starter</artifactId>
    <version>2.2.1</version>
</dependency>
在application.yml中加入RocketMQ的配置
rocketmq:
  name-server: localhost:9876
  # 指定生产者所属组
  producer:
    group: group_rocketmq
编写业务层接口MessageService的实现类MessageServiceRocketmqImpl,注意需要将上个案例中的MessageServiceImpl类上的@Service注解去掉,要不然自动注入的时候会发生冲突。
@Service
public class MessageServiceRocketmqImpl implements MessageService {
    @Autowired
    private RocketMQTemplate rocketMQTemplate;
    @Override
    public void sendMessage(String orderId) {
        System.out.println("待发送短信的订单已纳入处理队列,id:" + orderId);
        // 注意RocketMQ不支持类似order.queue.id这样的带特殊字符的destination
        // 发送同步消息,基本不用
        // rocketMQTemplate.convertAndSend("order_id", orderId);
        // 发送异步消息
        SendCallback callback = new SendCallback() {
            @Override
            public void onSuccess(SendResult sendResult) {
                System.out.println("消息发送成功!");
            }

            @Override
            public void onException(Throwable throwable) {
                System.out.println("消息发送失败!");
            }
        };
        rocketMQTemplate.asyncSend("order_id", orderId, callback);
    }

 @Override
    public String doMessage() {
     return null;
    }
}
要想消息存到MQ中以后自动去消费,就要用到JMS的消息监听器技术,只要被监听的队列中接收到新的数据就会去取出来执行。
MessageListener类,在类头上加上@Component注解,将这个类交给spring管理RocketMQListener<String>和接口中的方法@RocketMQMessageListener(topic = "order_id", consumerGroup = "group_rocketmq"),topic与rocketMQTemplate.asyncSend()方法的第一个参数destination的值对应,consumerGroup与application.yml中的group属性的值对应。@Component
@RocketMQMessageListener(topic = "order_id", consumerGroup = "group_rocketmq")
public class MessageListener implements RocketMQListener<String> {
@Override
public void onMessage(String orderId) {
System.out.println("已完成短信发送业务(RocketMQ topic_queue),id:" + orderId);
}
}
启动项目,访问下面的地址,往MQ中发消息
http://localhost:8080/orders/1
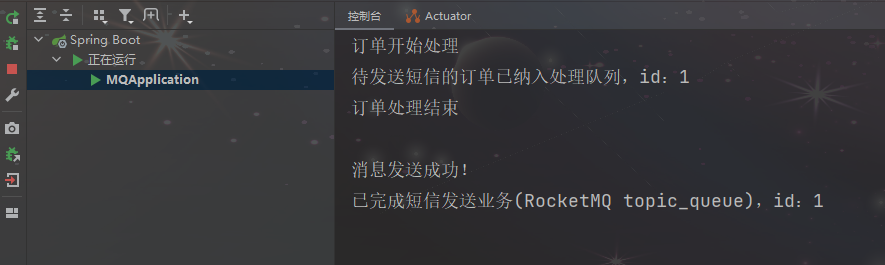
消息存取成功。
下载地址:https://kafka.apache.org/downloads
安装:直接解压即可。
启动:去bin目录下可以看到都是.sh的执行脚本,这些都是在linux上才可以启动,我这里要在windows上进行测试,所以要找.bat或者.cmd的脚本了,看bin目录下还有一个windows目录,这个目录下就是相关的.bat执行脚本了。
启动命名服务器zookeeper
在bin/windows目录下输入如下命令:
zookeeper-server-start.bat ../../config/zookeeper.properties
启动正常如下,默认端口:2181
启动kafka
再启动一个黑窗口,输入如下命令:
kafka-server-start.bat ../../config/server.properties
启动正常如下,默认端口:9092
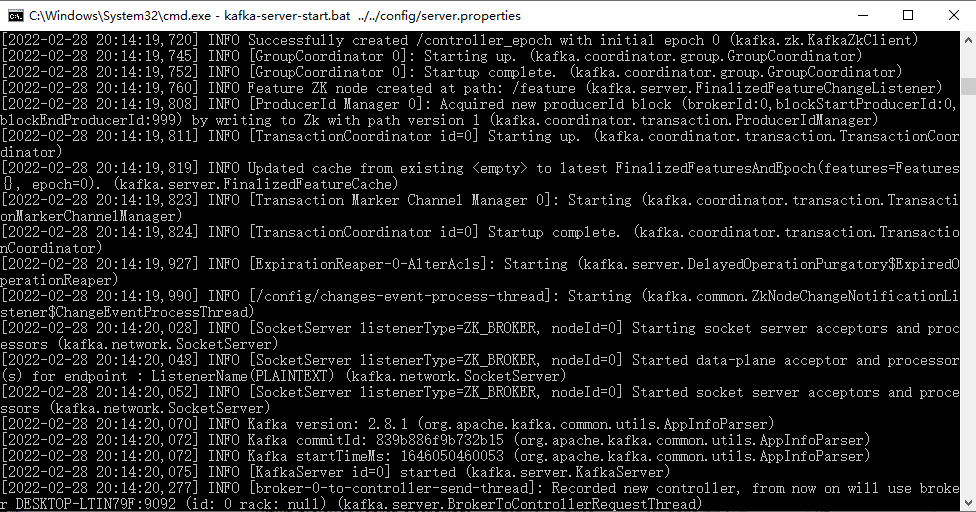
验证kafka是否可用
创建Topic
开一个黑窗口,创建一个topic
kafka-topics.bat --zookeeper 127.0.0.1:2181 --create --replication-factor 1 --partions 1 --topic candywall
查看Topic
kafka-topics.bat --zookeeper 127.0.0.1:2181 --list
可以看到有我上面创建的名字为candywall的topic

删除topic
kafka-topics.bat --delete --zookeeper 127.0.0.1:2181 --topic candywall
生产消息
继续使用这个黑窗口,作为消息的生产者,产生一些消息,输入如下命令:
kafka-console-producer.bat --broker-list 127.0.0.1:9092 --topic candywall
消费消息
再开一个黑窗口,作为消息的消费者,去消费一些消息,输入如下命令:
kafka-console-consumer.bat --bootstrap-server localhost:9092 --topic candywall --from-beginning
如果两个窗口里面可以互相收发消息,说明kafka功能是可用的。

P135实用开发篇-131-springboot整合Kafka
基于购物订单案例-发送短信案例的代码,整合RocketMQ
在pom.xml中加入springboot整合Kafka的依赖
<!--Kafka-->
<dependency>
    <groupId>org.springframework.kafka</groupId>
    <artifactId>spring-kafka</artifactId>
</dependency>
在application.yml中加入kafka的配置
spring:
  kafka:
    bootstrap-servers: localhost:9092
    consumer:
      group-id: order
编写业务层接口MessageService的实现类MessageServiceKafkaImpl,注意需要将上个案例中的MessageServiceImpl类上的@Service注解去掉,要不然自动注入的时候会发生冲突。
@Service
public class MessageServiceKafkaImpl implements MessageService {
    @Autowired
    private KafkaTemplate<String, String> kafkaTemplate;
    @Override
    public void sendMessage(String orderId) {
        System.out.println("待发送短信的订单已纳入处理队列(kafka),id:" + orderId);
        kafkaTemplate.send("candywall", orderId);
    }

    @Override
    public String doMessage() {
        return null;
    }
}
要想消息存到MQ中以后自动去消费,就要用到JKafka的消息监听器技术,只要被监听的队列中接收到新的数据就会去取出来执行。
MessageListener类,在类头上加上@Component注解,将这个类交给spring管理;@KafkaListener(topics = "candywall"),其中topics的值和MessageServiceKafkaImpl中的kafkaTemplate.send()方法的第一个参数topic的值对应;@Component
@RocketMQMessageListener(topic = "order_id", consumerGroup = "group_rocketmq")
public class MessageListener implements RocketMQListener<String> {
@Override
public void onMessage(String orderId) {
System.out.println("已完成短信发送业务(RocketMQ topic_queue),id:" + orderId);
}
}
启动项目,访问下面的地址,往MQ中发消息
http://localhost:8080/orders/1
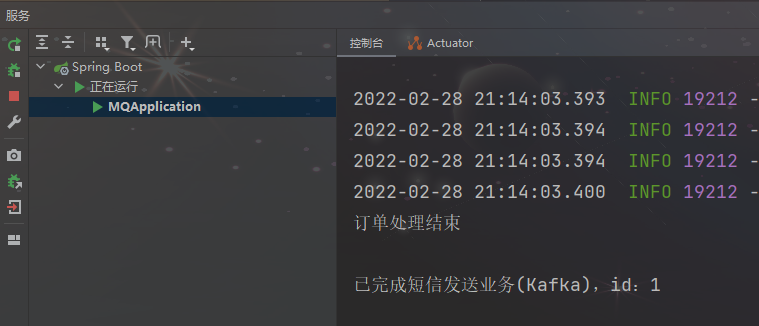
消息存取成功。
SpringBootAdmin分为服务器端和客户端:服务器端不涉及业务方法,近用来监控其他被监控的项目;客户端会将一些参数上报给服务器端,还会涉及一些业务方法。
在springboot中引入SpringBootAdminServer(监控控制台)的步骤
在pom.xml中加入SpringBootAdminServer的依赖,跟SpringBoot的版本号一致
<!--SpringbootAdminServer-->
<dependency>
    <groupId>de.codecentric</groupId>
    <artifactId>spring-boot-admin-starter-server</artifactId>
    version>2.6.2</version>
</dependency>
<dependency>
    <groupId>org.springframework.boot</groupId>
    <artifactId>spring-boot-starter-web</artifactId>
</dependency>
在application.yml中加入指定SpringbootAdminServer Web服务的端口号
```yaml
server:
  port: 8080
在springboot启动类上加@EnableAdminServer注解开启SpringBootAdmin服务
启动项目,打开浏览器输入localhost:8080就可以进入监控系统的主页了
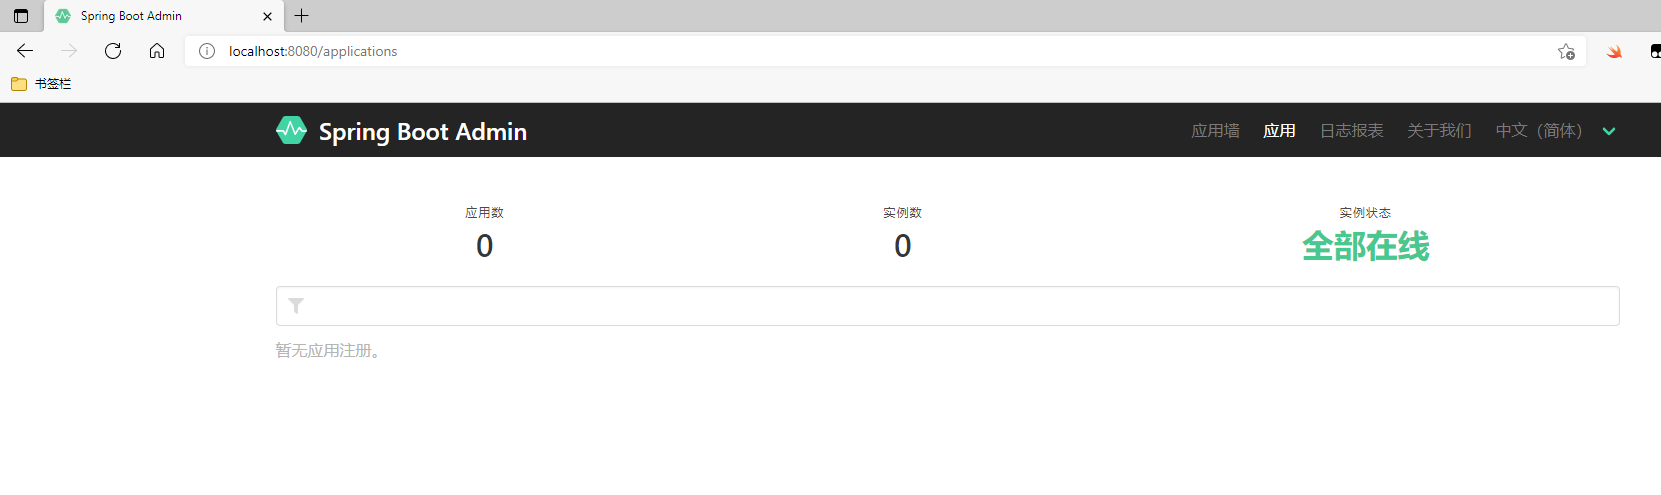
由于目前没有监控其他项目,所以显示为空,下面建几个项目由监控系统监控
在项目中引入SpringBootAdminClient(被监控)的步骤
在pom.xml中加入SpringbootAdminClient的依赖,跟SpringBoot的版本号一致
<!--SpringbootAdminClient-->
<dependency>
    <groupId>de.codecentric</groupId>
    <artifactId>spring-boot-admin-starter-client</artifactId>
    version>2.6.2</version>
</dependency>
<dependency>
    <groupId>org.springframework.boot</groupId>
    <artifactId>spring-boot-starter-web</artifactId>
</dependency>
在application.yml中指定当前SpringBootAdminClient客户端端口号,并且指定要加入SpringbootAdminServer Web服务url地址(包括IP和端口号),这样SpringBootAdmin客户端就可以注册到SpringBootAdmin上了,从而实现被监控。
# 当前SpringBootAdminClient客户端端口
server:
  port: 8081

spring:
  boot:
    admin:
      client:
        # SpringbootAdminServer Web服务url地址
        url: http://localhost:8080
启动项目,打开浏览器输入localhost:8080,可以看到当前客户端已经注册到监控系统上了
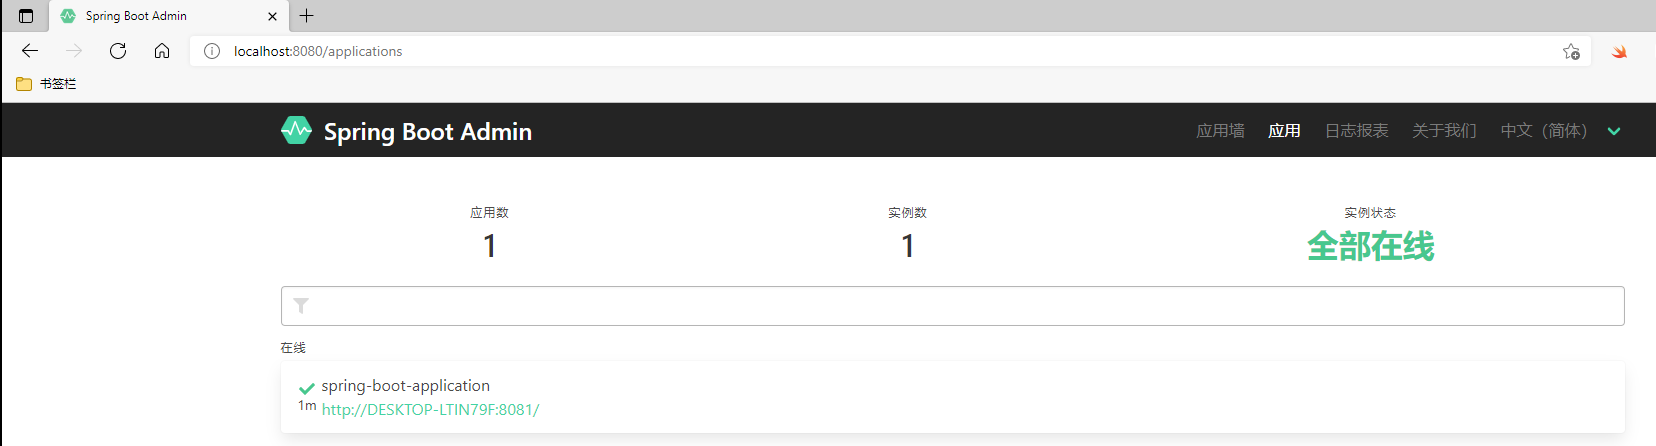
点监控墙
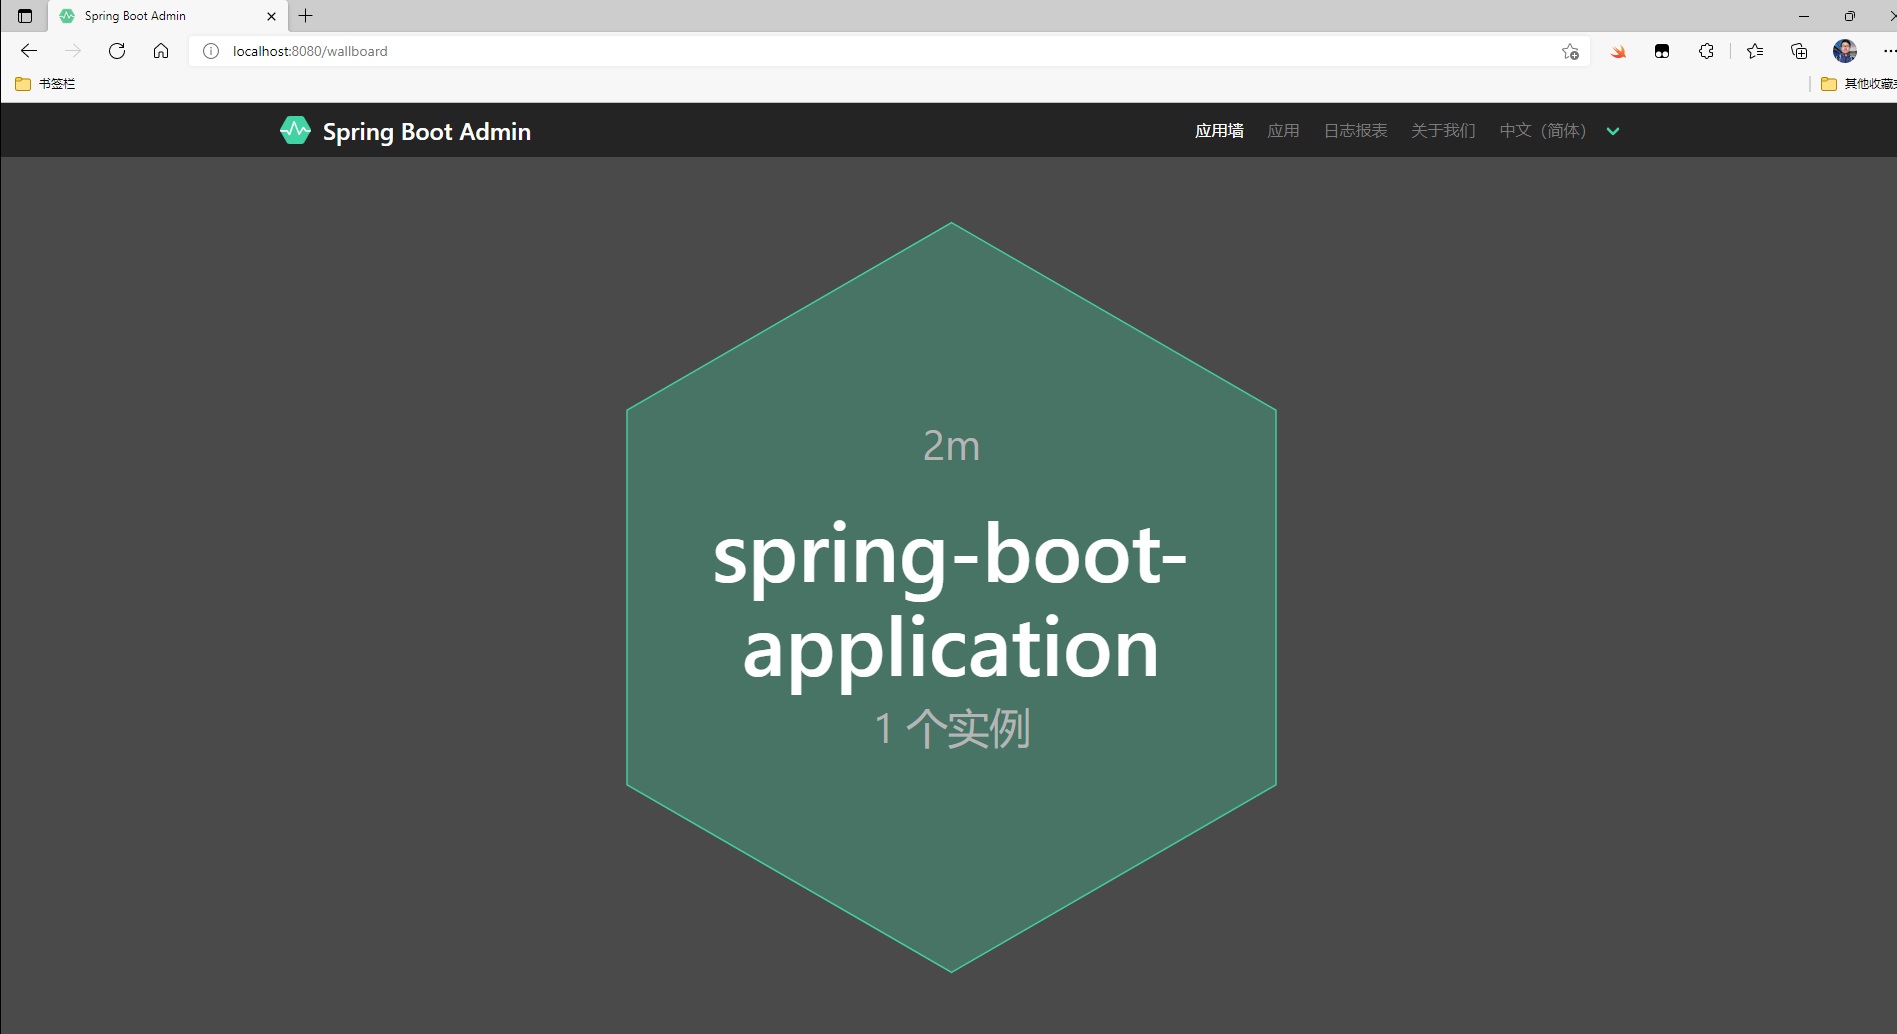
再点击这个注册上来的实例,可以看到当前客户端的详细运行状况信息,不过看到的信息还是很有限,接下来去客户端开放更多的参数信息给监控服务器。
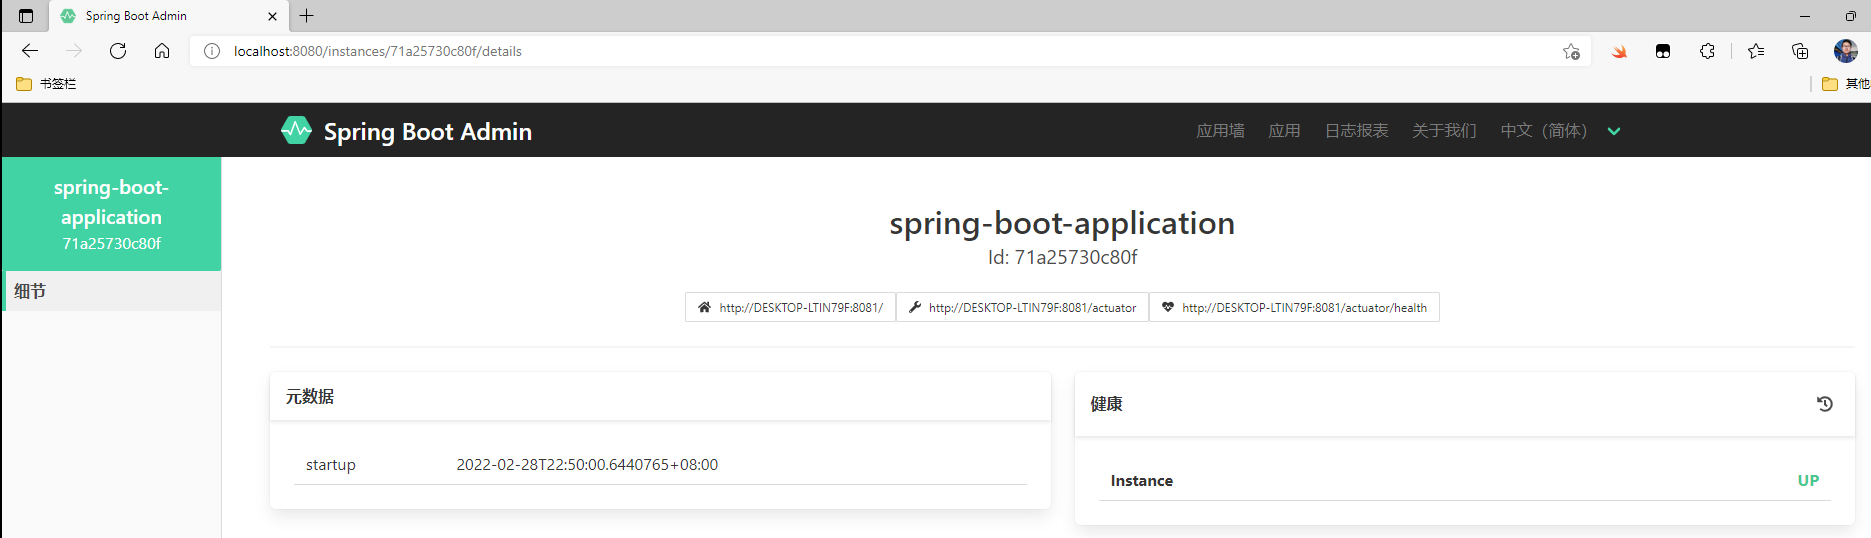
配置开放所有客户端指标信息给服务器
在application.yml中加入如下配置:
# 当前SpringBootAdminClient客户端端口号
server:
  port: 8081

spring:
  boot:
    admin:
      client:
        # SpringbootAdminServer Web服务url地址
        url: http://localhost:8080
# 配置开放给服务器端监控信息
management:
  endpoint:
    health:
      # 健康状况的详细信息是否上传到服务器,默认为never
      show-details: always
  endpoints:
    web:
      exposure:
        # 开放所有的指标信息,默认为health
        include: "*"
再启动项目,然后去浏览器查看对当前客户端的监控信息,可以看到监控信息非常丰富,包括内存磁盘的占用率,日志、JVM、缓存等信息应有尽有。
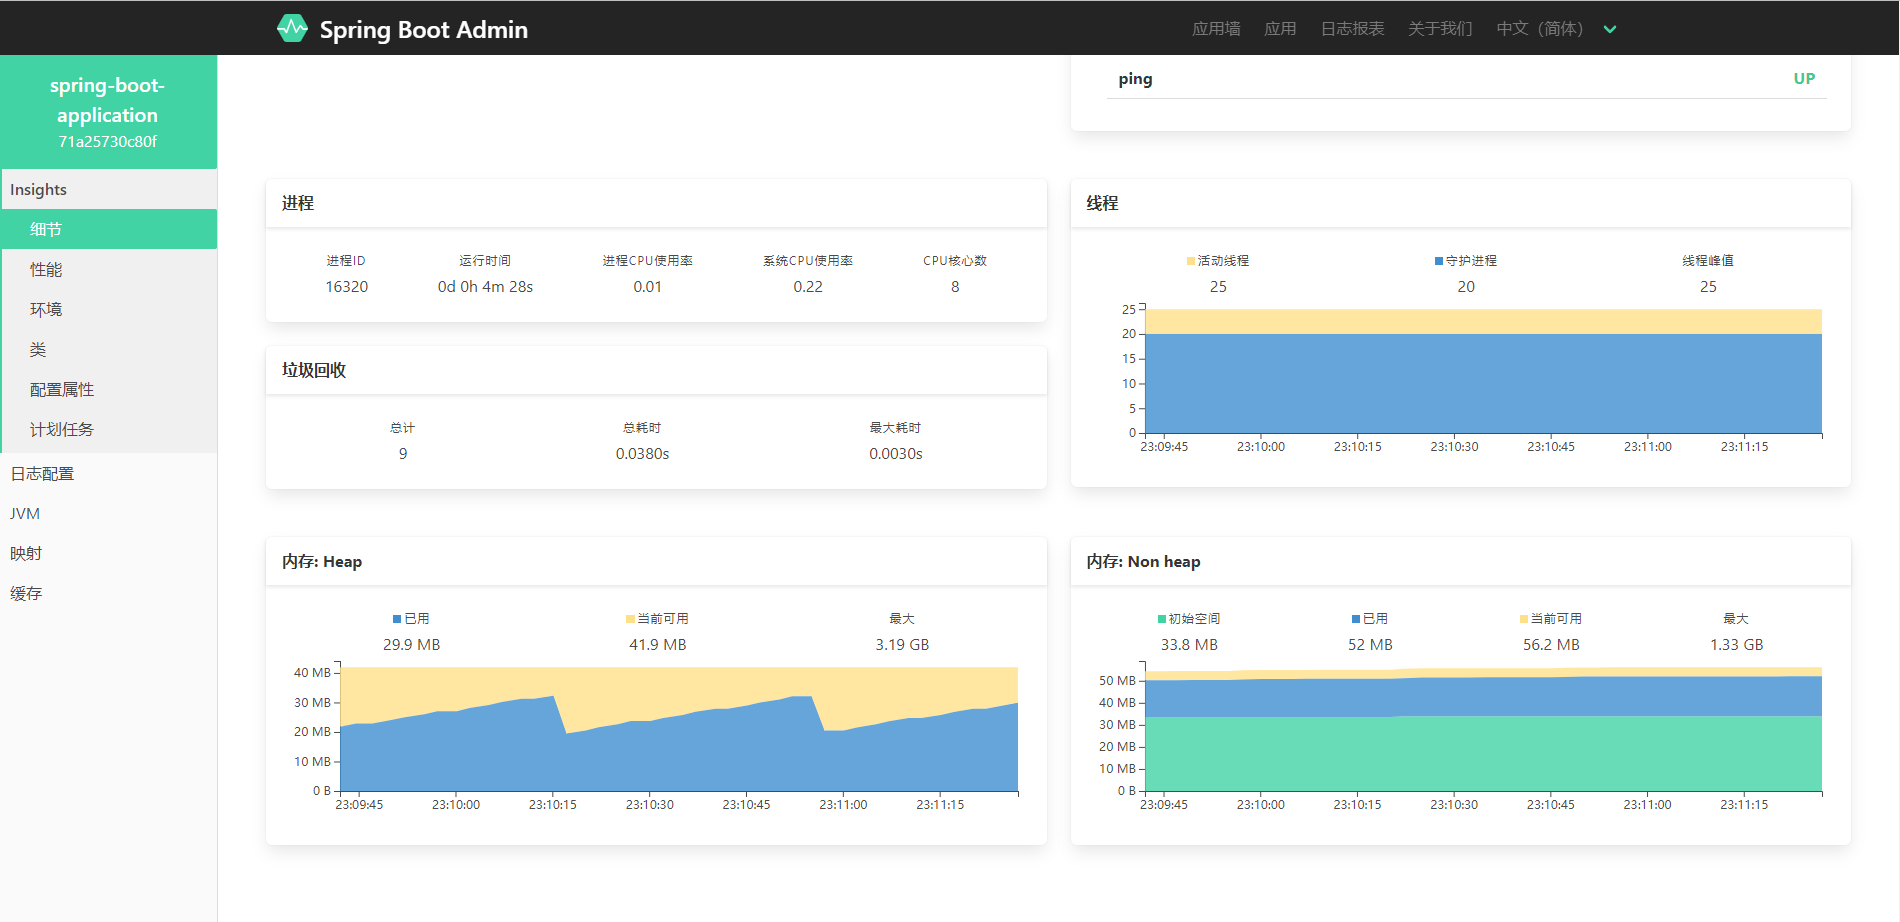
下面基于springboot_08_ssmp拷贝出一个新项目springboot_17_03_admin_client_ssmp,然后把这个项目注册到监控服务器上。步骤同上,故略。配置完之后,启动这个项目,然后去浏览器的监控界面上可以看到,有两个监控实例了。
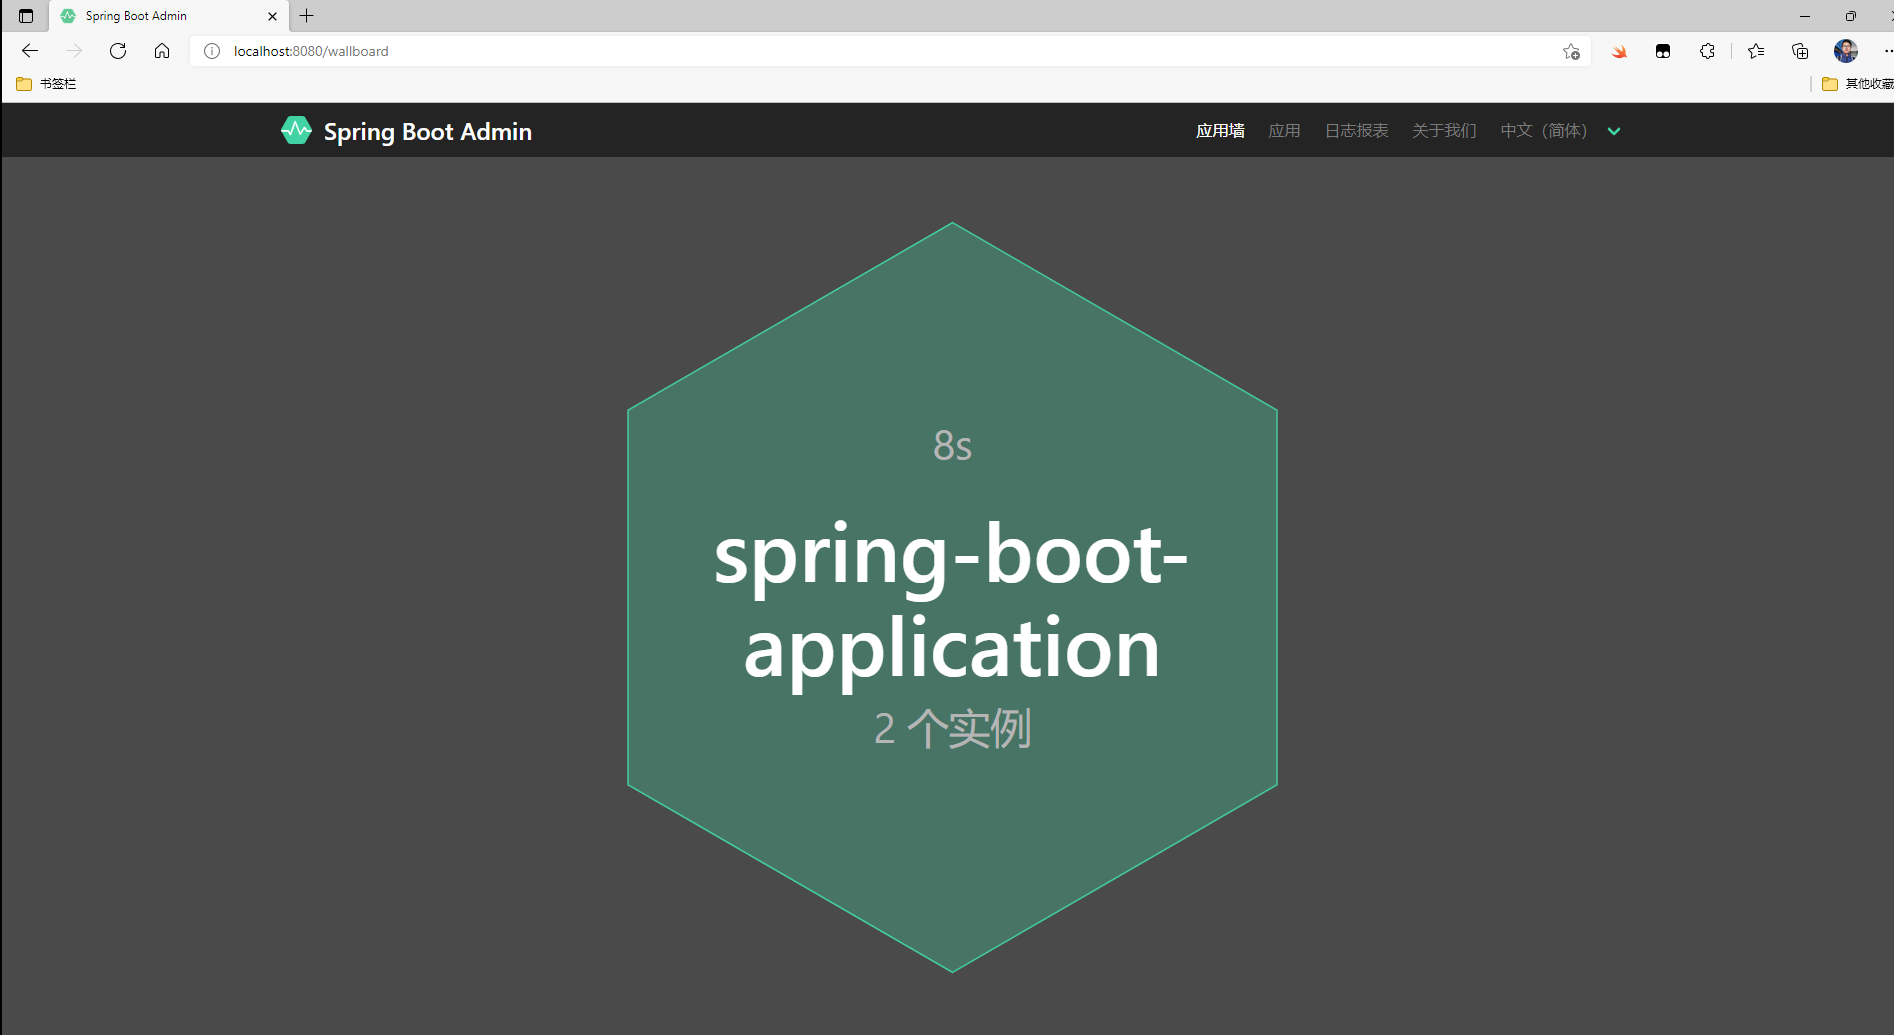
点击查看这个ssmp项目的详细信息,可以看到被监控的指标给多了,还可以看到连接的是mysql数据库

去浏览器输入http://localhost/pages/books.html,多刷新几次,然后再去监控页面去查看关于ssmp项目的http请求的次数和访问时间的统计
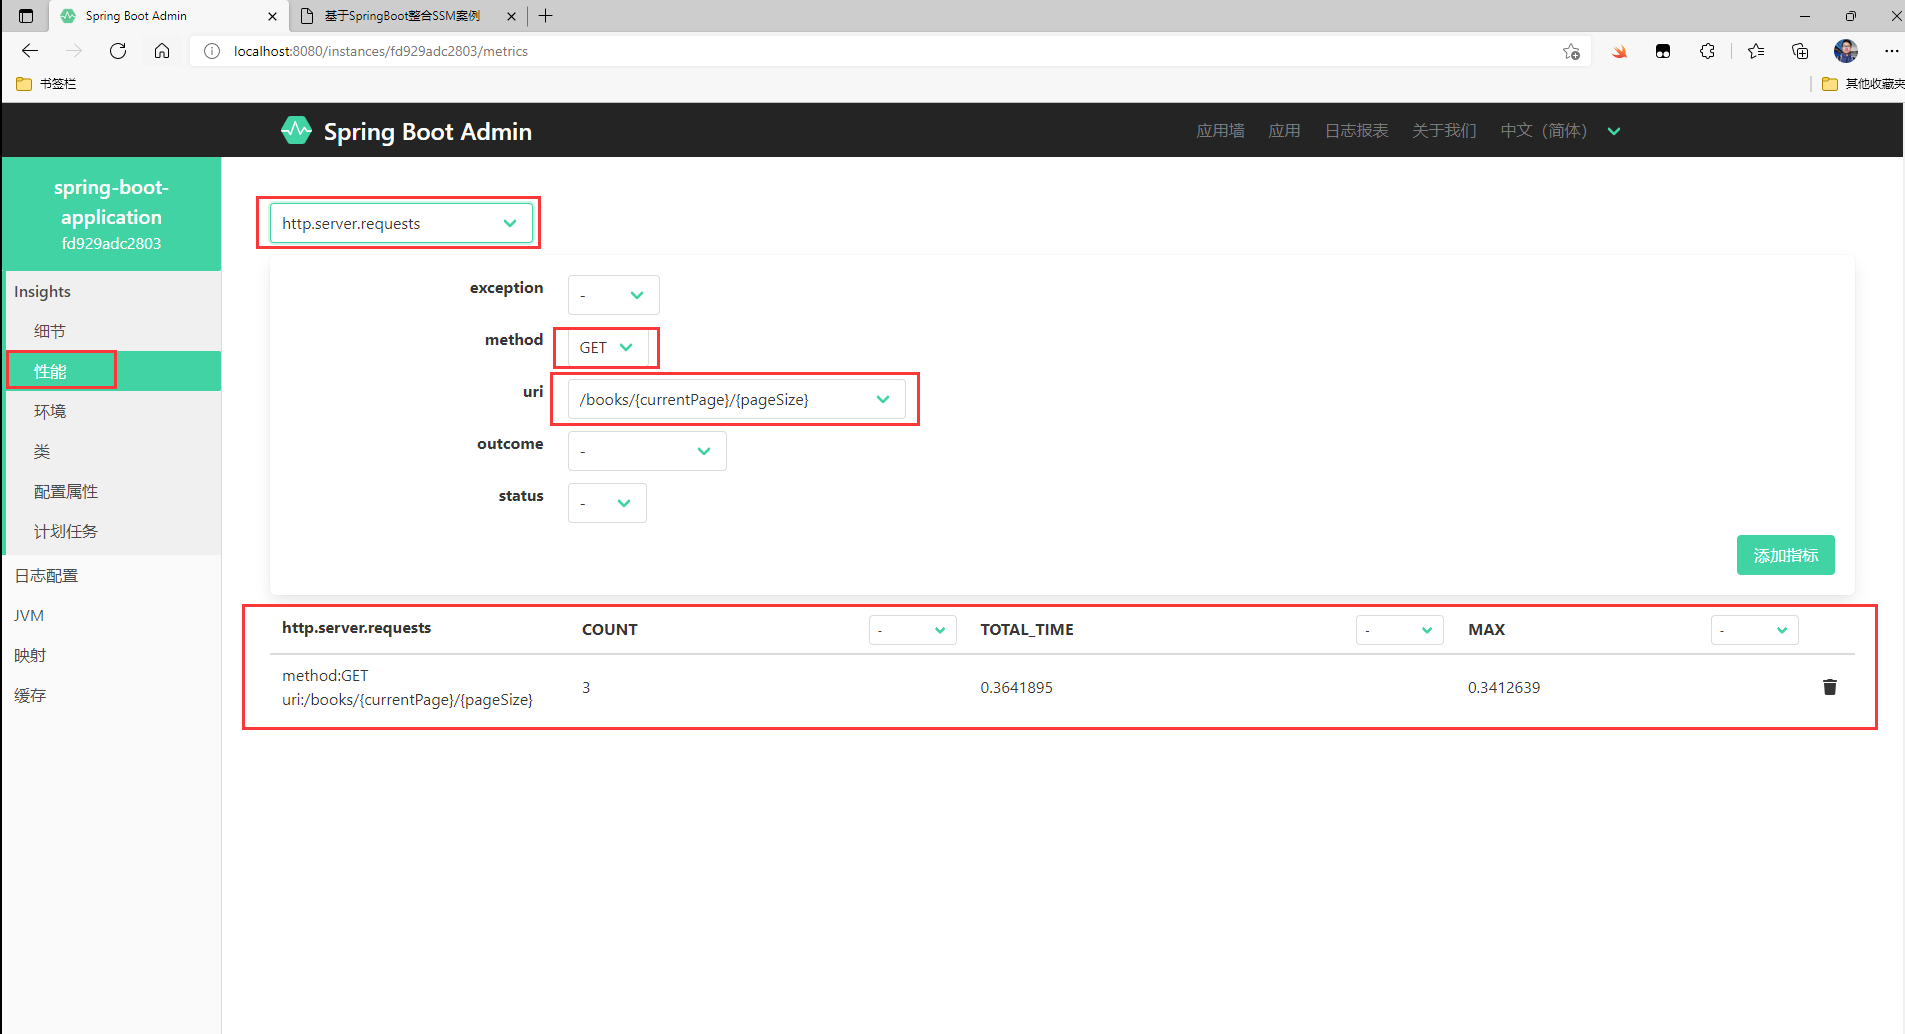
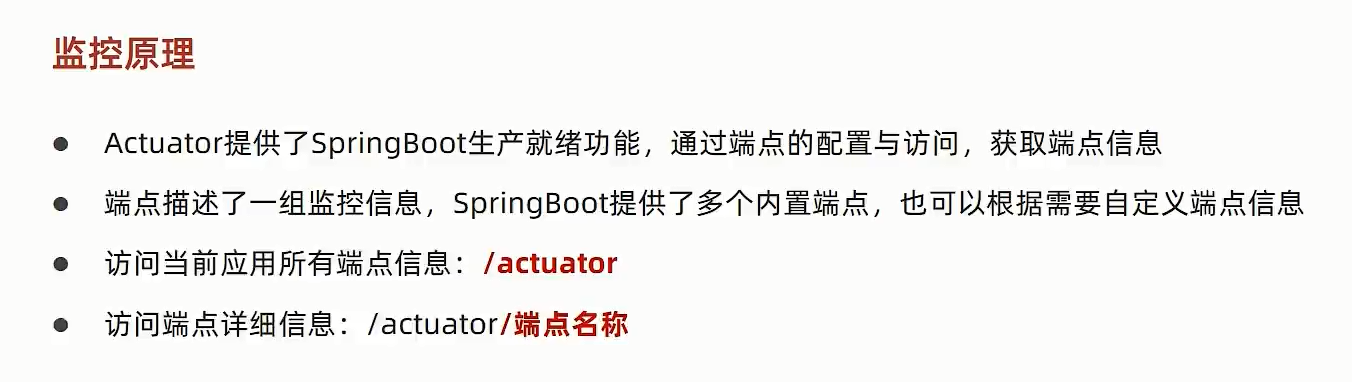
如SSMP项目启动在80端口,使用Postman访问http://localhost/actuator,结果返回了一堆更具体的访问地址
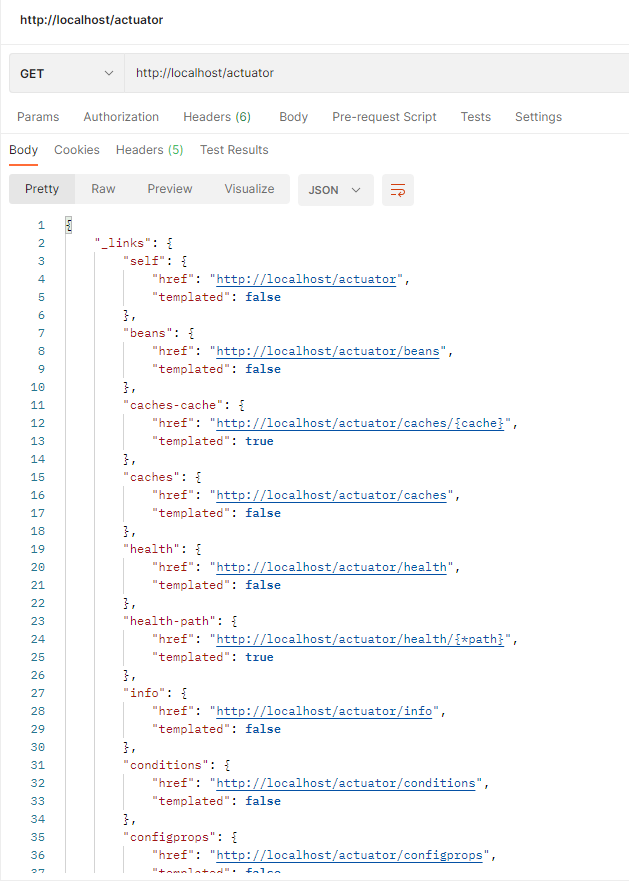
以其中的health为例,我们点击这个地址
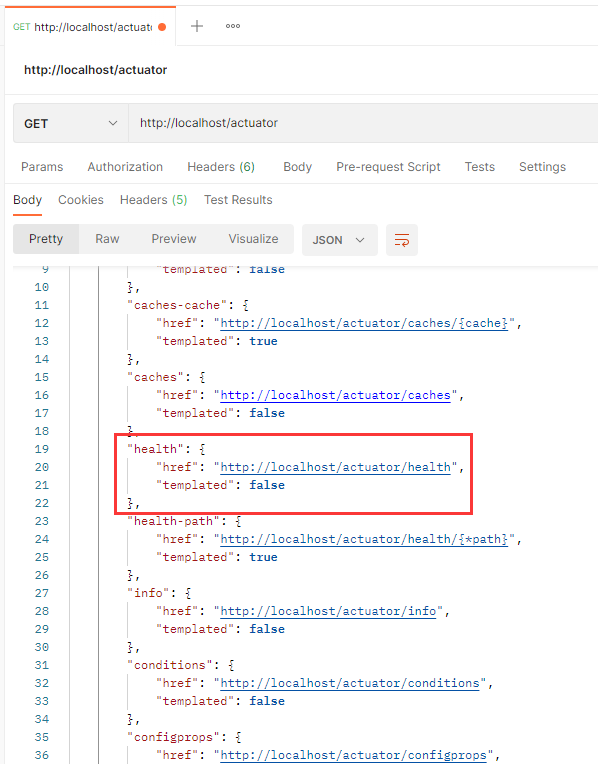
postman会建立一个新的http请求,再点击send发送请求
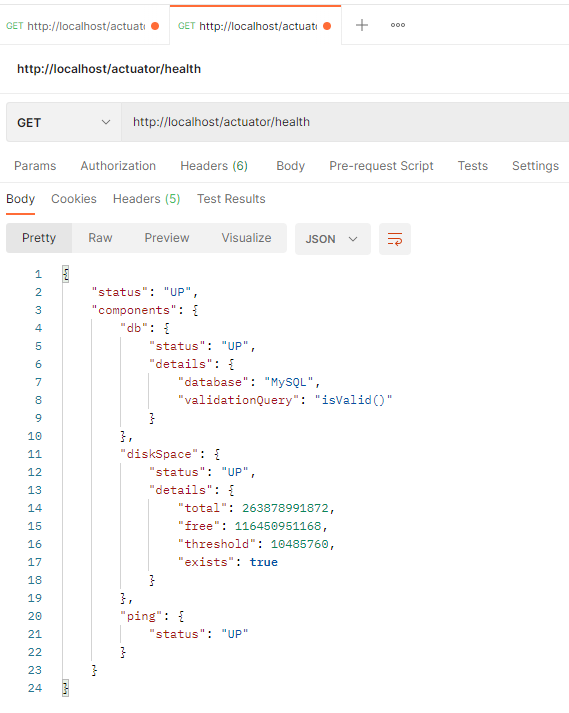
可以看到返回的信息就是SpringBootAdmin页面关于SSMP项目运行时的健康状况信息
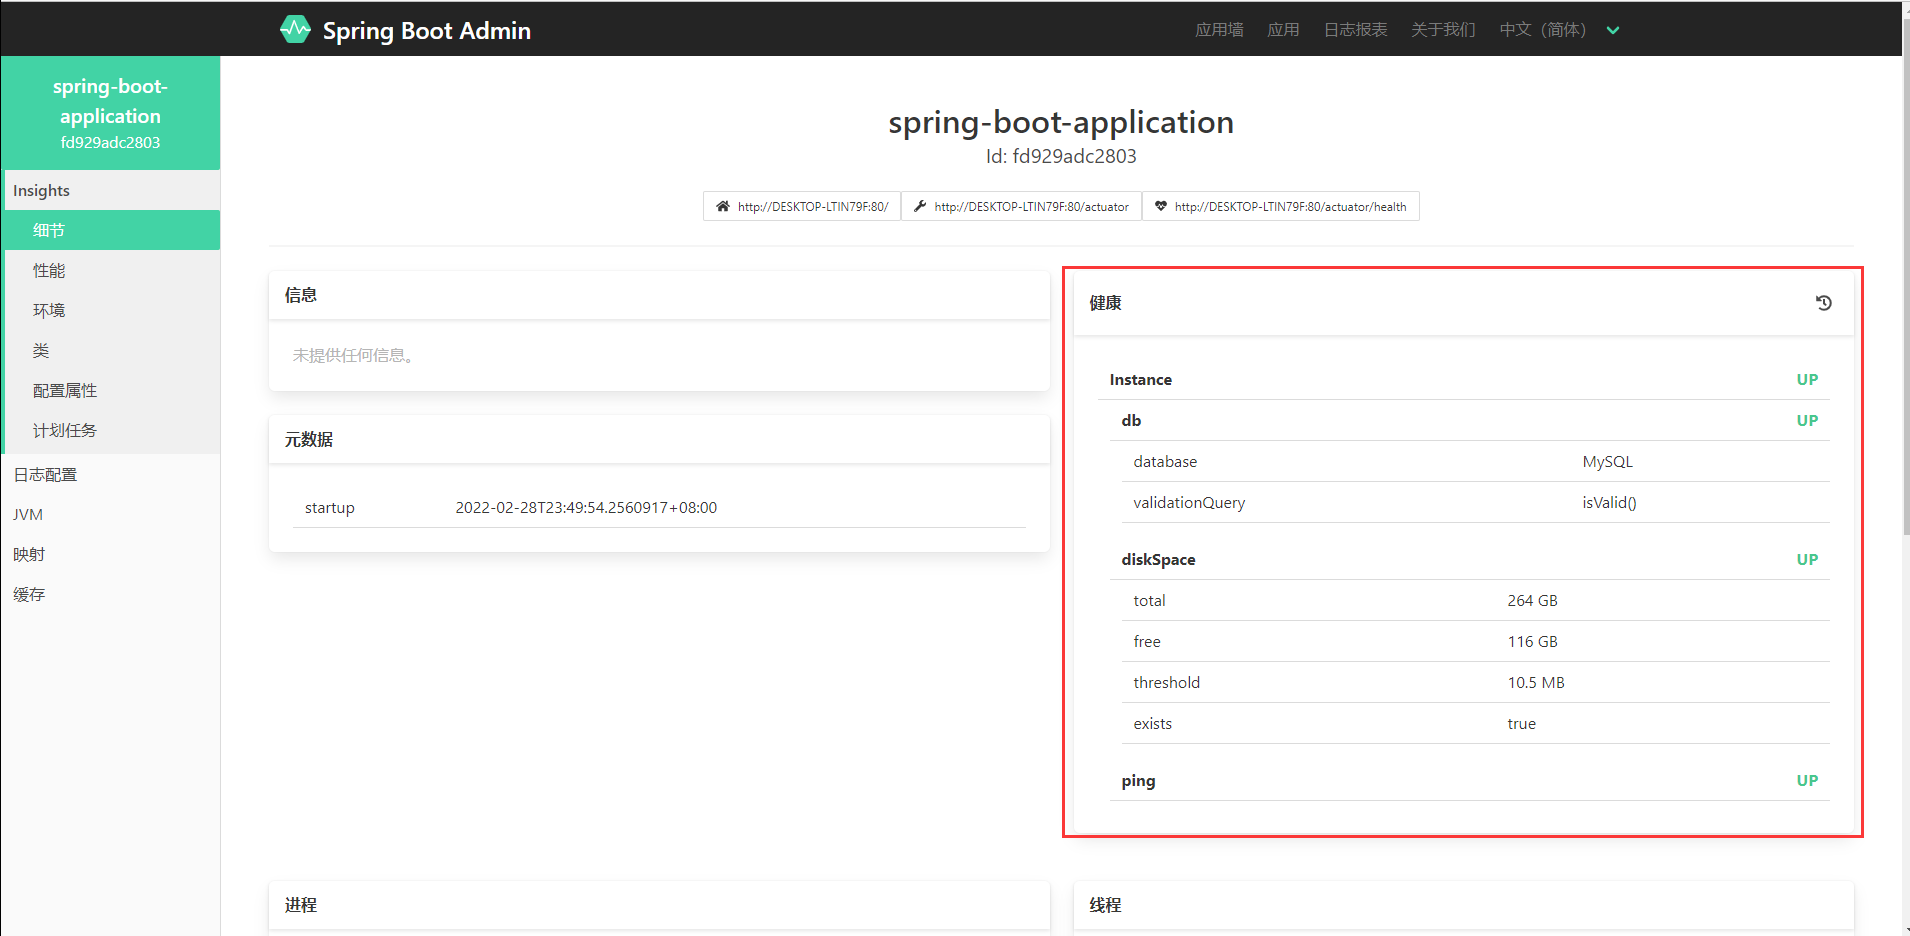
所以这个SpringBootAdmin就是通过http:/ip:port/actuator/端点名称访问到不同项目的运行指标的。
其他常用端点名称和描述信息如下:

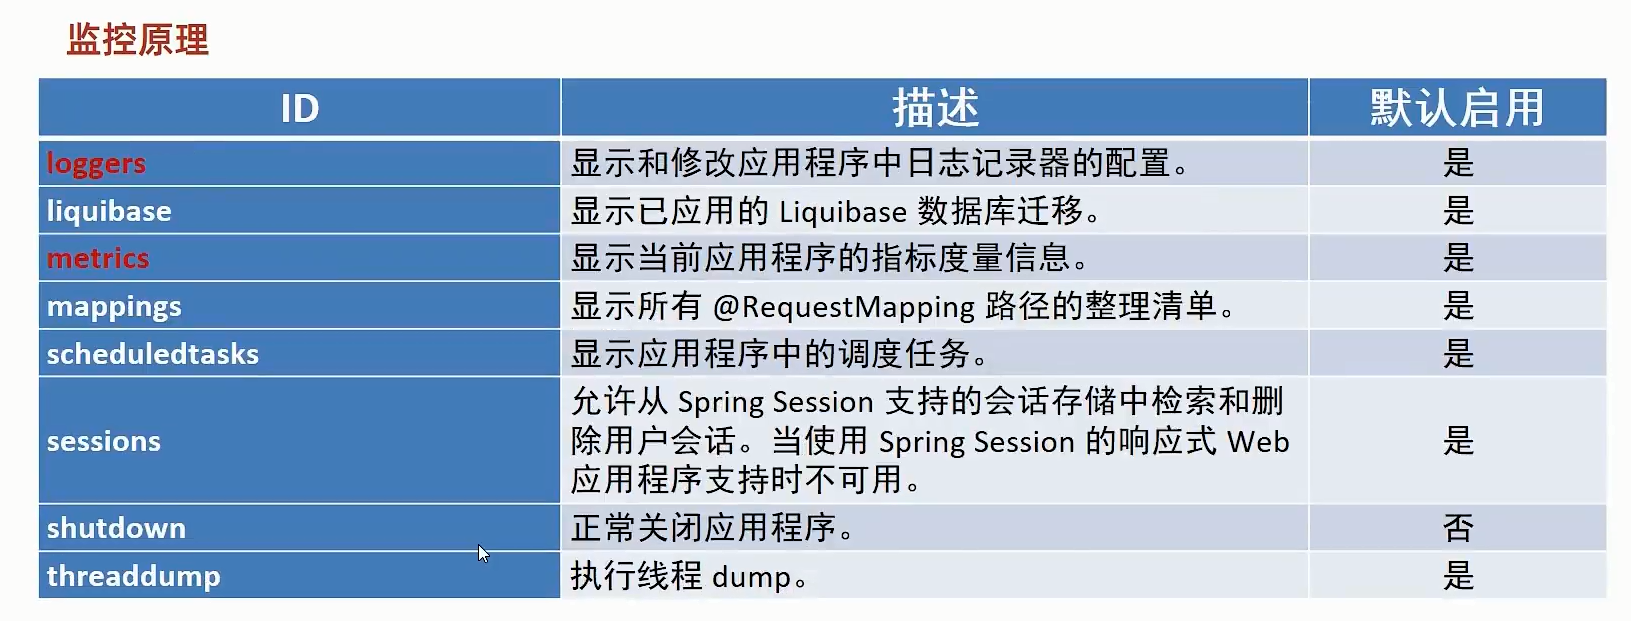
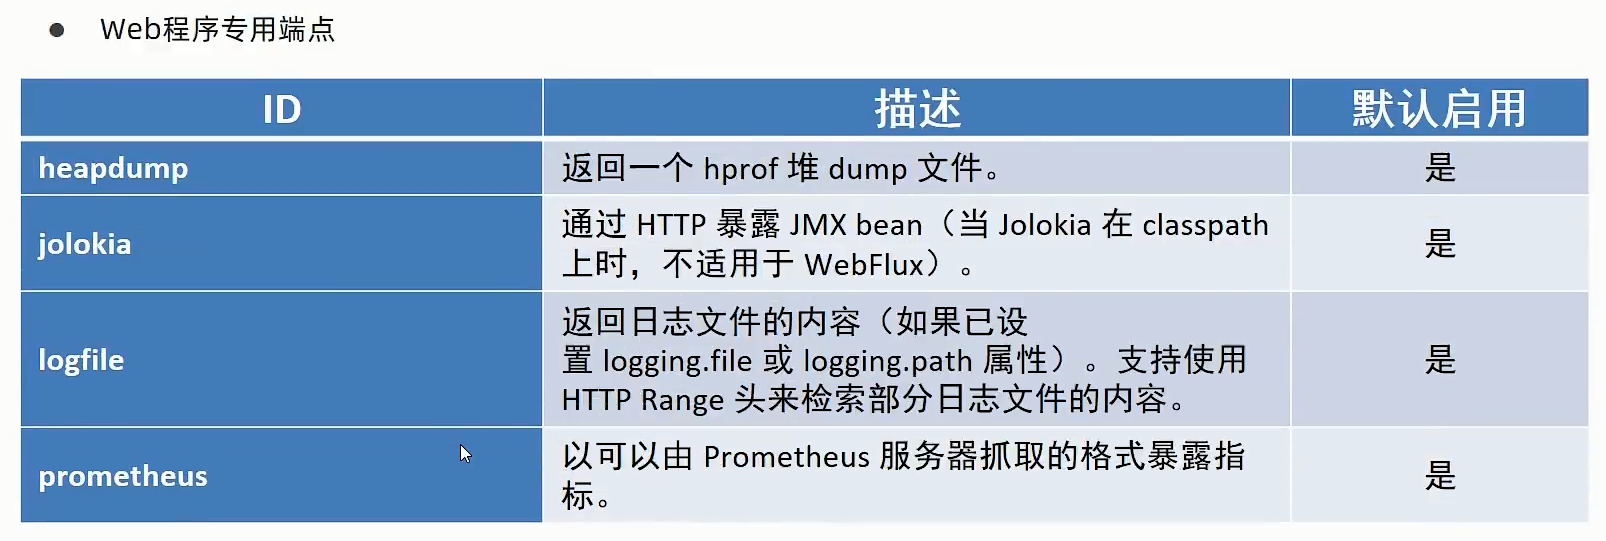
SSMP项目启动的时候会打印一行日志,表示暴露给监控系统的端点数:
2022-03-01 13:54:43.124 INFO 8500 --- [ main] o.s.b.a.e.web.EndpointLinksResolver : Exposing 13 endpoint(s) beneath base path '/actuator'
可以通过配置application.yml的management.endpoints.web.exposure.include属性来指定开放给web监控系统的端点,比如给的值为"*",表示开发所有端点,值为health,info,表示仅开放当前项目运行时的健康信息和的项目描述信息。
不过最终决定这个端点是否开放的源头是在management.endpoint.info.enabled属性,默认为true,如果指定为false,那么management.endpoints.web.exposure.include属性指定了info,也不会开放了。
还有一个属性management.endpoints.enabled-by-default表示开放所有的端点,默认值为true,这个所有指的不仅仅是web端点,还包括jmx等其他访问方式的端点,如Win+R输入jconsole,在进程列表中选择SSMP项目
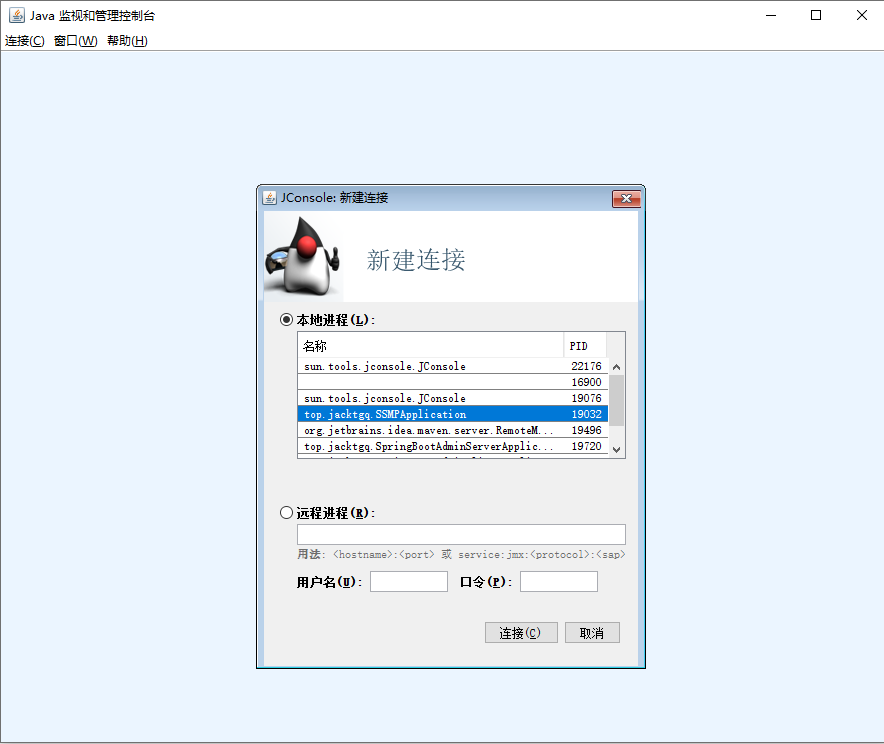
也可以监控这个项目运行时的一些信息
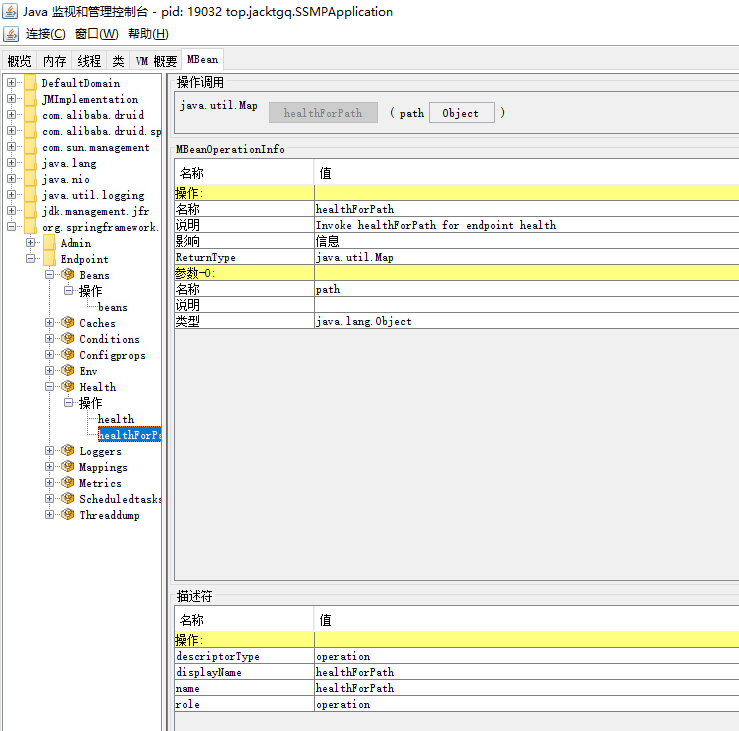
需要知道的是JMX默认开放所有的端点,而web只开放一部分。

如果要自定义SpringBootAdmin客户端的info端点返回的属性值,有两种方式来实现
配置文件法:
在application.yml中加入如下配置:
# 配置开放给服务器端监控信息
management:
  endpoint:
    health:
      # 健康状况的详细信息是否上传到服务器,默认为never
      show-details: always
    info:
      # 默认为true
      enabled: true
  endpoints:
    web:
      exposure:
        # 开放所有的指标信息,默认为health
        include: "*"
# 保证info端点被启用
info:
  appName: @project.artifactId@
  version: @project.version@
  company: 糖果编程之家
  author: 糖果墙
我这里给info下配置了4个属性,其中appName和version都引用了pom.xml中的属性值,这里需要先在pom.xml的build标签下面加下面的配置,否则会报一个@符号的解析错误。
<!-- 使用 @@ application.yml 获取pom文件中的配置  -->
<resources>
    <resource>
        <directory>src/main/resources</directory>
        <filtering>true</filtering>
    </resource>
</resources>
启动项目,然后去监控系统界面查看
此处可能存在不合适展示的内容,页面不予展示。您可通过相关编辑功能自查并修改。
如您确认内容无涉及 不当用语 / 纯广告导流 / 暴力 / 低俗色情 / 侵权 / 盗版 / 虚假 / 无价值内容或违法国家有关法律法规的内容,可点击提交进行申诉,我们将尽快为您处理。


